In addition to the KVM virtual machine creation feature, Proxmox also integrates the LXC (LinuX Container) setup and management feature, a very popular operating system virtualization technology today.
LXC (LinuX Ccontainer) is an operating system-based virtualization solution that allows multiple Linux systems to operate on a single physical Server, sharing the same Linux kernel.
To better understand LXC, you can review the article LXC vs. Docker I shared before.
In this article, I will guide you how to set up LXC on the Proxmox VE virtualization environment.
I. Download LXC Templates
Similar to setting up a KVM virtual machine, you need to prepare the installation source when setting up LXC. Proxmox uses an installation template called CT Template. You need to download the CT Templates to Proxmox before creating the LXC Container.
Go to local storage → CT Templates → Click on Templates button
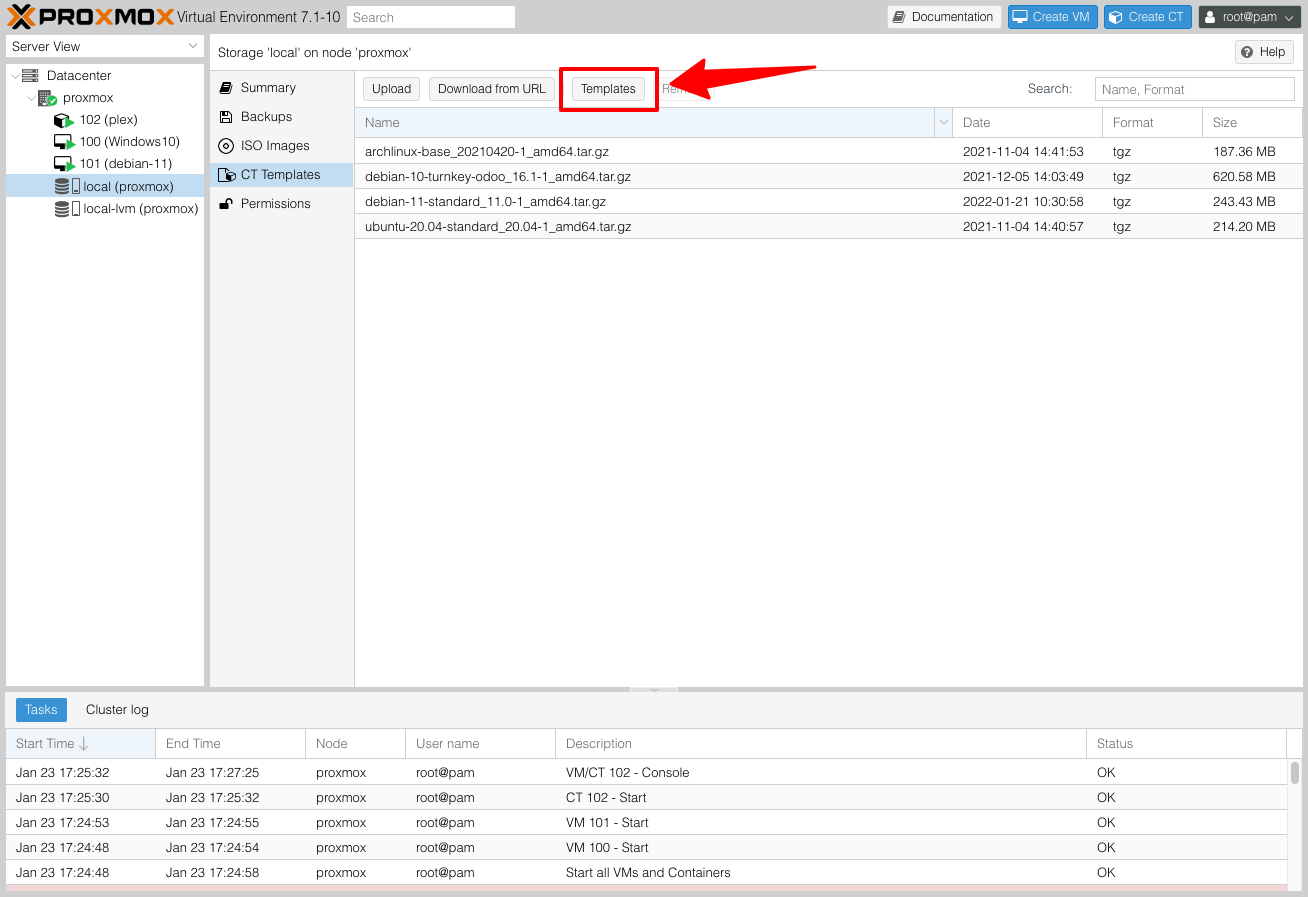
Proxmox has pre-set up a CT Templates repository with many Linux distros as well as pre-configured web applications. Click on the Template you need and click the Download button to download.
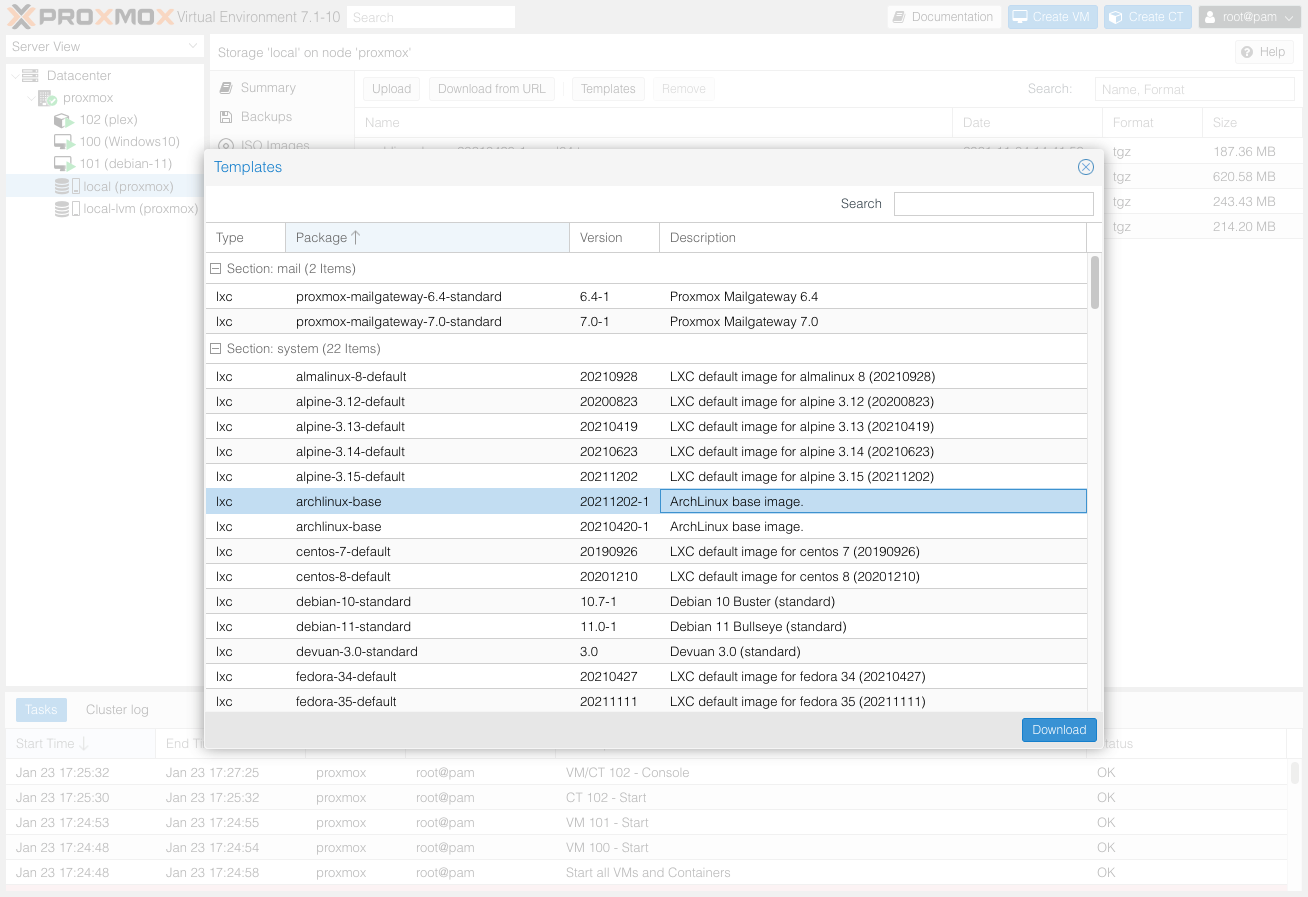
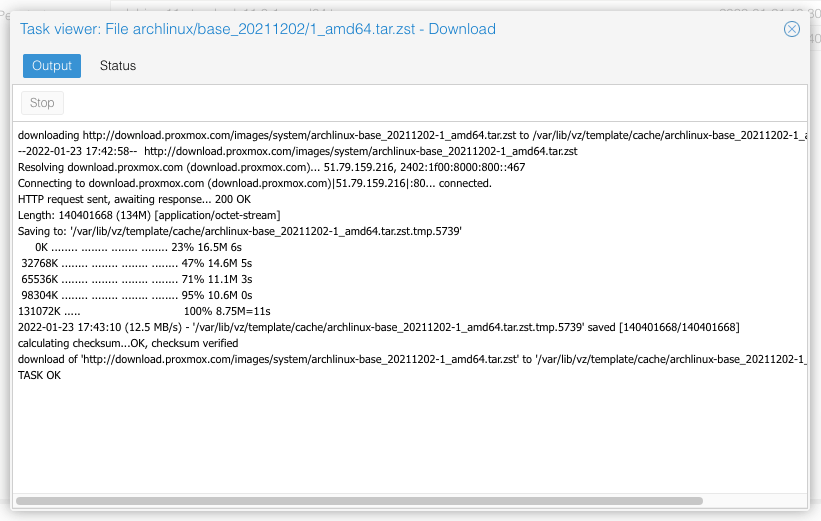
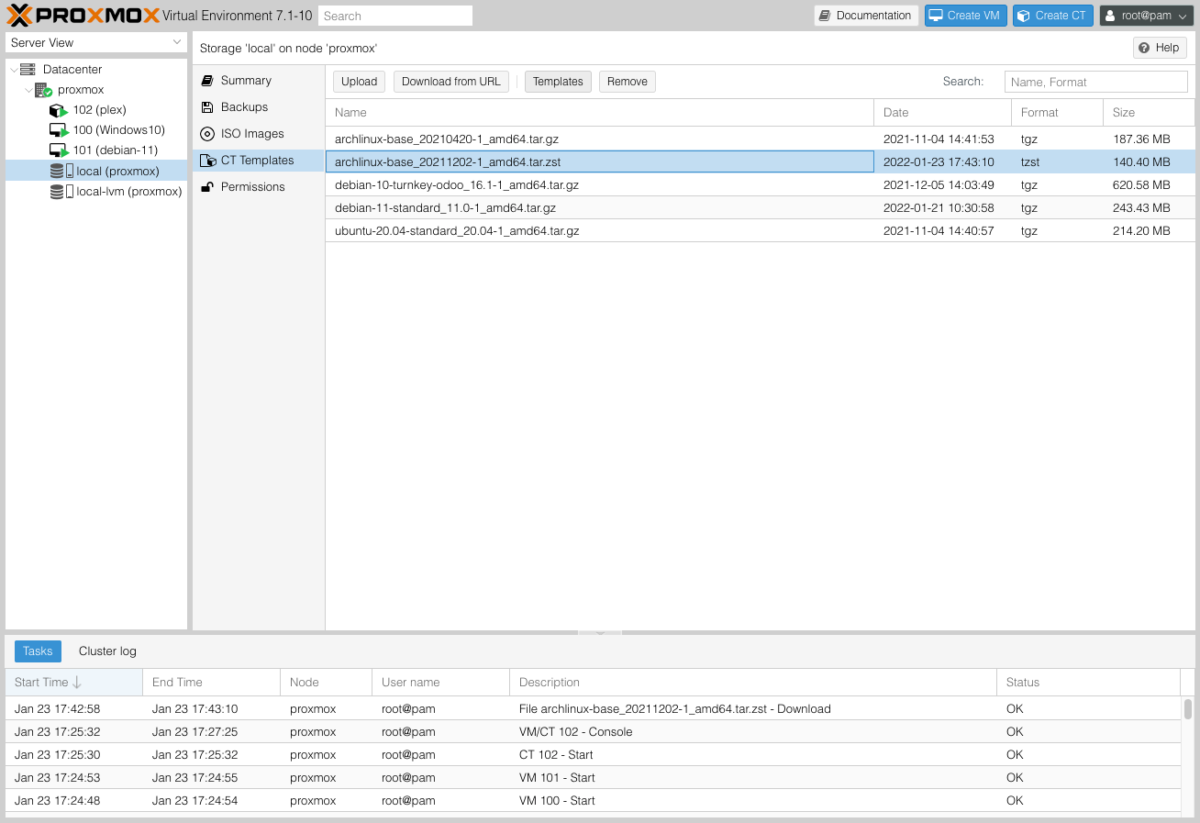
Once completed, the templates will appear in the CT Templates section. We can now create an LXC on Proxmox.
II. Create LXC on Proxmox
Access the Proxmox Web UI interface, click the Create CT button on the Header (Proxmox calls Linux Container CT for short)
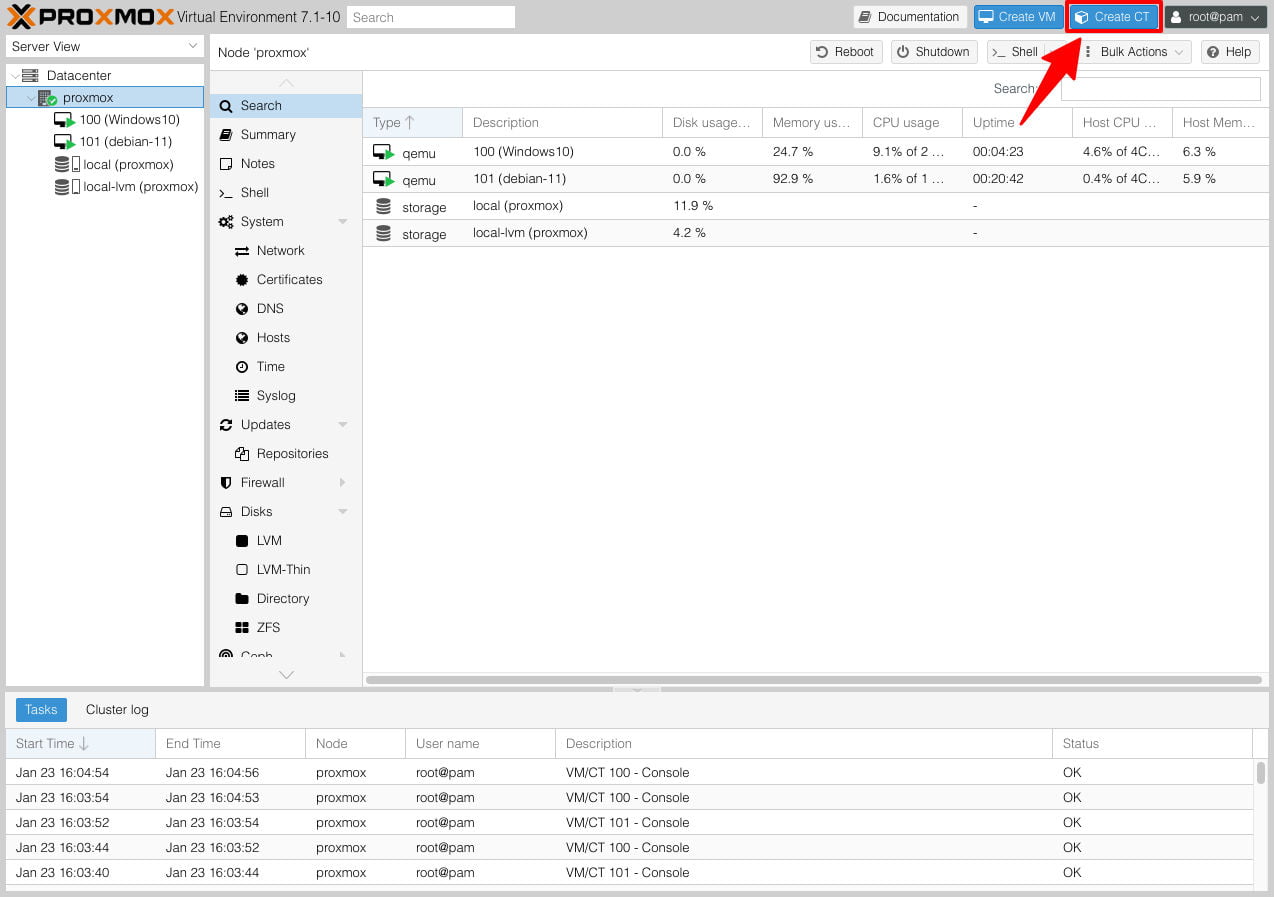
1. General
Keep the default parameters, I only change 2 parameters
- Hostname: enter container name
- Password & Confirm password: enter the password used to manage the container.
Click Next
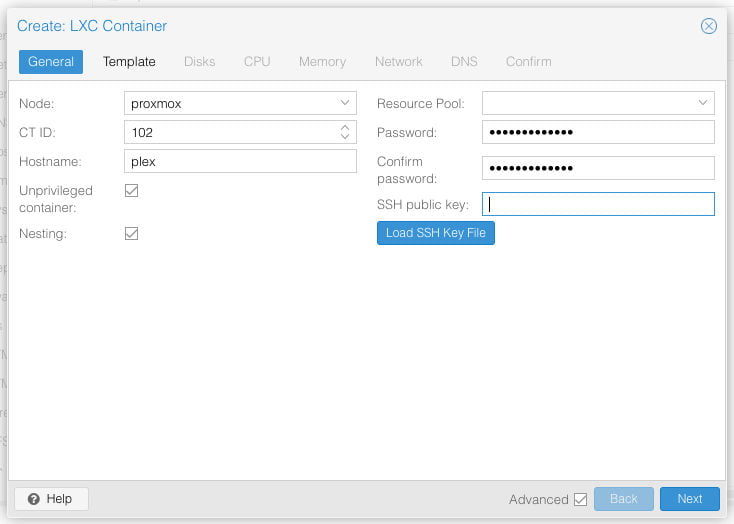
2. Template
-
- Template: select the template you want to install for the container.
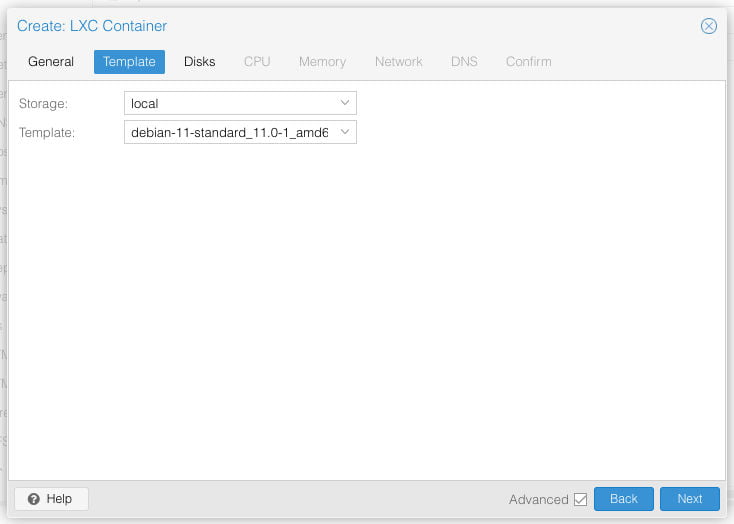
3. Disks
- Disk size (GiB): keep the default 8 GB or change it as you like
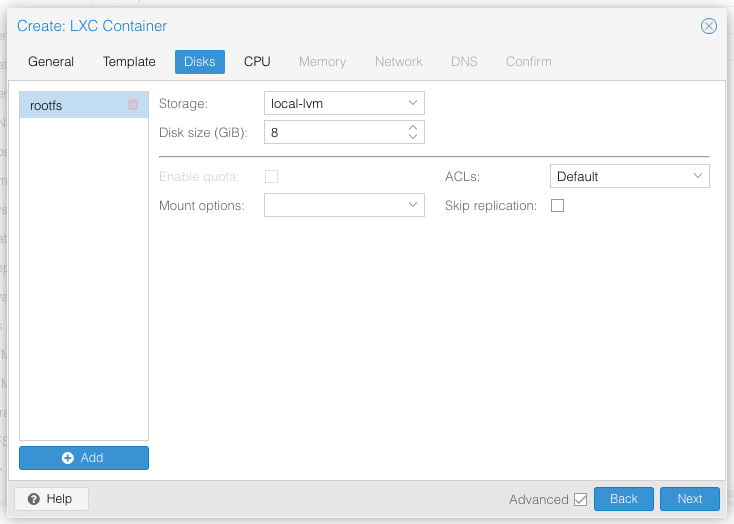
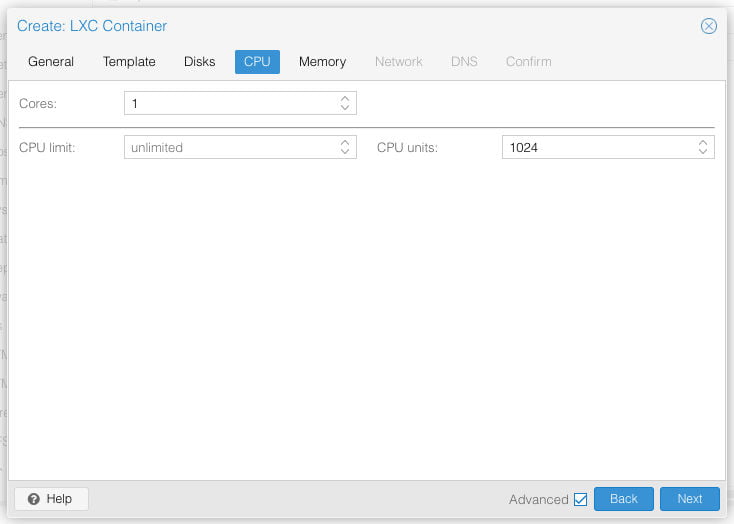
4. CPU
Change the number of CPU Cores depending on your needs. I keep the default 1 Core.
5. Memory
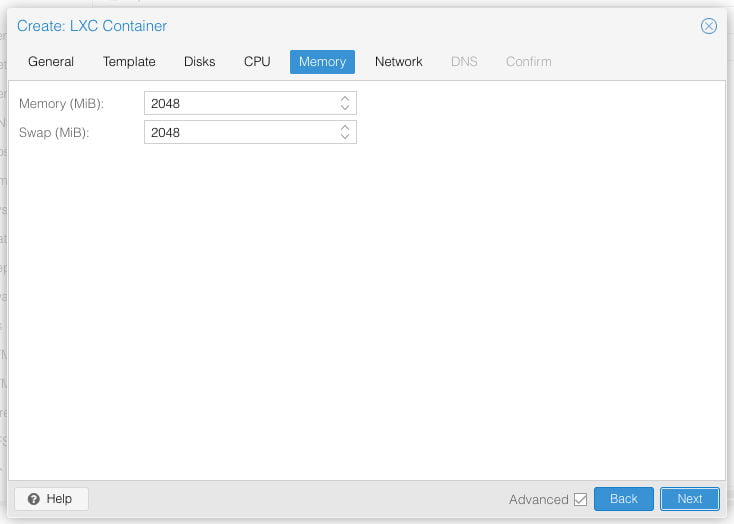
You need to change the Memory capacity depending on the purpose of use.
- Memory: 2048
- Swap: 2048
6. Network
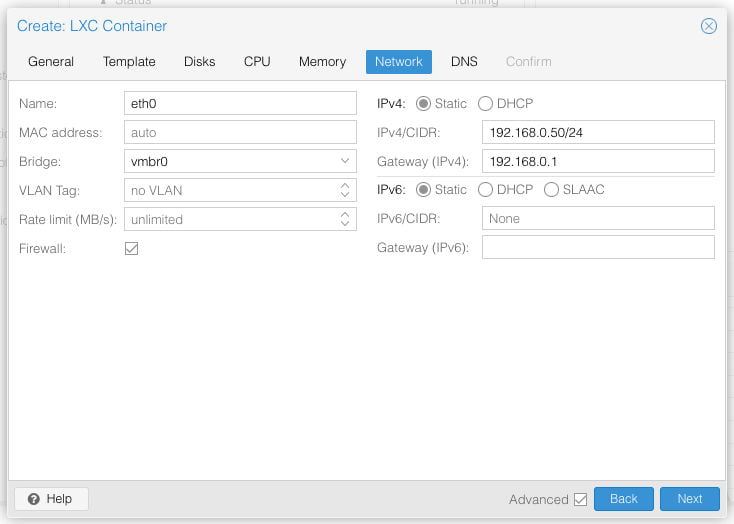
- IPv4: select Static to configure static IP for the container based on your subnet.
- IPv6: select Static and leave default None to disable IPv6.
7. DNS
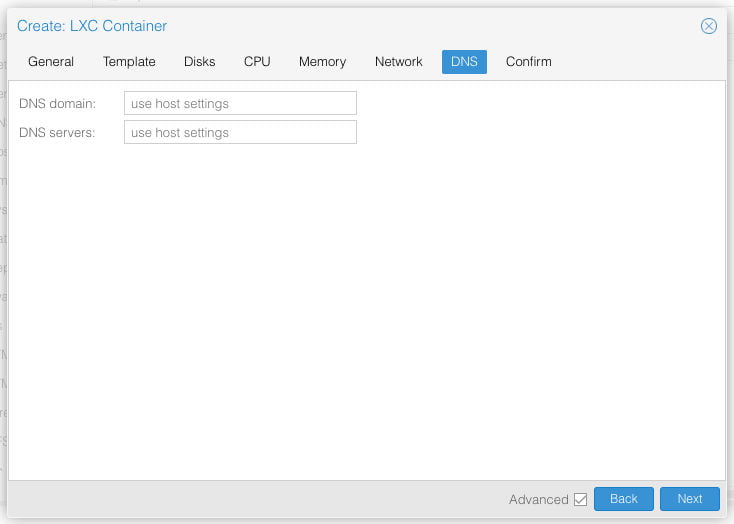
Leave the default settings to use Proxmox DNS.
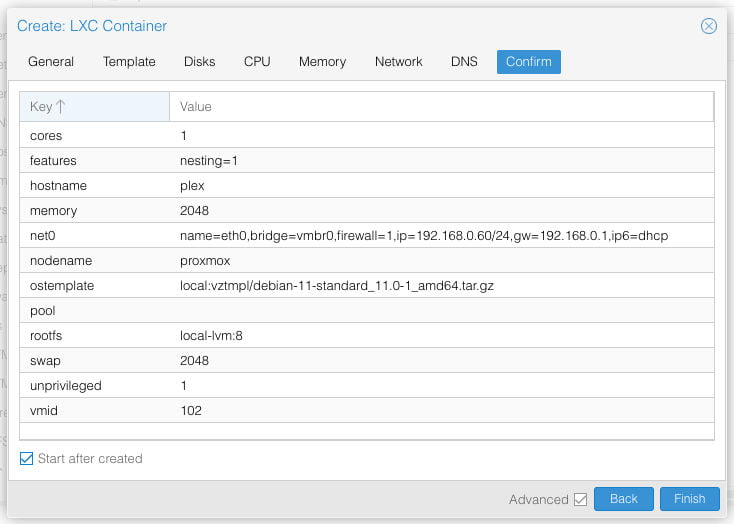
8. Confirm
Check all the parameters one last time. Click Start after created to let LXC run automatically after creation.
Click Finish to create the new LXC Container.
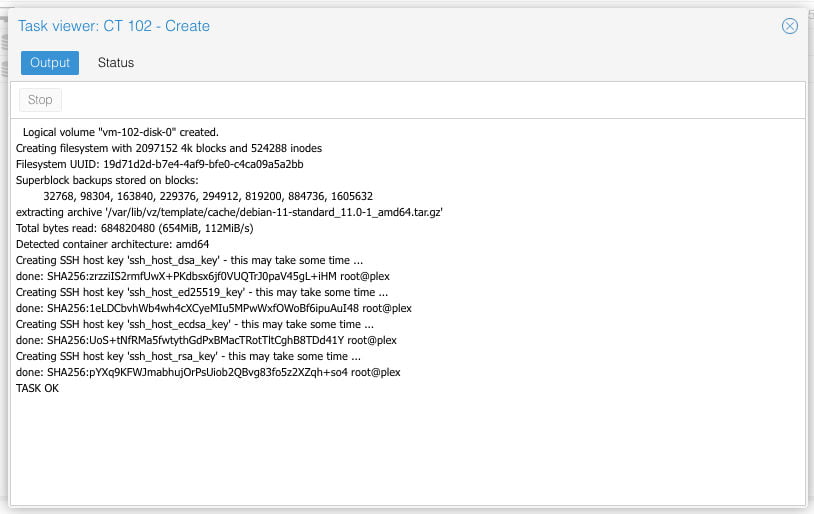
Wait a few minutes for Proxmox to set up the Container. When finished, a message box will appear saying TASK OK. You can close this dialog box to start accessing the LXC Container.
III. Accessing LXC Container
Because it shares the same Linux kernel as the Proxmox host, LXC boots extremely quickly. The container starts almost instantly after pressing the Start button.
I access the Console section of LXC to enter the CLI command line interface. All management and installation operations can be performed here.
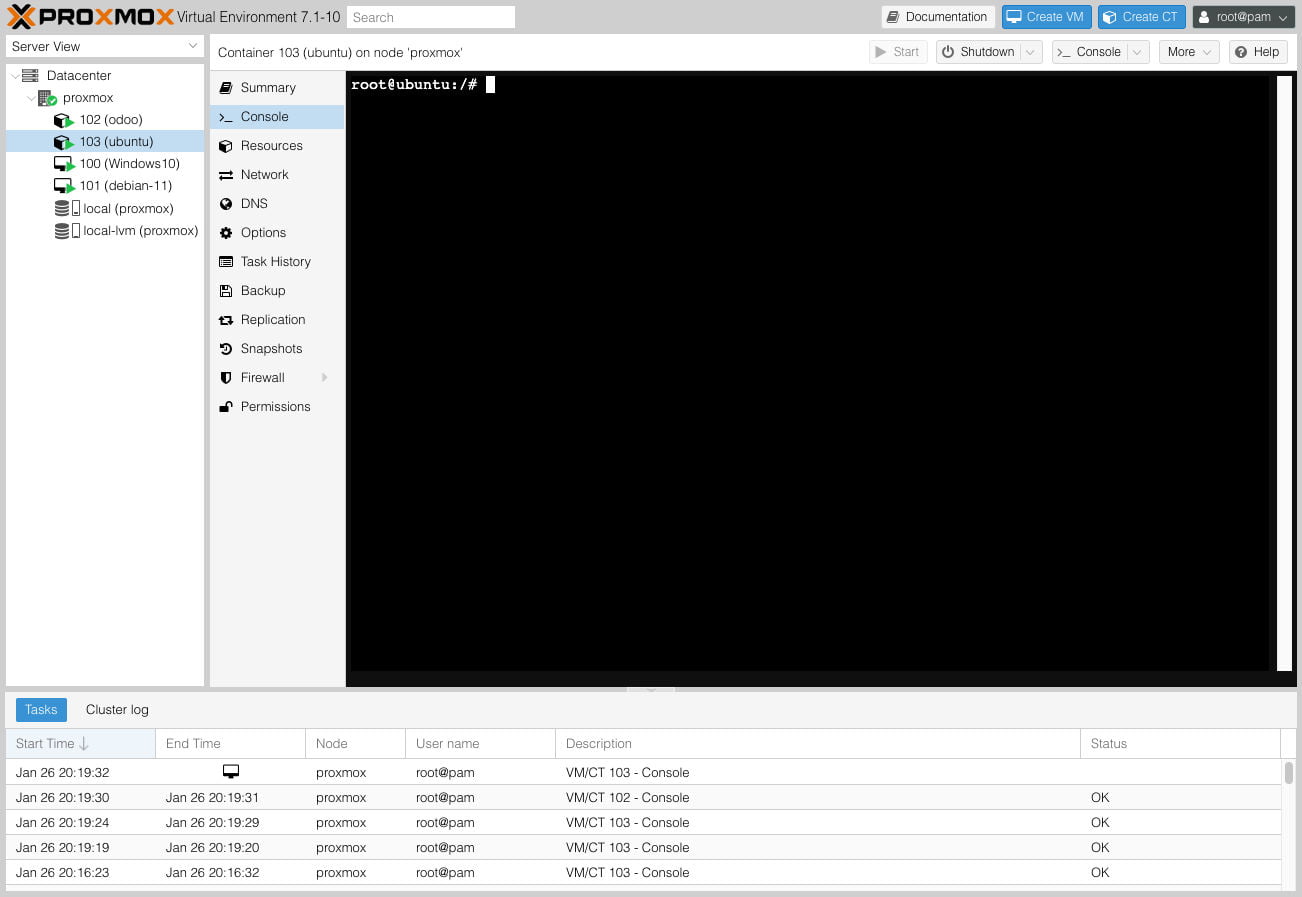
By default after setup, LXC container will lock SSH access of the account. root. Therefore, I will create a new sudo account to log in to SSH.
1. Create a new account
Create new account with username markknow. Remember to replace it with any other login name you like.
sudo adduser markknowCode language: Nginx (nginx)The system will ask you to create a password and provide personal information for the new account. Remember to create a complex password (don’t use 123456 or abcdef). You can leave the Full Name, Room Number,… information blank and Enter multiple times, then select Y to confirm and you’re done.
Adding user `markknow' ...
Adding new group `markknow' (1002) ...
Adding new user `markknow' (1002) with group `markknow' ...
Creating home directory `/home/markknow' ...
Copying files from `/etc/skel' ...
New password:
Retype new password:
passwd: password updated successfully
Changing the user information for markknow
Enter the new value, or press ENTER for the default
        Full Name (): MarkKnow
        Room Number ():
        Work Phone ():
        Home Phone ():Code language: PHP (php)
Add this new account to the sudo group. The sudo group is a group with administrative rights on Linux.
sudo usermod -aG sudo markknowCode language: Nginx (nginx)To check the sudo rights of the new account, first switch to this new account.
su - markknowCode language: Nginx (nginx)Next, try typing the following command
sudo ls -la /rootCode language: Nginx (nginx)Enter the password of the account you created earlier
(sudo) password for markknow:Code language: CSS (css)The result received as follows means that the new account has sudo rights and can install and configure the virtual machine freely.
markknow@ubuntu:~$ sudo ls -la /root
total 76836
drwx------  5 root root     4096 Jan 25 08:08 .
drwxr-xr-x 22 root root     4096 Jan 26 13:16 ..
-rw-------  1 root root     1315 Jan 26 13:16 .bash_history
-rw-r--r--  1 root root     3106 Dec  5  2019 .bashrc
drwx------  2 root root     4096 Jan 23 23:27 .cache
drwx------  3 root root     4096 Jan 25 08:08 .config
drwxr-xr-x  3 root root     4096 Jan 24 13:28 .local
-rw-r--r--  1 root root      161 Dec  5  2019 .profile
-rw-r--r--  1 root root 78640798 Jan 20 08:04 plexmediaserver_1.25.4.5426-eb46d070e_amd64.debCode language: YAML (yaml)
2. Enable Start at boot
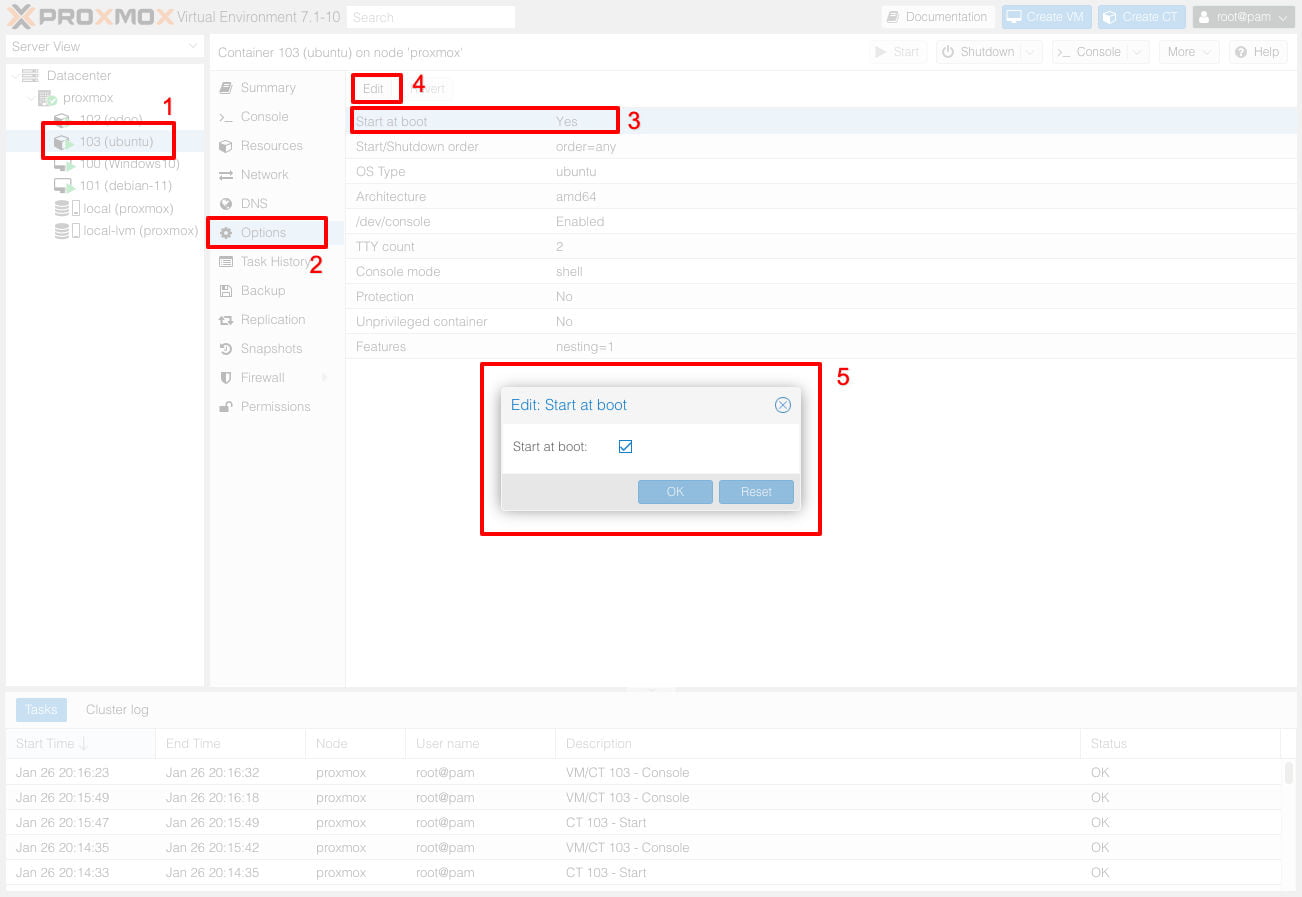
The Start at boot feature will allow the LXC container to automatically run every time Proxmox restarts. For containers that need to be used 24/7, I will enable this feature to ensure it always runs every time Proxmox starts.
- Select the LXC Container to edit in the Resource Tree
- Select Options
- Select Start at boot
- Click Edit
- Select Start at boot and click OK
And that’s it. You now have a LXC “virtual machine” on the Proxmox platform to freely tinker with and research.
Comment Policy: We truly value your comments and appreciate the time you take to share your thoughts and feedback with us.

Note: Comments that are identified as spam or purely promotional will be removed.

To enhance your commenting experience, consider creating a Gravatar account. By adding an avatar and using the same e-mail here, your comments will feature a unique and recognizable avatar, making it easier for other members to identify you.

Please use a valid e-mail address so you can receive notifications when your comments receive replies.
