Updated 08/2024: add Passthrough HDD Serial Number
After successfully installing the XPEnology virtual machine on Proxmox, I continued to pass through the hard drive so that the XPEnology virtual machine could access it directly, not through Proxmox management.
Here are the instructions I followed for the XPEnology VM. You can do this for any other KVM VM on the Proxmox platform.
1. Passthourgh External HDD
For external hard drives (External HDD) plugged into the Server via USB port, I operate exactly the same as the USB Passthrough setup shared in the previous article.
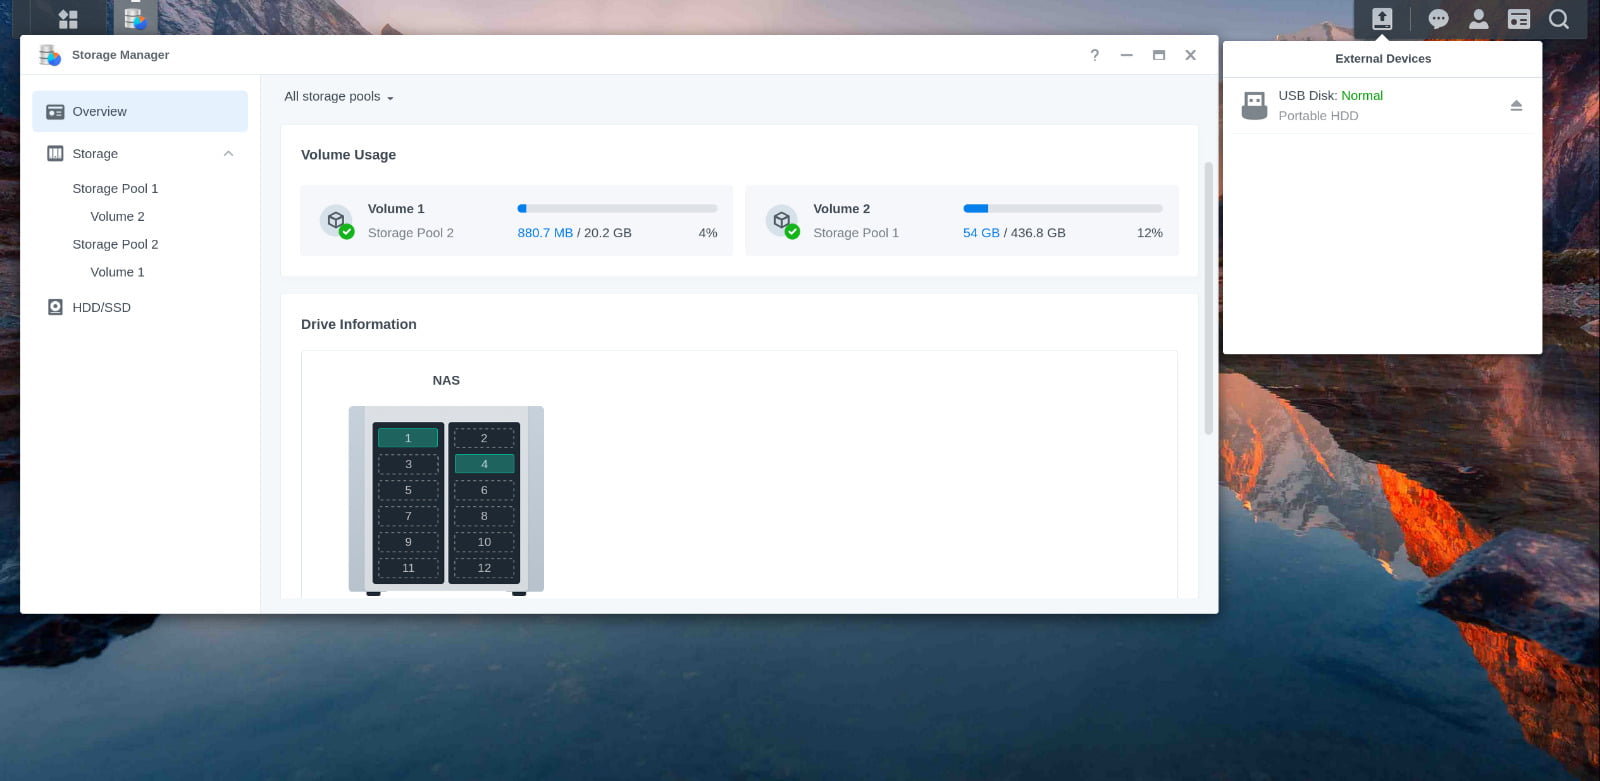
For example, below is a Portable HDD external hard drive configured to Passthrough into a virtual machine.
2. Passthourgh Internal Hard Drive
For internal hard drives (Interal HDD) connected via SATA / NVME port, I need to SSH into Proxmox console to do it via command line.
Use the following command to find the hard drives available on the Proxmox server
lsblk |awk 'NR==1{print $0" DEVICE-ID(S)"}NR>1{dev=$1;printf $0" ";system("find /dev/disk/by-id -lname "*"dev"" -printf " %p"");print "";}'|grep -v -E 'part|lvm'Code language: Nginx (nginx)The result appears as below.
NAME                           MAJ:MIN RM   SIZE RO TYPE MOUNTPOINT DEVICE-ID(S)
sda                              8:0    0 465.8G  0 disk   /dev/disk/by-id/ata-TOSHIBA_MQ01ABF050M_X66BP0UWT /dev/disk/by-id/wwn-0x5000039752682108
nvme0n1                        259:0    0 953.9G  0 disk   /dev/disk/by-id/nvme-eui.002538ba71be0f6a /dev/disk/by-id/nvme-SAMSUNG_MZVLW1T0HMLH-000L7_S35ANX0JA08970Code language: YAML (yaml)
I want to Passthrough TOSHIBA hard drive (465.8G) into XPENology virtual machine, write down its id: ata-TOSHIBA_MQ01ABF050M_X66BP0UWT.
To passthrough this hard drive to the virtual machine, use the command qm set (OPTIONS)
qm set 126 -sata3 /dev/disk/by-id/ata-TOSHIBA_MQ01ABF050M_X66BP0UWT
update VM 126: -sata3 /dev/disk/by-id/ata-TOSHIBA_MQ01ABF050M_X66BP0UWTCode language: YAML (yaml)126: ID of the XPENology virtual machine-sata3: connect to virtual machine via SATA standard/dev/disk/by-id/ata-TOSHIBA_MQ01ABF050M_X66BP0UWT: id of the hard drive that needs Passthrough
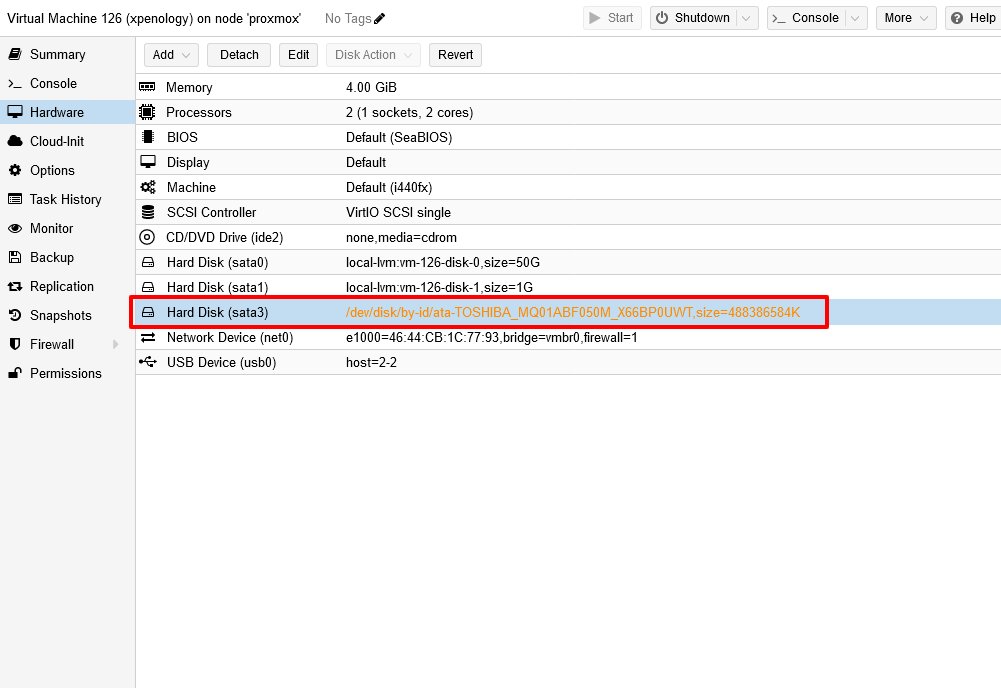
Return to the Proxmox interface, access the Hardware section of the XPENology virtual machine, the list has added Hard Disk (sata3).

Access the virtual machine, command Shutdown to turn off the machine.
3. Passthrough HDD Serial Number
Since Synology identifies hard drives by Serial Number, it is required to add the Passthrough HDD Serial Number step to Synology.
Install lshw to check hard drive Serial Number
# Install lshw
apt install lshwCode language: Nginx (nginx)
Find Serial Number by command
lshw -C diskCode language: Nginx (nginx)The returned result will show the serial line: WXH….. This is the Serial Number of the HDD
  *-disk
       description: ATA Disk
       product: WDC WD10SPZX-75Z
       vendor: Western Digital
       physical id: 0.0.0
       bus info: scsi@0:0.0.0
       logical name: /dev/sda
       version: 1A03
       serial: WXH1AC8EZTTH
       size: 931GiB (1TB)
       capabilities: partitioned partitioned:dos
       configuration: ansiversion=5 logicalsectorsize=512 sectorsize=4096 signature=d7c8623eCode language: YAML (yaml)
Access Proxmox Shell, edit virtual machine configuration file
nano /etc/pve/qemu-server/100.confCode language: Nginx (nginx)Replace 100 by id of the running XPEnology virtual machine
Find the HDD Passthrough declaration line, and add the Serial parameter, similar to the one below.
sata3: /dev/disk/by-id/ata-WDC_WD10SPZX-75Z10T2_WXH1AC8EZTTH,size=976762584K,serial=WXH1AC8EZTTH

Code language: HTTP (http)
4. Complete
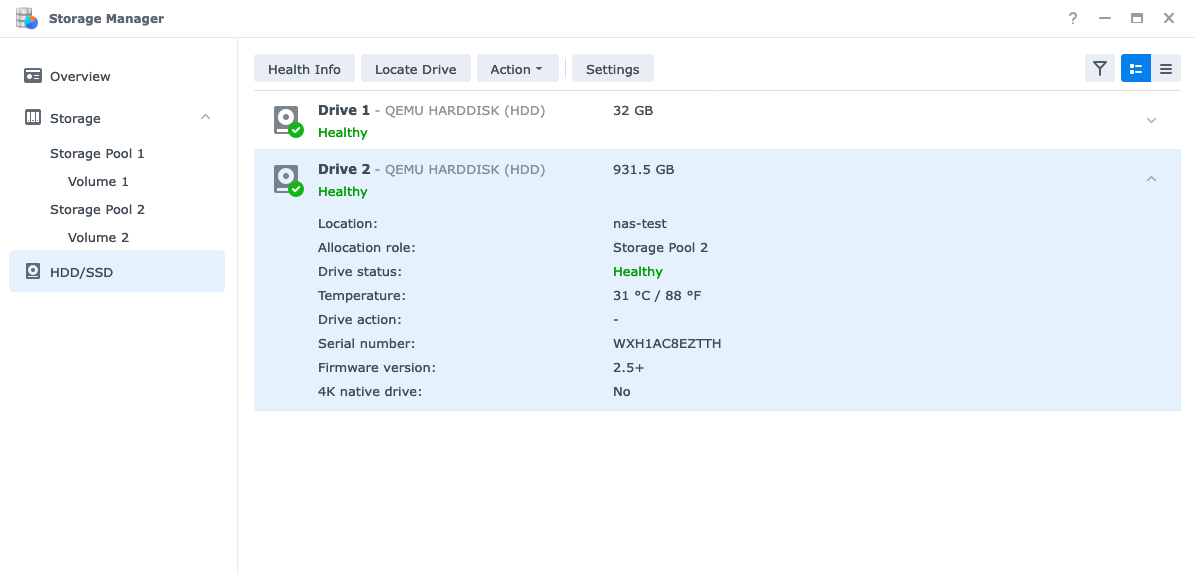
Below is my result after Passthrough HDD from Proxmox to XPEnnology virtual machine: 1 USB HDD and 1 SATA HDD working fine on XPEnology virtual machine.


With the passthrough HDD with serial number as instructed above, you can detach HDD from the virtual machine and then attach it to another virtual machine and perform migration without worrying about data loss. I tested with 1 SATA HDD, and everything works normally.
Reference: https://pve.proxmox.com/wiki/Passthrough_Physical_Disk_to_Virtual_Machine_(VM), https://dannyda.com/2020/08/26/how-to-passthrough-hdd-ssd-physical-disks-to-vm-on-proxmox-vepve/
Comment Policy: We truly value your comments and appreciate the time you take to share your thoughts and feedback with us.

Note: Comments that are identified as spam or purely promotional will be removed.

To enhance your commenting experience, consider creating a Gravatar account. By adding an avatar and using the same e-mail here, your comments will feature a unique and recognizable avatar, making it easier for other members to identify you.

Please use a valid e-mail address so you can receive notifications when your comments receive replies.
