Continuing with the series about Proxmox, this article will guide you how to install a KVM virtual machine running Linux on Proxmox VE.
I will install Debian 11 operating system. You can apply the same to install other Linux versions: Ubuntu, Arch, Fedora,…
I. Upload ISO to Proxmox
Before setting up the virtual machine, you need to upload the Debian 11 installation ISO file to Proxmox.
Access the Proxmox web interface, click local in the Resource Tree section, select ISO Images, then click the Upload or Download from URL button.
- Upload: upload ISO from your computer
- Download from URL: download ISO file directly from the Internet.
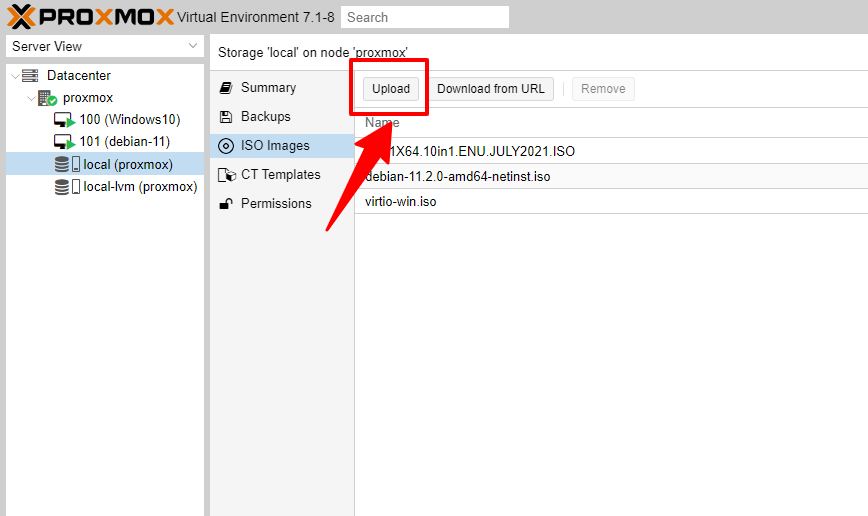
Once downloaded, the Debian installation ISO file will be available in the ISO Images section.

II. Create KVM virtual machine for Debian 11
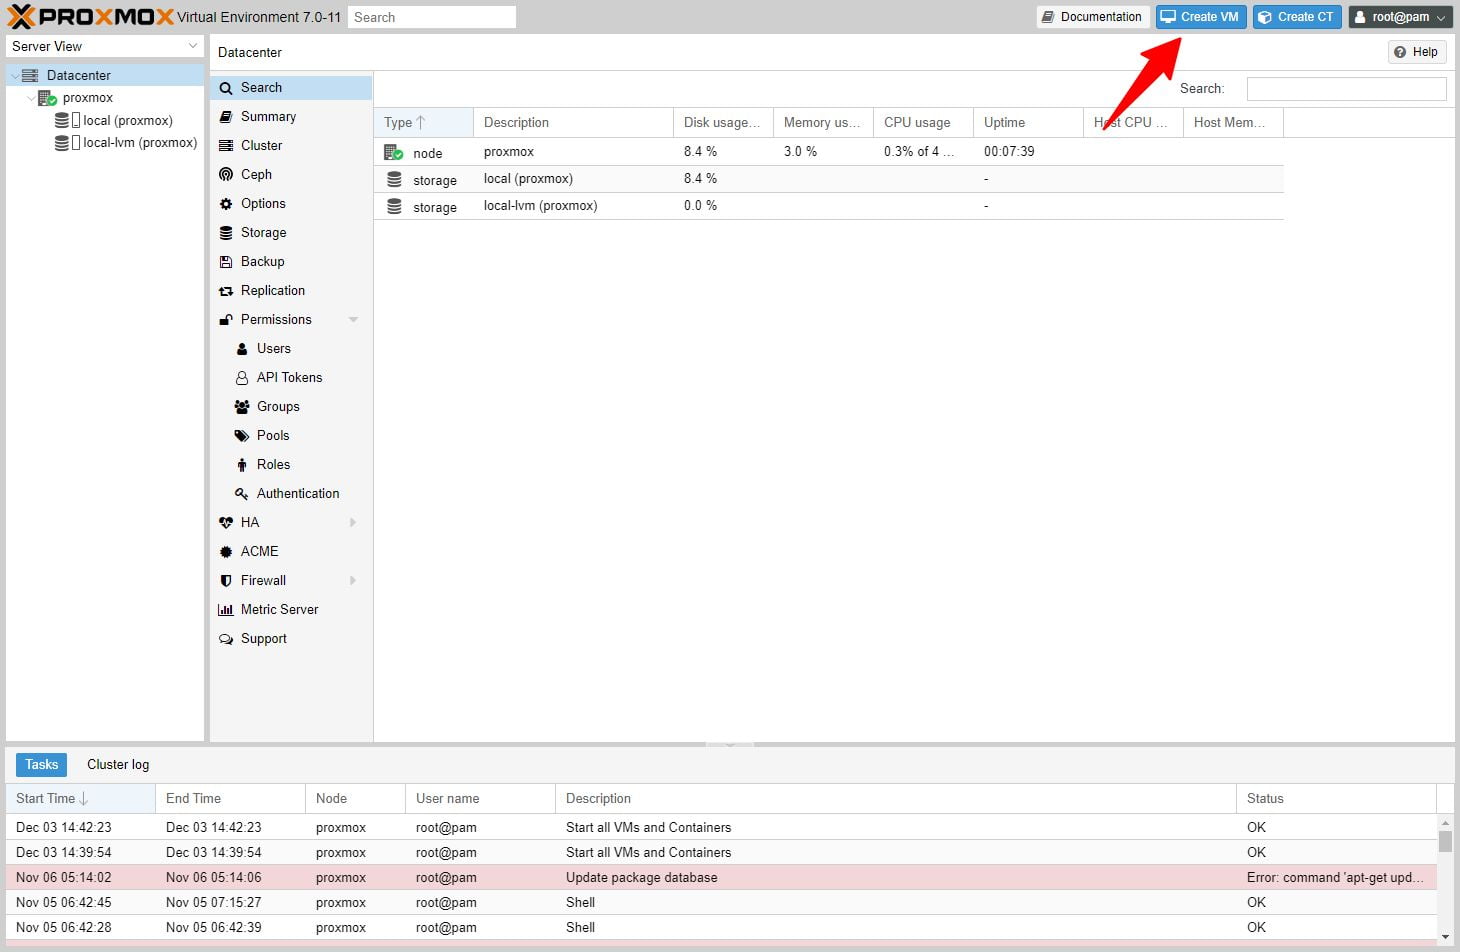
Click the Create VM button on the Proxmox Header to start the virtual machine creation process.
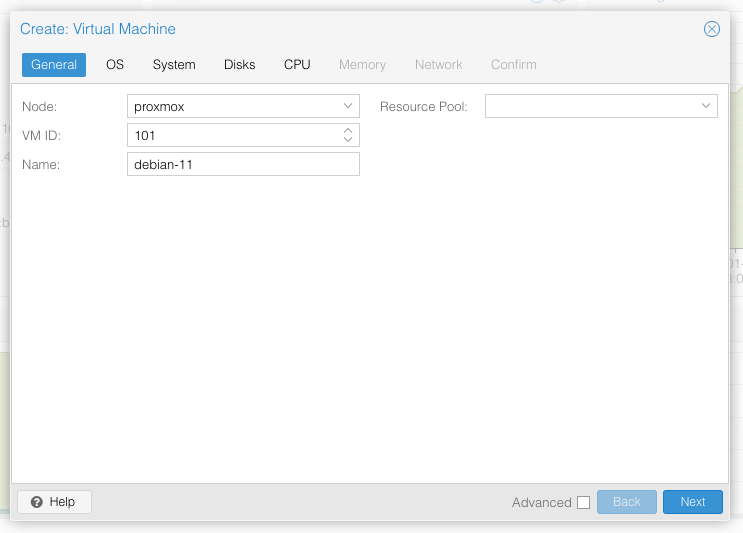
1. General Information
- Node: select the Proxmox host you want to install the virtual machine on
- VM ID: keep default or change as desired
- Name: debian-11
Click Next to continue
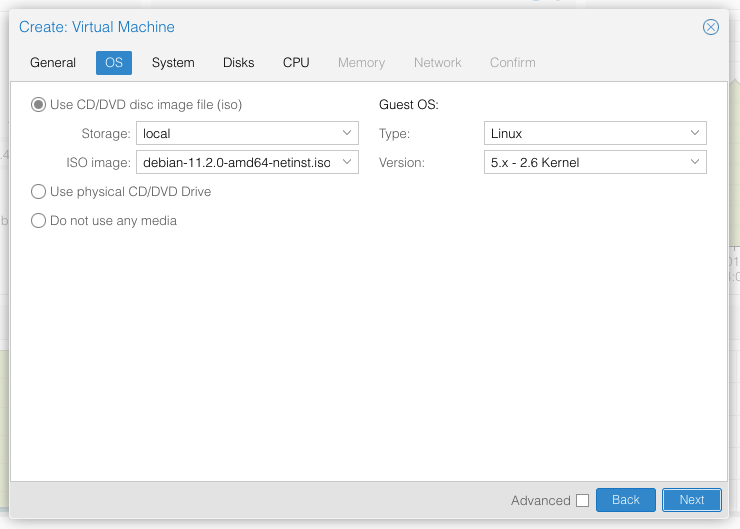
2. OS – Operating System
- Click Use CD/DVD disc image file (iso)
- Storage: select local
- ISO Images: select the debian ISO file downloaded in the previous step
- Guest OS:
- Type: Linux
- Version: 5.x – 2.6 Kernel
Click Next
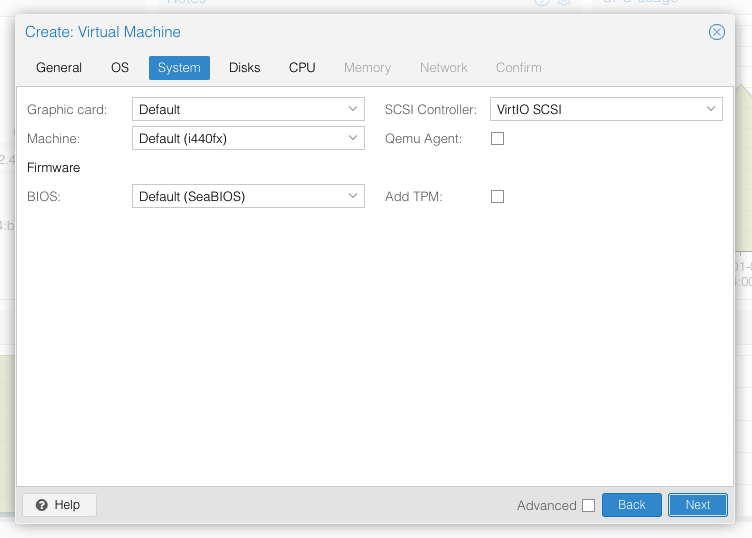
3. System
- Graphic card: Default
- Machine: Default (i440fx)
- BIOS: Default (SeaBIOS)
- SCSI: select VirtIO SCSI
Click Next
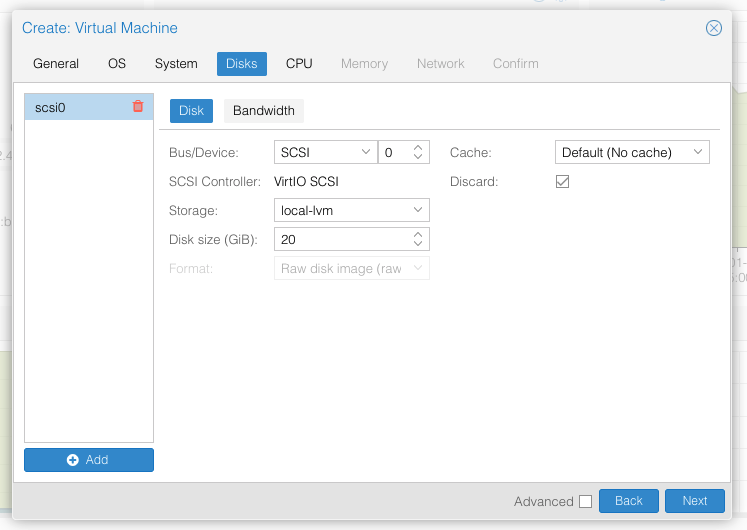
4. Hard Disk
- Bus/Device: select SCSI
- Cache: Default (No cache)
- Storage: select local-lvm
- Disk size (GB): 20GB or larger
- Discard: tick
Click Next to continue
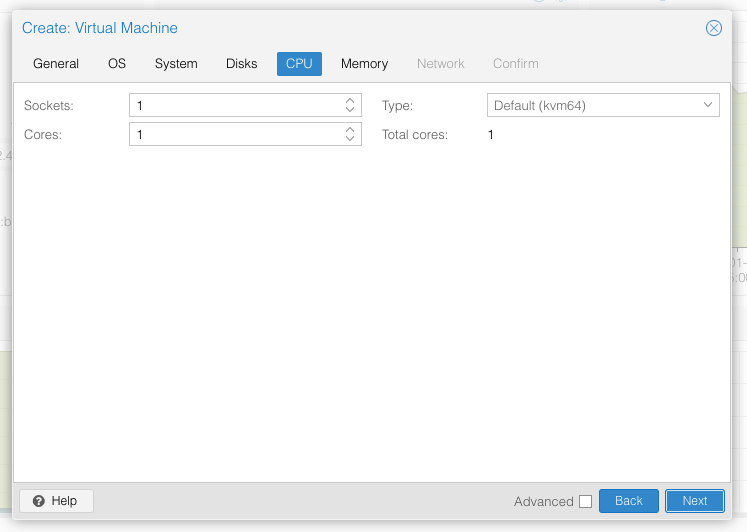
5. CPU
Depending on your usage needs, you choose the appropriate vCPU, I choose 1 Core.
- Sockets: 1
- Cores: 1
- Type: Default (kvm64)
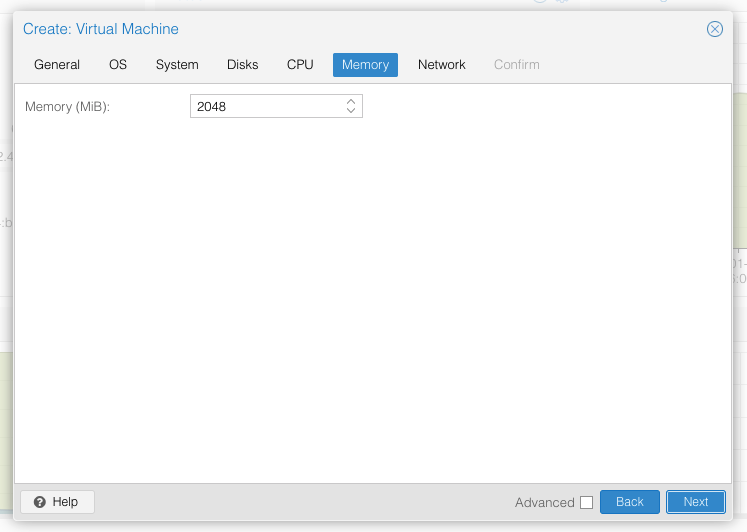
6. Memory
Choose at least 1 GB (1024 MB). I choose 2 GB (2048)
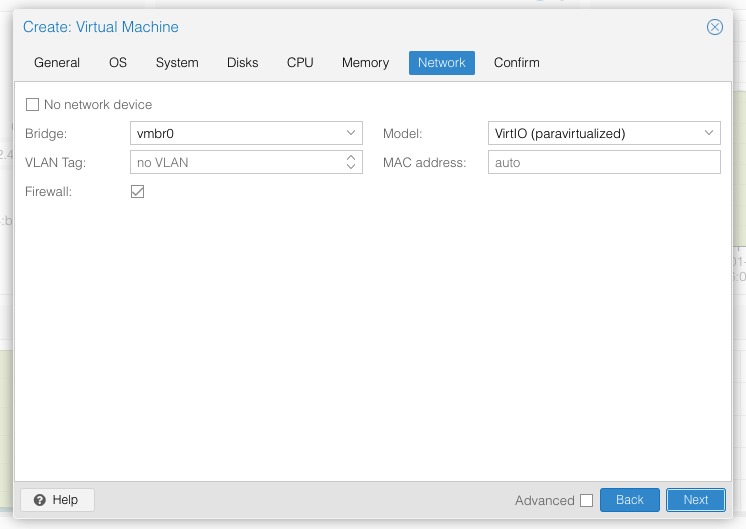
7. Network
- Model: select VirtIO (paravirtualized)
8. Confim
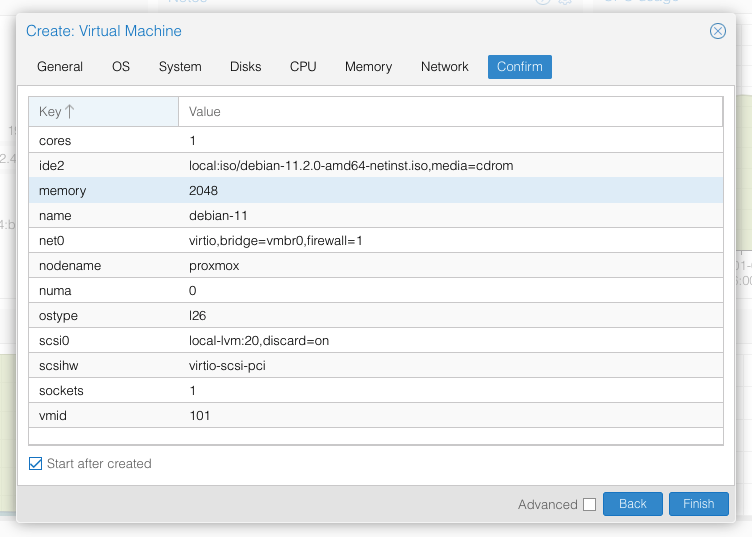
Check the information one last time, click Start after created and click Finish to create the new virtual machine.
The virtual machine will automatically activate after creation.
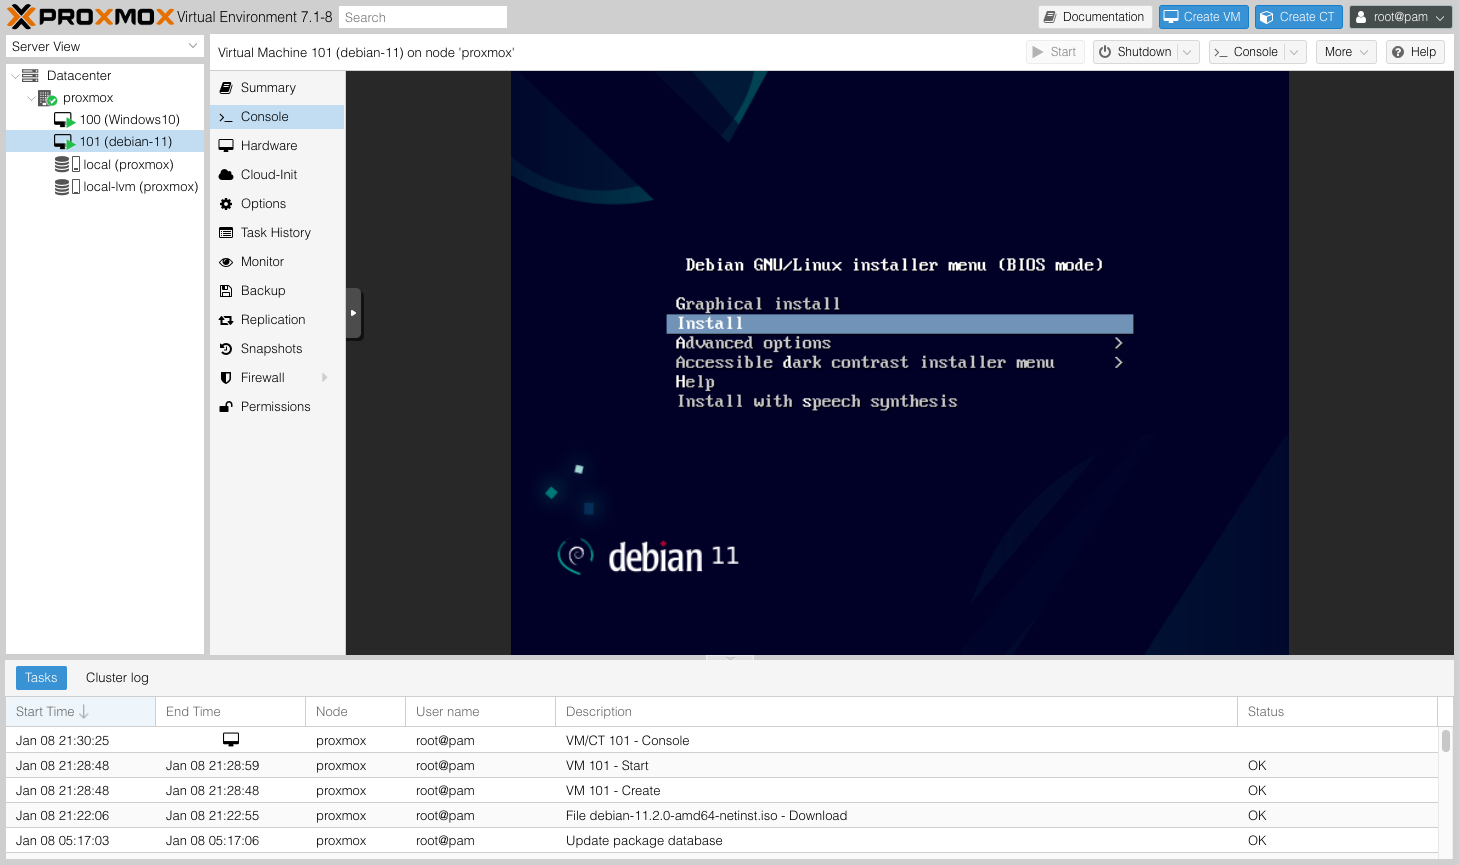
III. Operating System Installation
Access the Console section of the newly created Linux virtual machine to proceed with the operating system installation steps.
IV. Install and Activate QEMU Guest Agent
After installing Linux on the virtual machine, you need to install Guest Agent.
apt-get install qemu-guest-agentCode language: JavaScript (javascript)If you are installing CentOS / Rocky Linux or other Redhat based Linux distributions, use the following command
yum install qemu-guest-agentCode language: Nginx (nginx)Then turn off the virtual machine and go to Options to enable the QEMU Guest Agent feature.
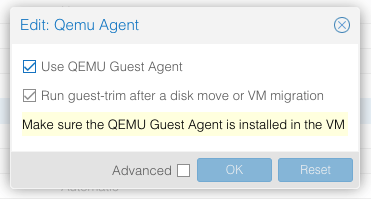
Double click on QEMU Guest
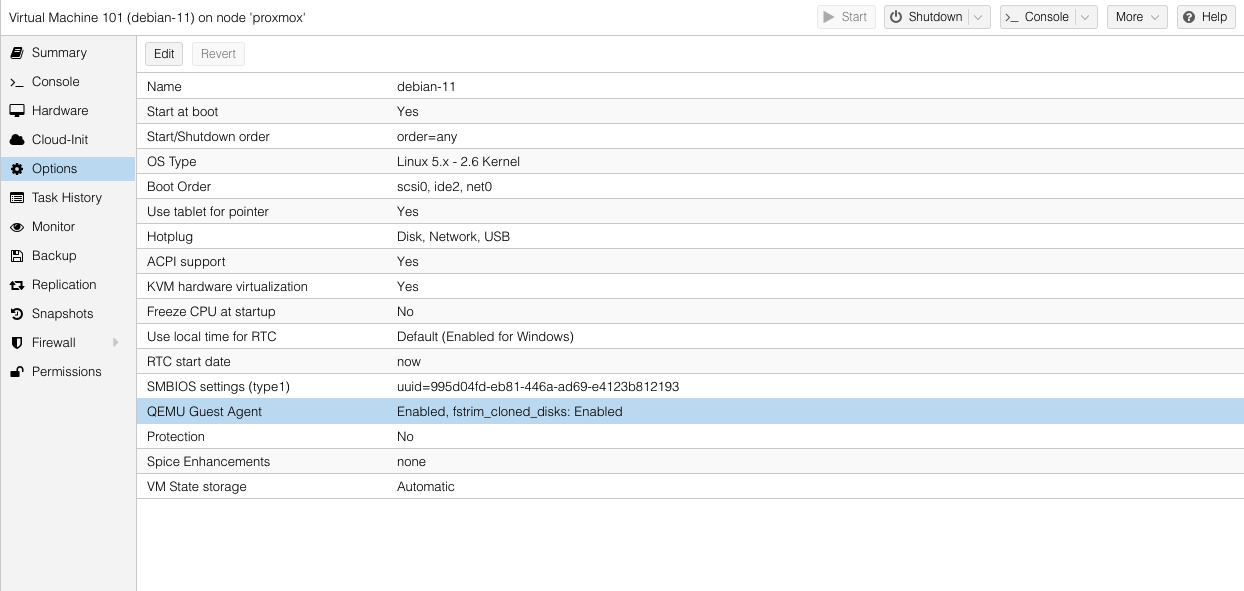
Select Use QEMU Guest Agent and click OK to confirm.
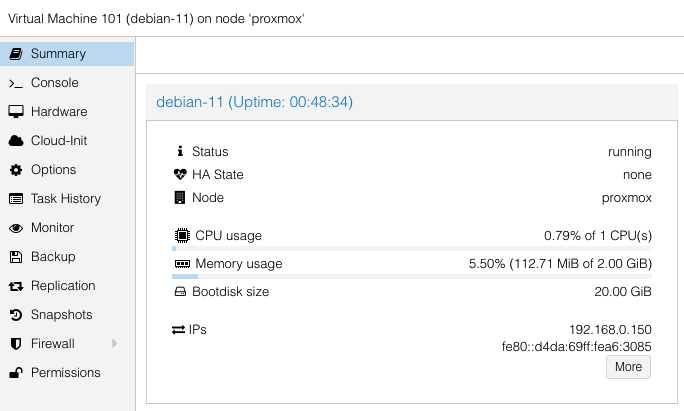
After activating QEMU Guest Agent, you restart the virtual machine. The CPU Usage, Memory Usage, IPs information of the virtual machine will be displayed in the Summary section of Proxmox.
And that’s it. You have a Linux virtual machine on Proxmox to freely research and tinker with.
Comment Policy: We truly value your comments and appreciate the time you take to share your thoughts and feedback with us.

Note: Comments that are identified as spam or purely promotional will be removed.

To enhance your commenting experience, consider creating a Gravatar account. By adding an avatar and using the same e-mail here, your comments will feature a unique and recognizable avatar, making it easier for other members to identify you.

Please use a valid e-mail address so you can receive notifications when your comments receive replies.
