Today’s article will guide you how to install Squid on Oracle Cloud’s free VPS virtual machine to make a Proxy Server. You can apply the same to install on your home server or on VPS of other services such as Digital Ocean, Vultr, …
I will install Squid using Docker Compose so that I can remove it at any time without affecting the system.
1. Preparation requirements
- Pre-setup VPS running Ubuntu 20.04 or 22.04 operating system
- VPS has Docker / Docker Compose installed.
2. Install Squid Proxy
SSH into VPS and create new folder for Squid
mkdir ~/squid
cd ~/squidCode language: Bash (bash)
Create file compose.yml
services:
  proxy:
    image: ubuntu/squid
    ports:
      - "3128:3128"
    environment:
      - TZ=Asia/Ho_Chi_Minh
    volumes:
      - ./squid.conf:/etc/squid/squid.confCode language: YAML (yaml)
Create additional configuration file for squid
nano squid.confCode language: CSS (css)Enter the following Content and save.
http_access allow all
http_port 3128Code language: Nginx (nginx)
With this configuration, squid will operate on port 3128 and open access to all network protocols and source IPs.
3. Activate Squid
Activate squid with the following command
docker compose up -dCode language: Nginx (nginx)Next check if Squid is running using the command curl
curl -x 127.0.0.1:3128 -I -L http://google.comCode language: YAML (yaml)The result returned shows a line. Via: 1.1 47b623f8c9ff (squid/6.6) means Squid is working fine.
HTTP/1.1 301 Moved Permanently
Location: http://www.google.com/
Content-Type: text/html; charset=UTF-8
Content-Security-Policy-Report-Only: object-src 'none';base-uri 'self';script-src 'nonce-eSmZn_UUYRd5jJKWrz2pcA' 'strict-dynamic' 'report-sample' 'unsafe-eval' 'unsafe-inline' https: http:;report-uri https://csp.withgoogle.com/csp/gws/other-hp
Date: Sat, 21 Sep 2024 06:11:29 GMT
Expires: Mon, 21 Oct 2024 06:11:29 GMT
Cache-Control: public, max-age=2592000
Server: gws
Content-Length: 219
X-XSS-Protection: 0
X-Frame-Options: SAMEORIGIN
Cache-Status: 47b623f8c9ff;detail=mismatch
Via: 1.1 47b623f8c9ff (squid/6.6)
Connection: keep-alive

HTTP/1.1 200 OK
Content-Type: text/html; charset=ISO-8859-1
Content-Security-Policy-Report-Only: object-src 'none';base-uri 'self';script-src 'nonce-LLLlSd3CIXQZ_bzbO-3lgg' 'strict-dynamic' 'report-sample' 'unsafe-eval' 'unsafe-inline' https: http:;report-uri https://csp.withgoogle.com/csp/gws/other-hp
P3P: CP="This is not a P3P policy! See g.co/p3phelp for more info."
Date: Sat, 21 Sep 2024 06:11:29 GMT
Server: gws
X-XSS-Protection: 0
X-Frame-Options: SAMEORIGIN
Expires: Sat, 21 Sep 2024 06:11:29 GMT
Cache-Control: private
Set-Cookie: AEC=AVYB7co-QfUvSxhu9soW6ZgzlyOQJRXfhoUfBRWnDOC5nMYJLnNYnrfAlA; expires=Thu, 20-Mar-2025 06:11:29 GMT; path=/; domain=.google.com; Secure; HttpOnly; SameSite=lax
Set-Cookie: NID=517=h0bemJIvrMRrJZB4shhmaOXwuIcB1E7YgXuxGHpHFOqRnhN9uHiQW_BeC0xDzBeCAOHfdzxGuUsHXGErQH-Z_cTEvg8MkjZB_YbCznJ1WTILQqdQyFAYDhl4-w5JpizfuTWMnedLylBQaqZIr2AZfjMxFnTG8h98M83luUWRkEdfc4efIMDzn9y7KIEwg2eR; expires=Sun, 23-Mar-2025 06:11:29 GMT; path=/; domain=.google.com; HttpOnly
Cache-Status: 47b623f8c9ff;detail=mismatch
Via: 1.1 47b623f8c9ff (squid/6.6)
Connection: keep-alive

Code language: YAML (yaml)
Find VPS Public IP address
curl ifconfig.meCode language: CSS (css)The returned IP will be used to configure the Proxy on the client computer.
4. Configure Security List for Oracle VPS
This step only applies to those of you who are installing Squid on Oracle Cloud VPS.
Access the Sercirity List configuration for VPS, add a new Ingress Rule with the following parameters:
- Source Type: CIDR
- Sour CIDR: 0.0.0.0/0
- IP Protocol: TCP
- Source Port Range : All (leave blank)
- Destination Port Range: 3128
- Description: Squid Proxy Server
Click the Add Ingress Rules button to create.
5. Configure Proxy on browser
Depending on the application, the proxy configuration will be different. Here I will configure on Firefox.
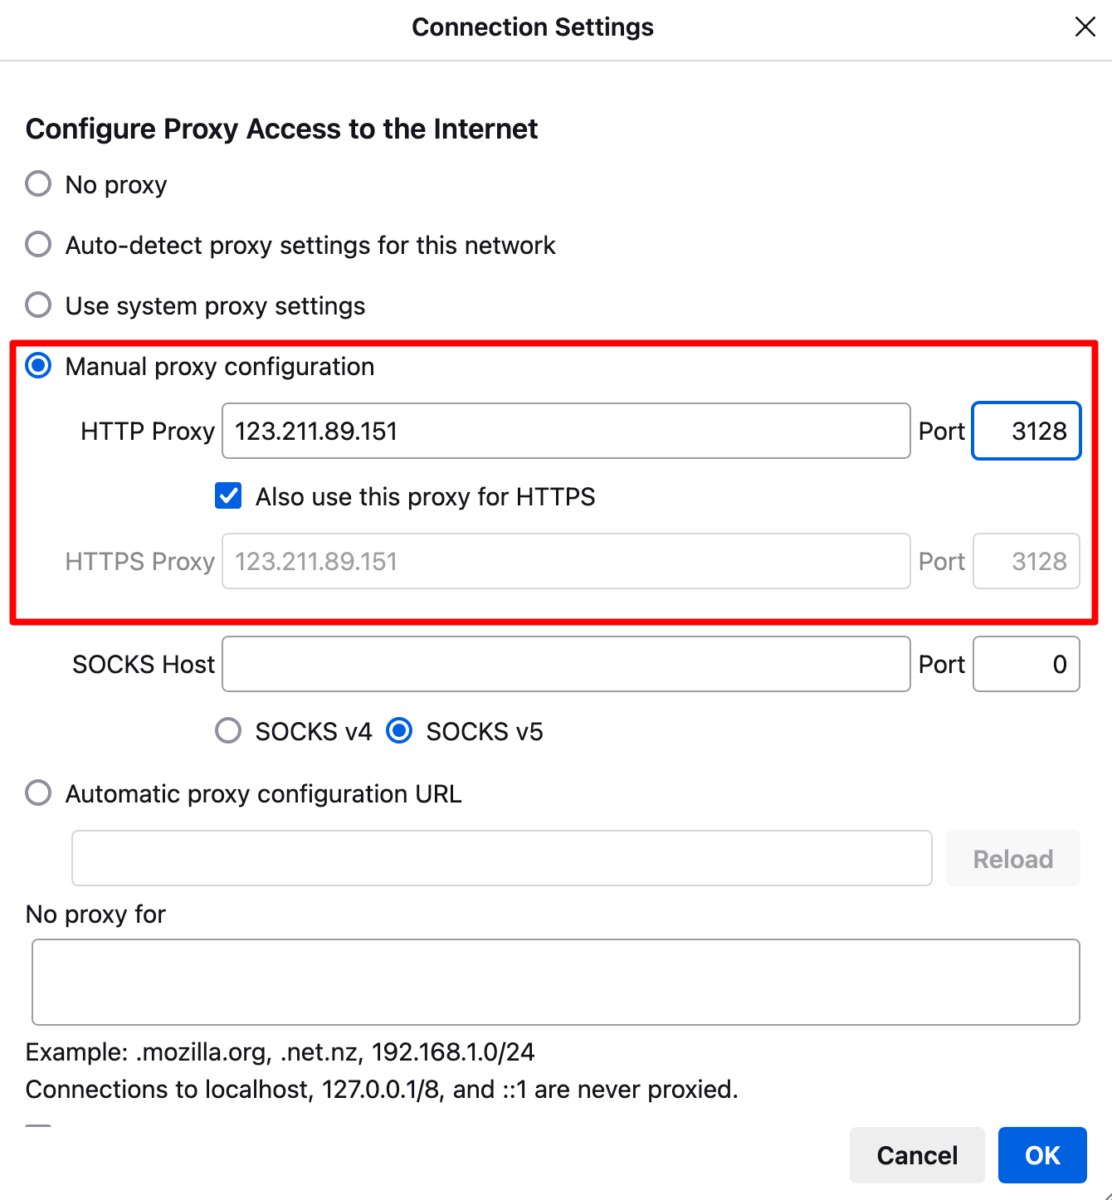
Go to Settings (or type about:preferences in the web address and press Enter), find Network Settings and adjust the parameters.
- HTTP Proxy: enter VPS IP
- Port: 3128
- Click to add Also use this proxy for HTTPS

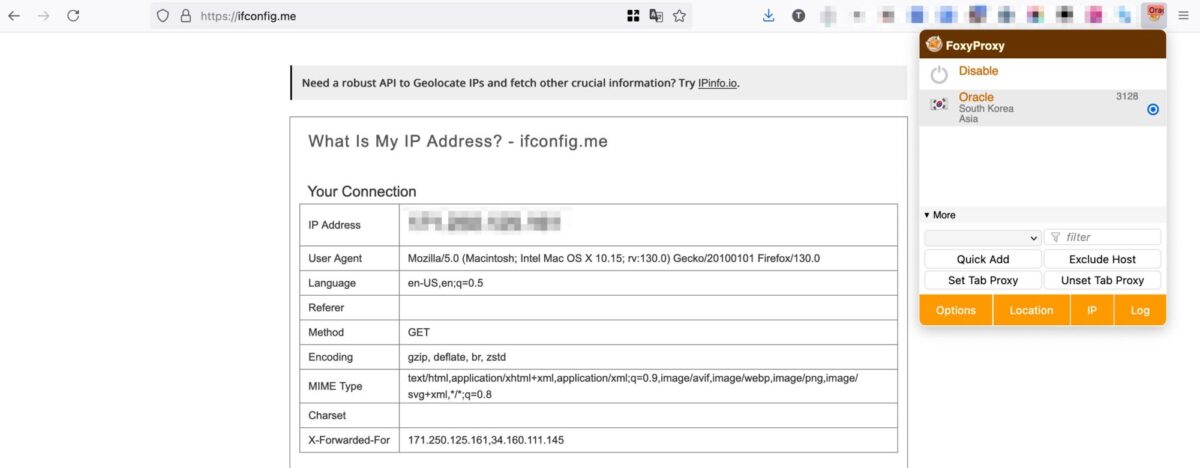
Then visit the website https://ifconfig.me/ you will see it show the IP of the VPS that is installing Squid Proxy.
6. Install Foxy Proxy extension
Configuring Proxy directly in Firefox’s Settings will be very inconvenient if you need to turn proxy on or off depending on the website you visit. For convenience, I recommend installing the extension. Foxy Proxy standard to be able to switch back and forth between different Proxies.
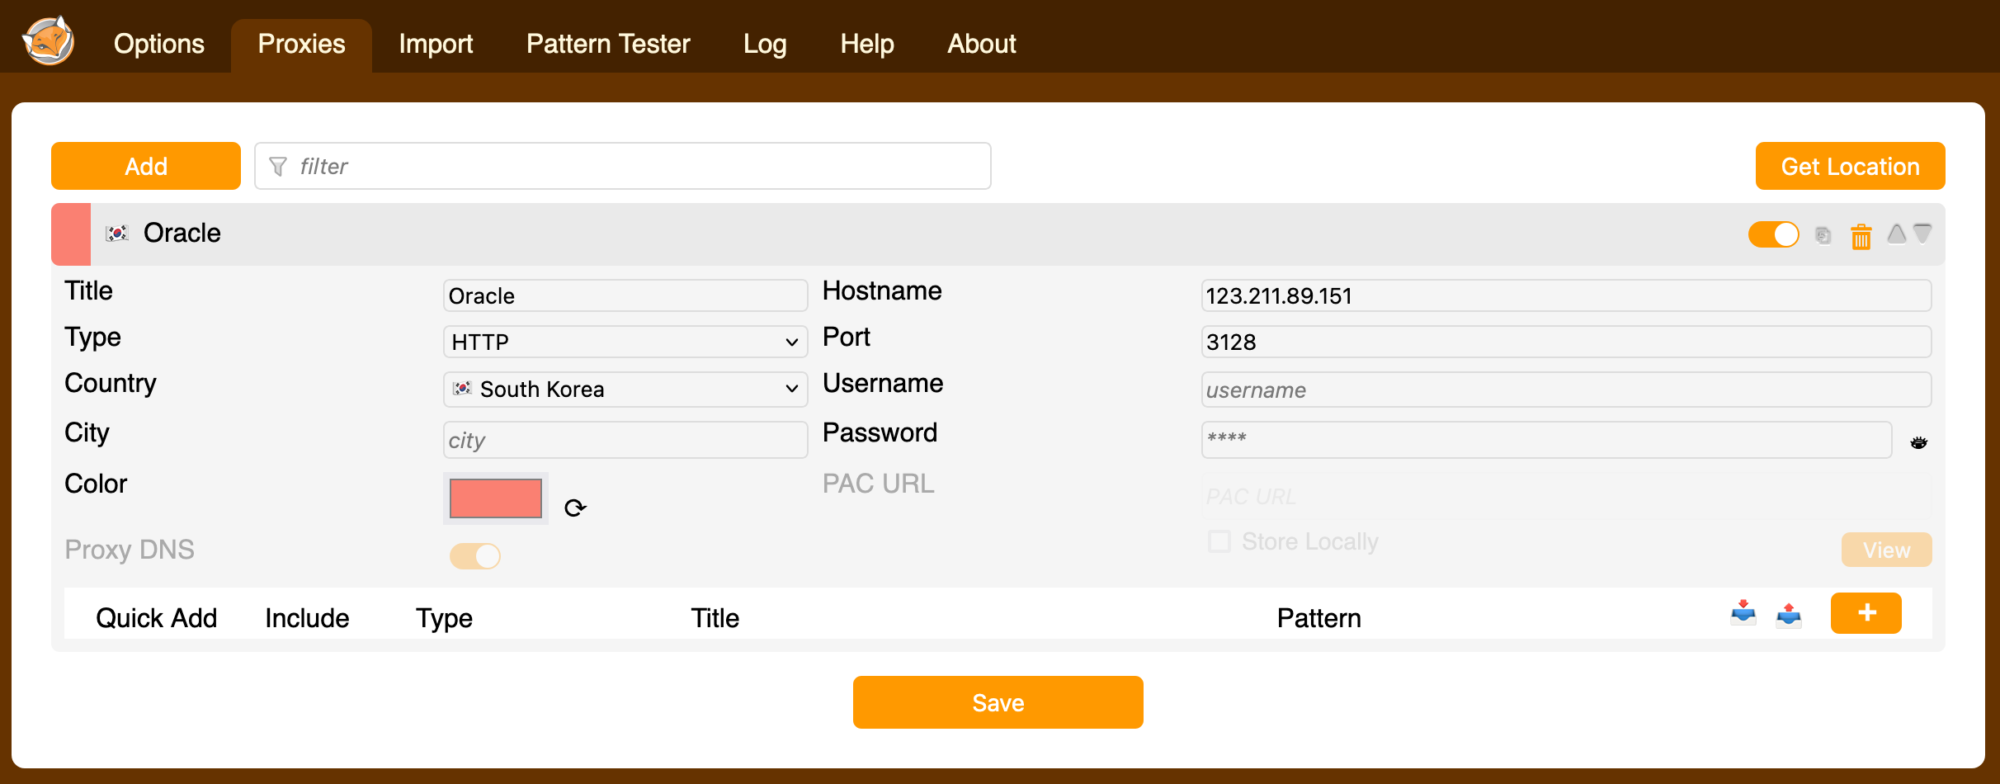
After installation, go to FoxyProxy configuration page and add Proxy in Proxies section. Click Save to save.

Every time I need to use Proxy, I will click on the FoxyProxy icon to activate the corresponding Proxy. Or click Disable to stop using Proxy.

6. Configure security with account and password
With the settings shared above, everyone can use your Squid Server if they know the IP address. To prevent unauthorized access, I will configure an additional security step for Squid Proxy with an account and password.
Install additional tools apache2-utils
sudo apt install apache2-utilsCode language: Nginx (nginx)Create a file to save your account and password. You replace markknow with your account name
cd ~/squid/
htpasswd -c passwords markknowCode language: JavaScript (javascript)
Enter your password and confirm. Your account information and password will be saved to a file. passwords located in the same folder as the file compose.yml
Update file compose.ymladd the last line as below
services:
  proxy:
    image: ubuntu/squid

    ports:
      - "3128:3128"
    environment:
      - TZ=UTC
    volumes:
      - ./squid.conf:/etc/squid/squid.conf
      - ./passwords:/etc/squid/passwordsCode language: YAML (yaml)
Edit the file again squid.conf with the following content to enable account and password authentication.
auth_param basic program /usr/lib/squid/basic_ncsa_auth /etc/squid/passwords
auth_param basic children 5
auth_param basic realm Squid proxy-caching web server
auth_param basic credentialsttl 2 hours

acl password proxy_auth REQUIRED
http_access allow password

http_access deny all

http_port 3128Code language: YAML (yaml)
Restart Squid
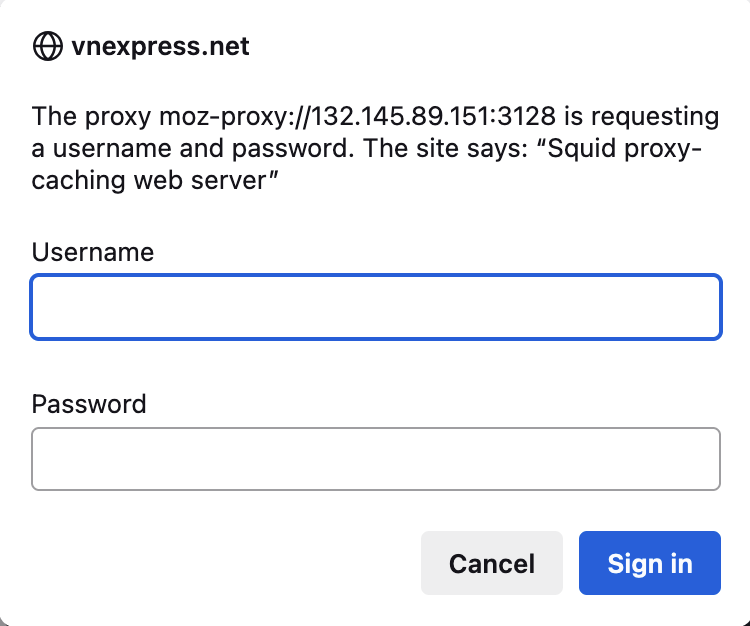
docker compose restartCode language: Nginx (nginx)Go back to Firefox and access the network through Proxy, you will be asked to enter your account and password to authenticate.

That’s it! Now you don’t have to worry about someone else using your Proxy Server.
Comment Policy: We truly value your comments and appreciate the time you take to share your thoughts and feedback with us.

Note: Comments that are identified as spam or purely promotional will be removed.

To enhance your commenting experience, consider creating a Gravatar account. By adding an avatar and using the same e-mail here, your comments will feature a unique and recognizable avatar, making it easier for other members to identify you.

Please use a valid e-mail address so you can receive notifications when your comments receive replies.
