
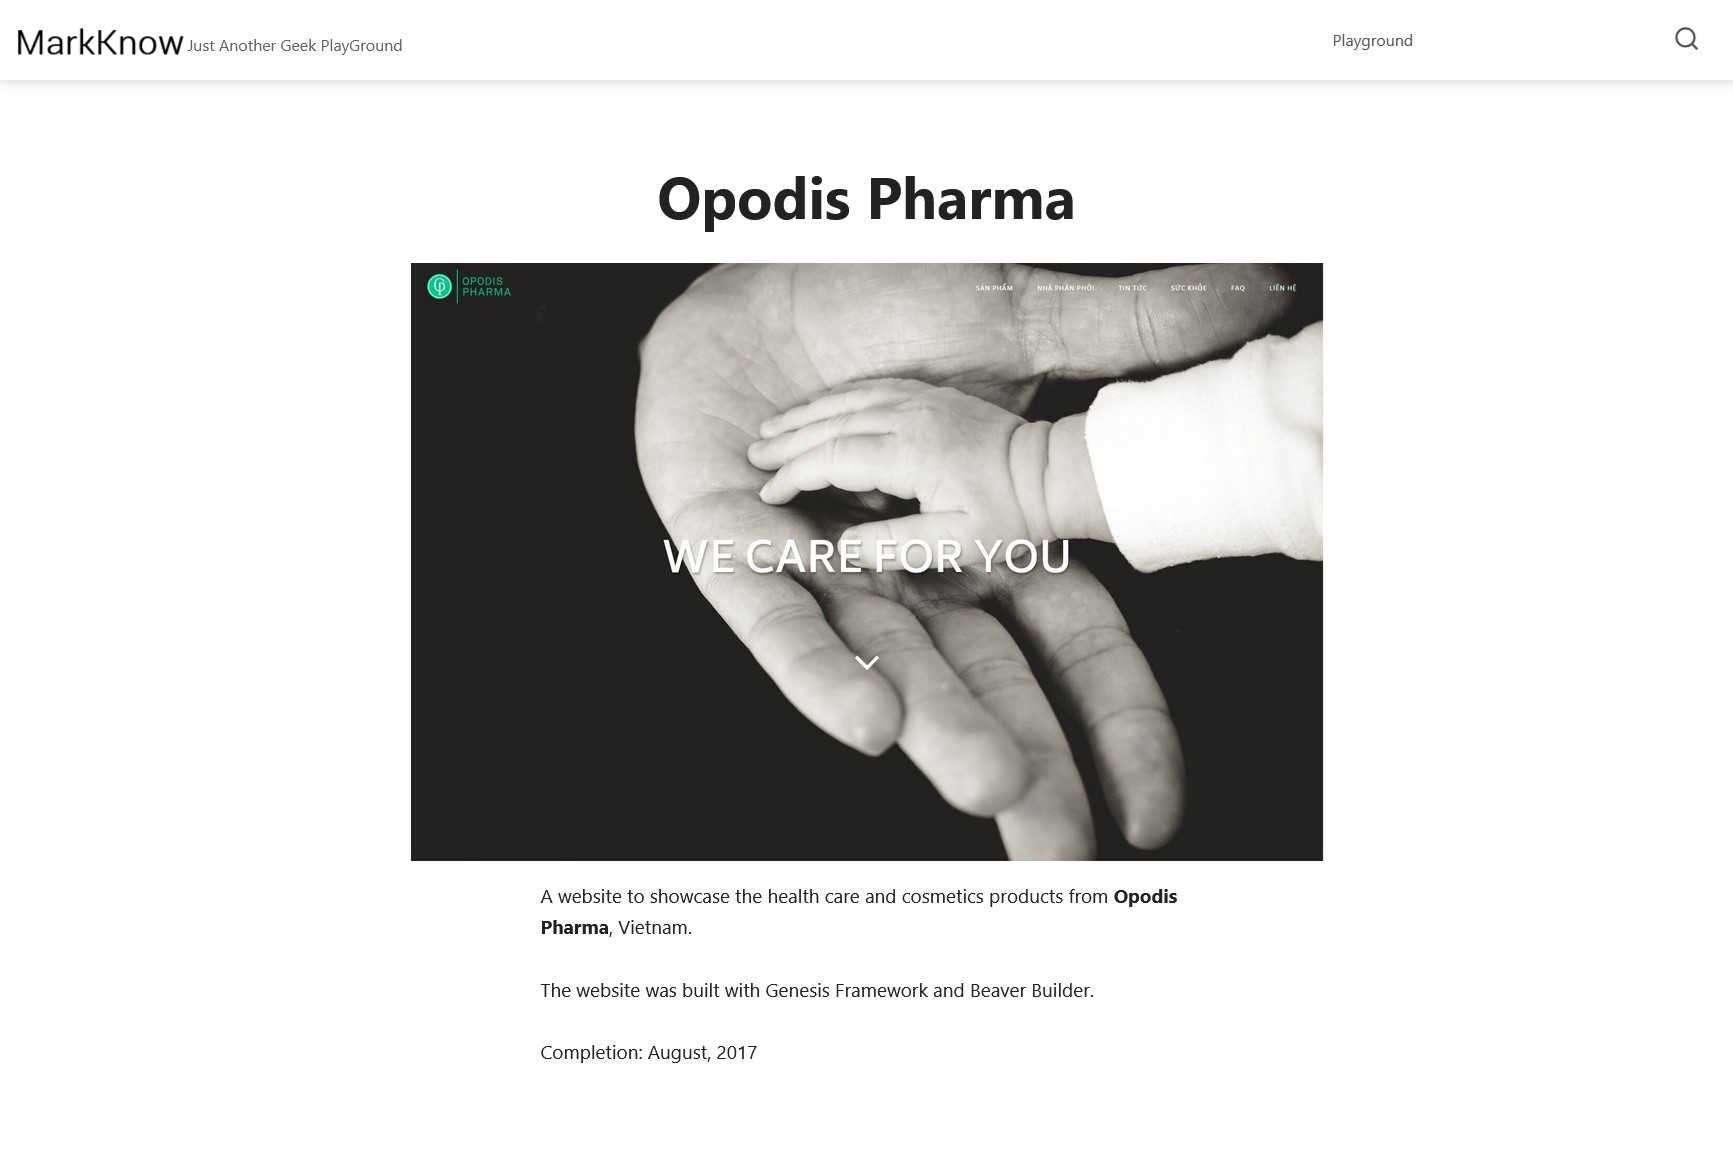
I am setting up a Portfolio feature for this MarkKnow blog to introduce the website projects I have completed so far. Hopefully, from there, I will find new business opportunities to earn money to buy beer every day.
The simplest way to create a Portfolio for a website is to use available plugins (search for portfolio in the Plugins section and you will find many options). However, I prefer to do it manually for the convenience of managing features and for customization according to personal needs.
The steps to set up a Portfolio for your website will be shared in this articles.
I. Create custom post type and custom field
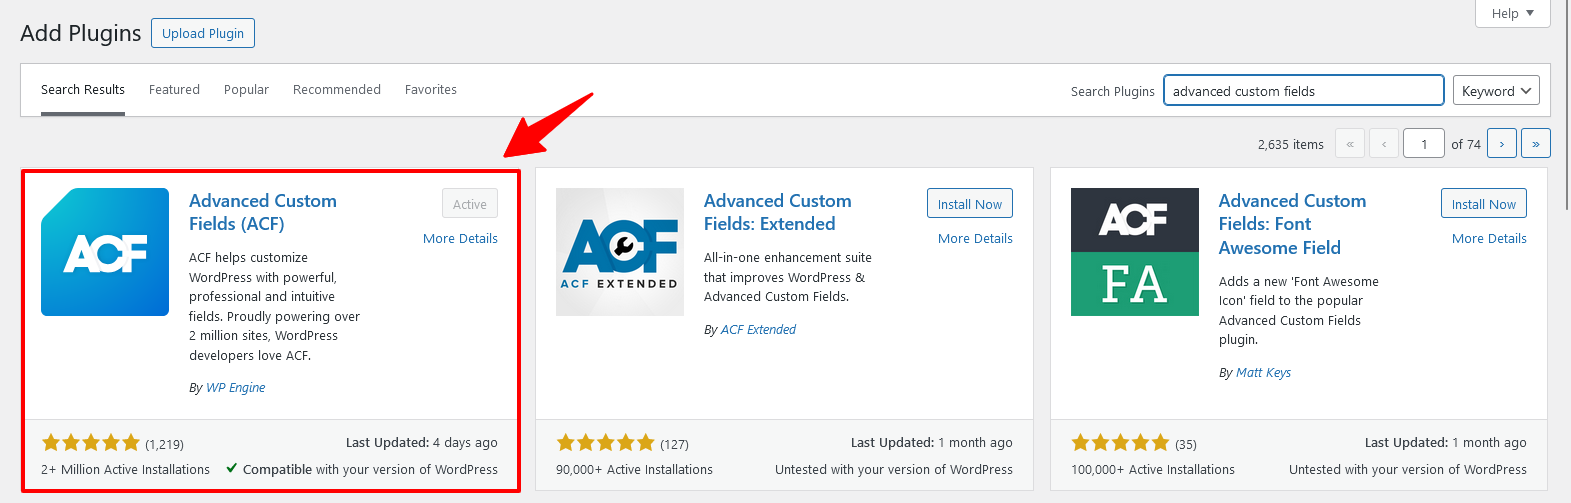
1. Install the Advanced Custom Fields (ACF) plugin
Go to Dashboard –> Plugins, find and install Advanced Custom Fields and activate.
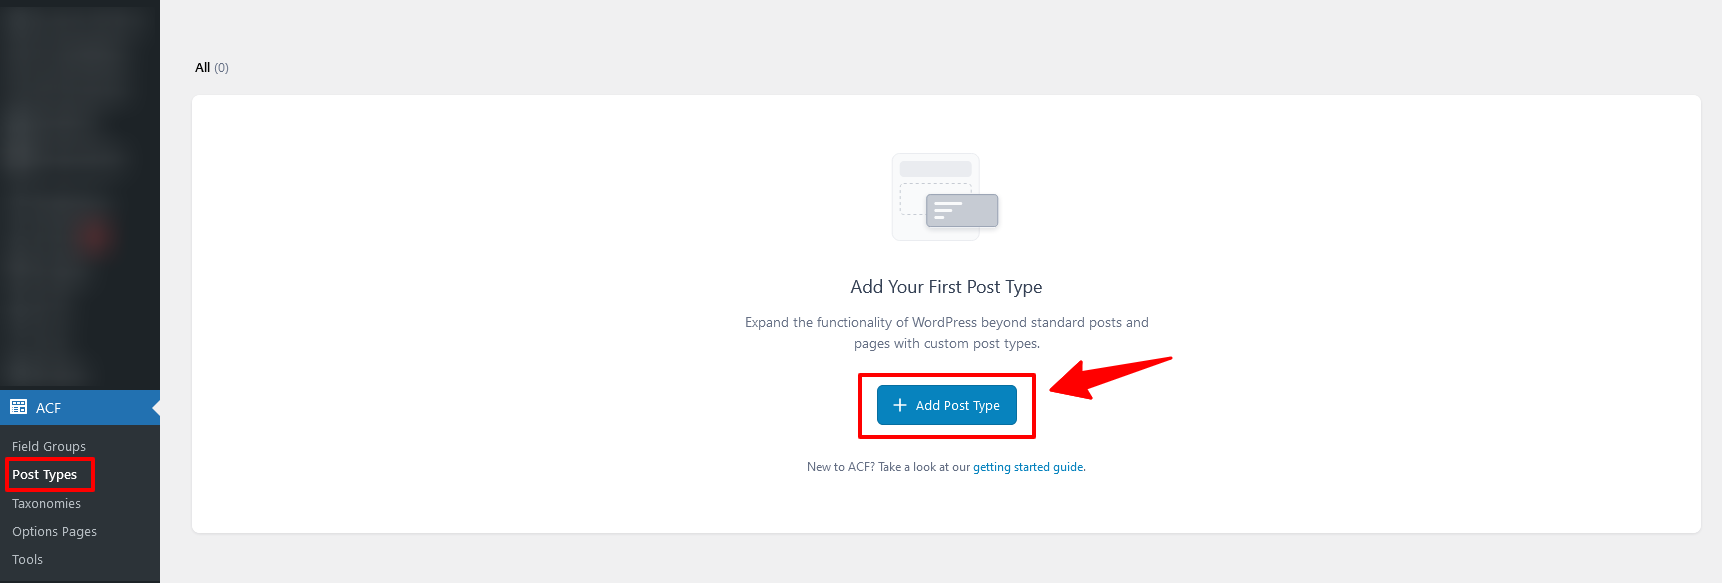
2. Create Custom Post Type
Access the Post Types section in the menu of the newly installed ACF plugin, click the Add Post Type button to create a new one.
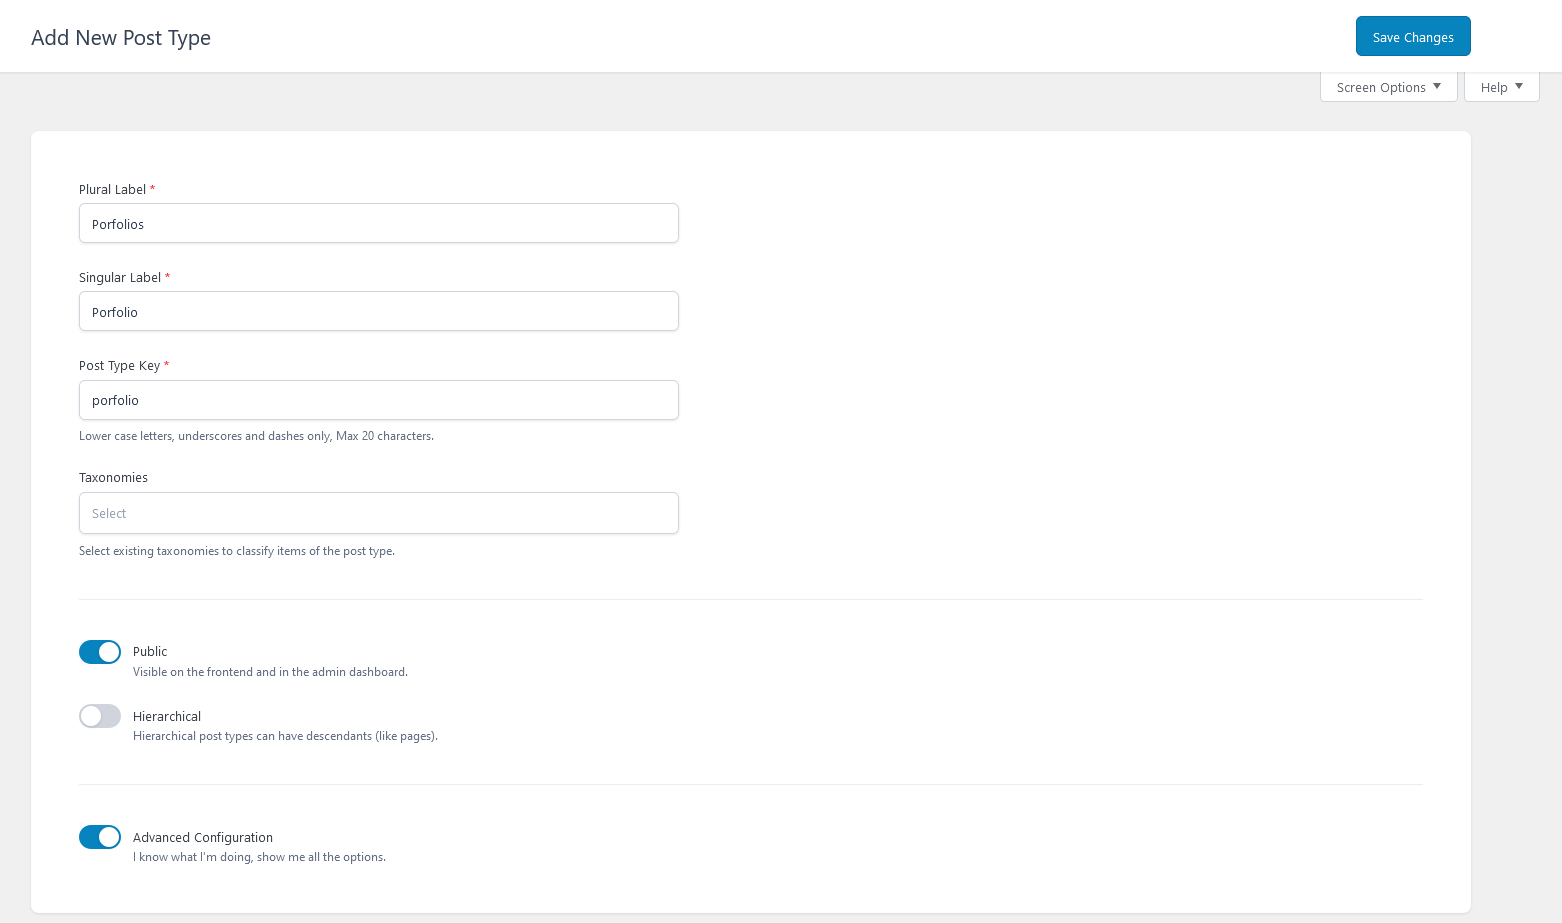
Enter the necessary information to create a Portfolio and click Save Changes to save.
3. Create Custom Fields
Next, I will create a new custom field to save the website address of the Portfolio page.
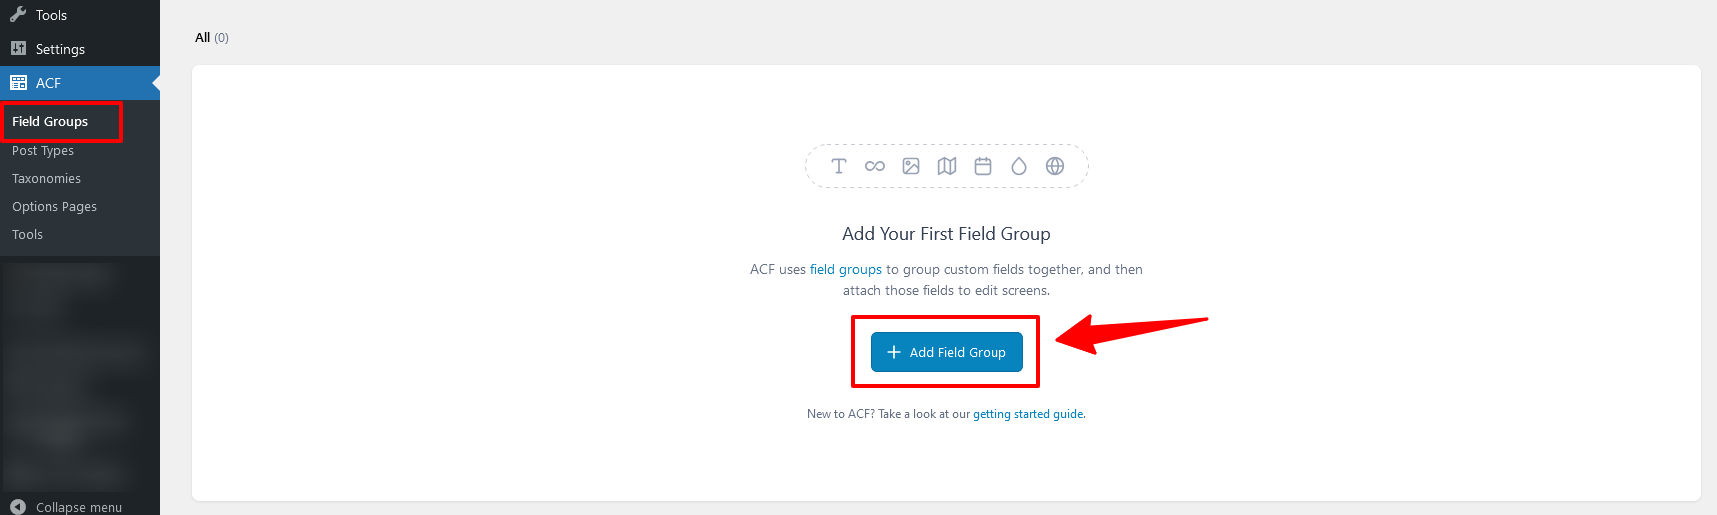
Go to the Field Groups section of ACF, click the Add Field Group button
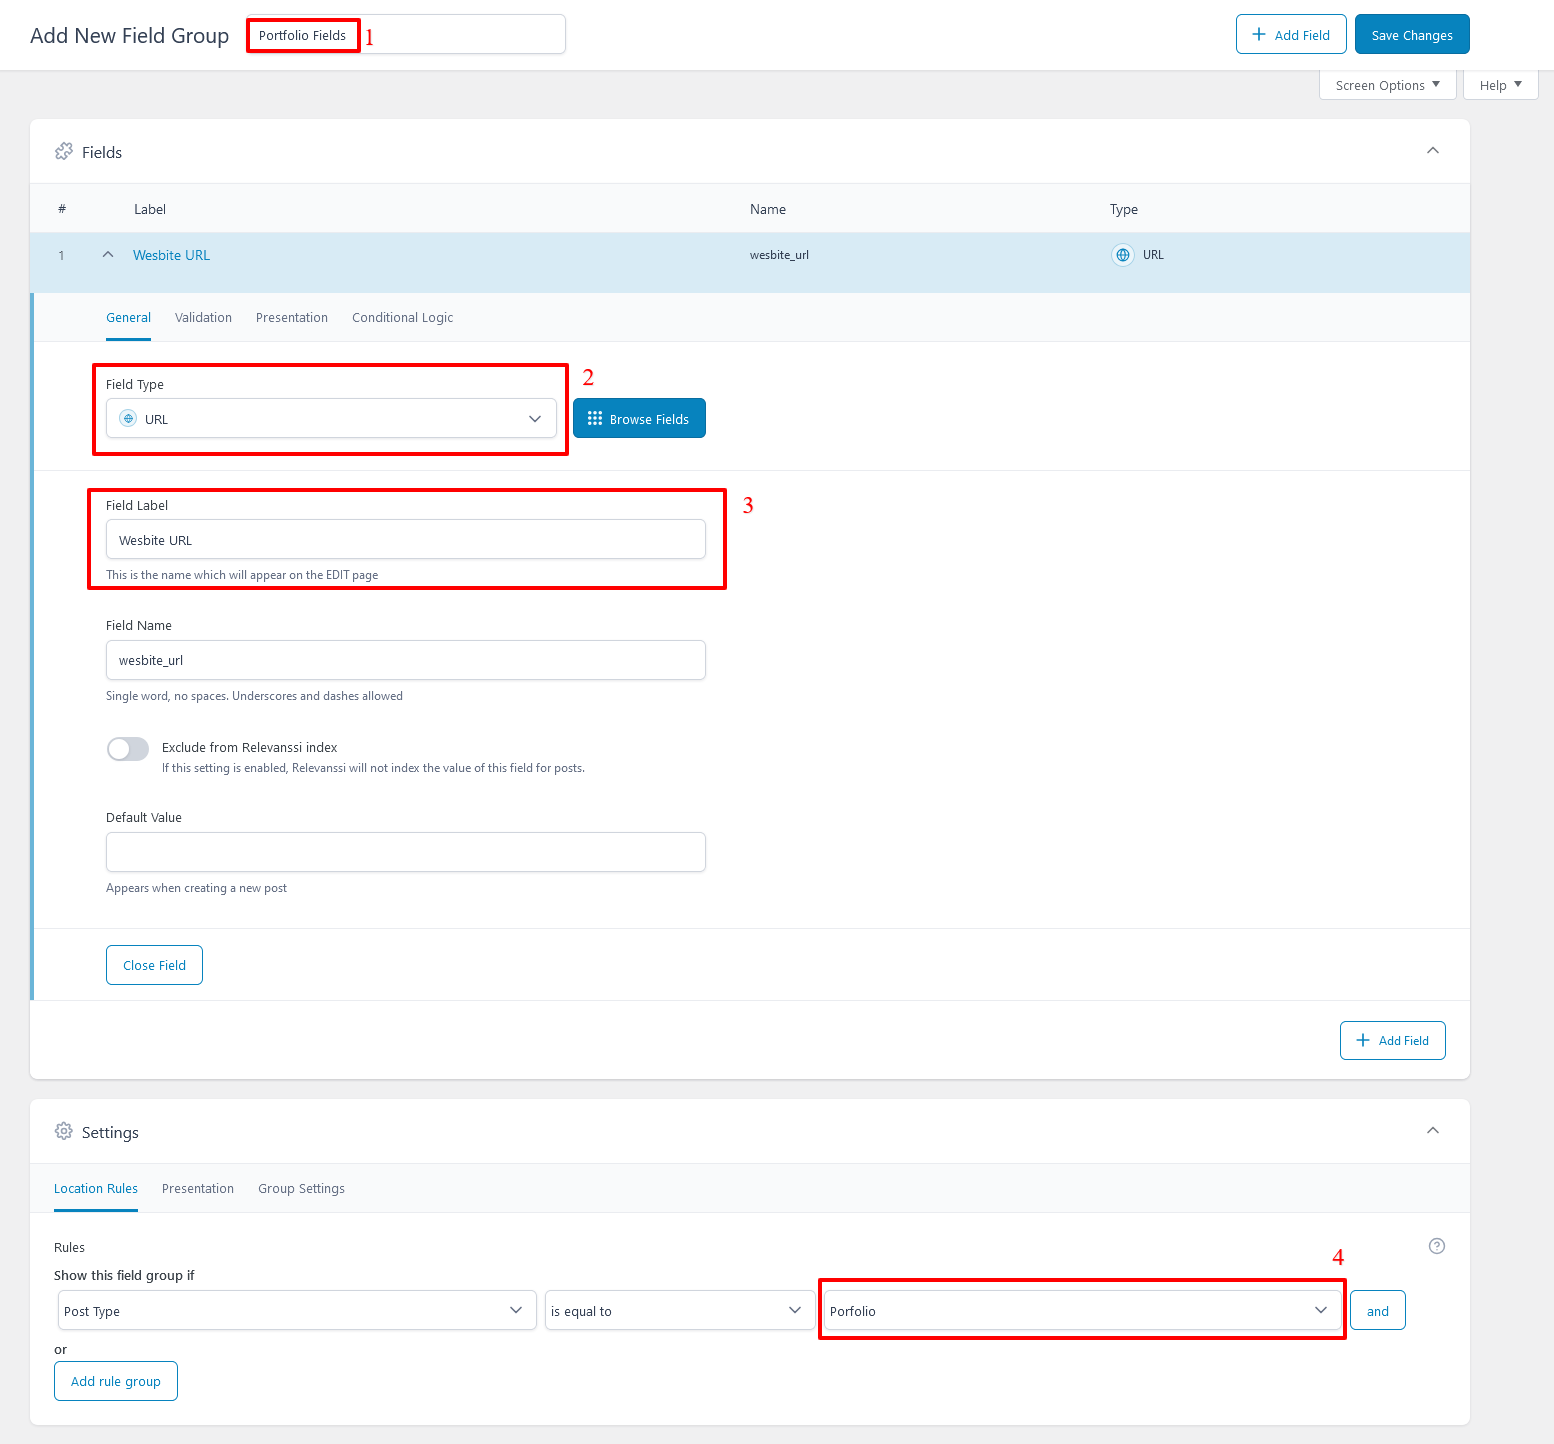
Enter the required information
- Field Group Name
- Select data type: I choose URL
- Name the data field
- Select Portfolio so that when creating a new Portfolio page, this Custom field Group will appear.
Then click Save Changes to save.
4. Create a new Portfolio
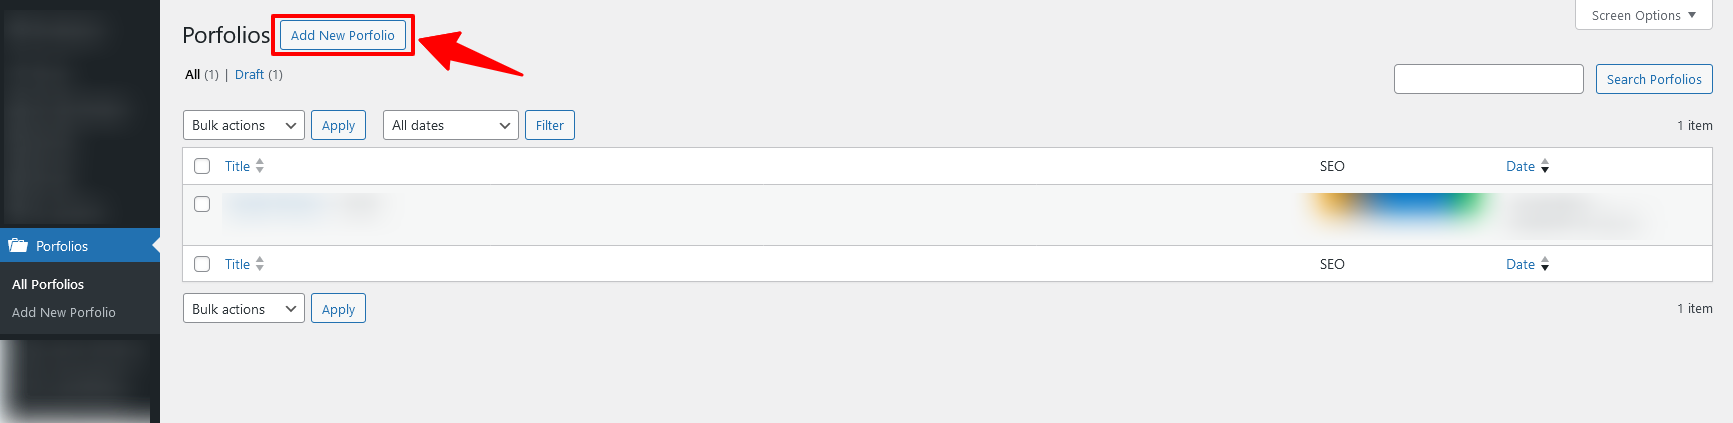
The left menu of WordPress now has a new item called Portfolios, click on the Add New Portfolio button to create a new one.
Below the Block Editor, there is now a new section called Portfolio Fields, which includes a custom field called Website URL.
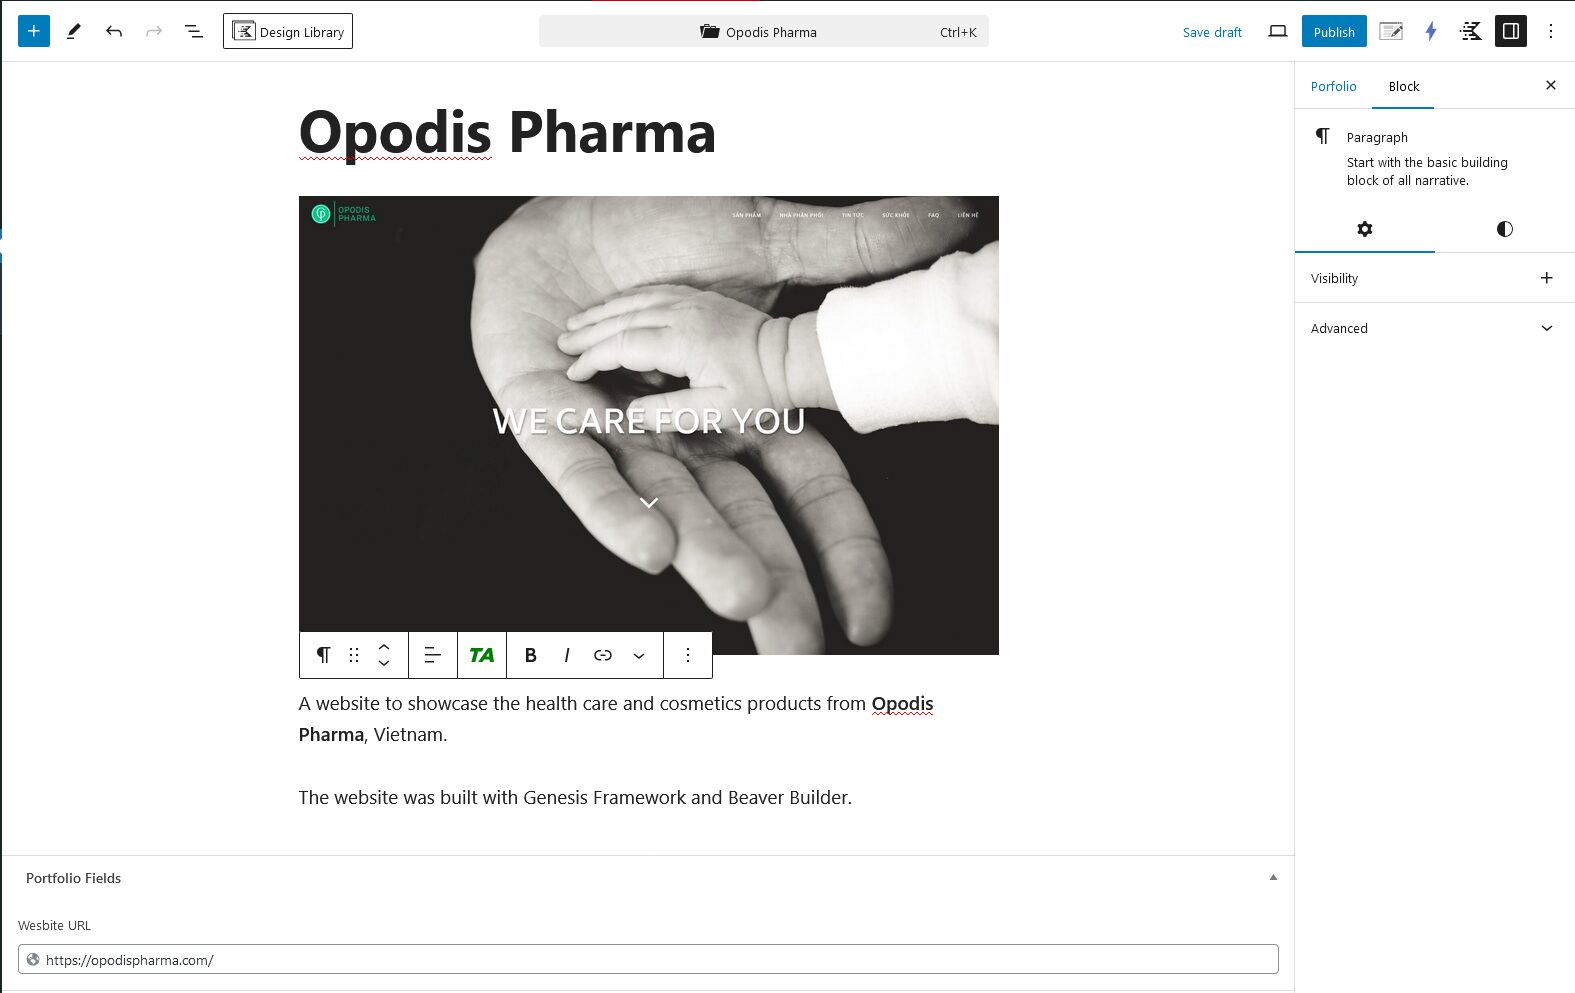
Enter content and click Publish to post the content of this Portfolio page to the Front end.
The newly created portfolio page is now visible on the front end. However, only the title and block editor content are currently displayed. The Website URL is a custom field and is not yet visible on the front end. It needs to be configured further.
II. Displaying custom fields using Kadence Hooked Elements
There are multiple ways to display Custom Fields on the front end of WordPress: using code snippets or using the block editor.
From 2014 to 2020, when I was still using Genesis Framework, I often wrote code to insert custom fields Content into articles through Genesis’ built-in action hook.
After WordPress adopted Block Editor, I switched to using Kadence theme instead of Genesis Framework. Working with custom post type / custom taxonomy and custom field has become much easier thanks to Hooked Elements feature of Kadence Pro and Dynamic Content of Kadence Blocks Pro plugin.
Kadence Pro and Kadence Blocks Pro are paid plugins that extend the features of the two products Kadence theme and Kadence Blocks. Price: $149 / year.
Below is a guide on how to display Custom Field on the front end using the Hooked Elements feature of Kadence theme.
1. Preparation requirements
If you only use the free Kadence theme and free Kadence Blocks, the features shared below will not be applicable.
- WordPress site using Kadence theme, plus Kadence Pro upgrade (starting at $149/year).
- Install Kadence Blocks plugin(free) and Kadence Blocks Pro .
2. Enable Hooked Elements
Go to the Kadence menu under Appearance and enable the Hook Elements feature.

3. Create Hooked Element
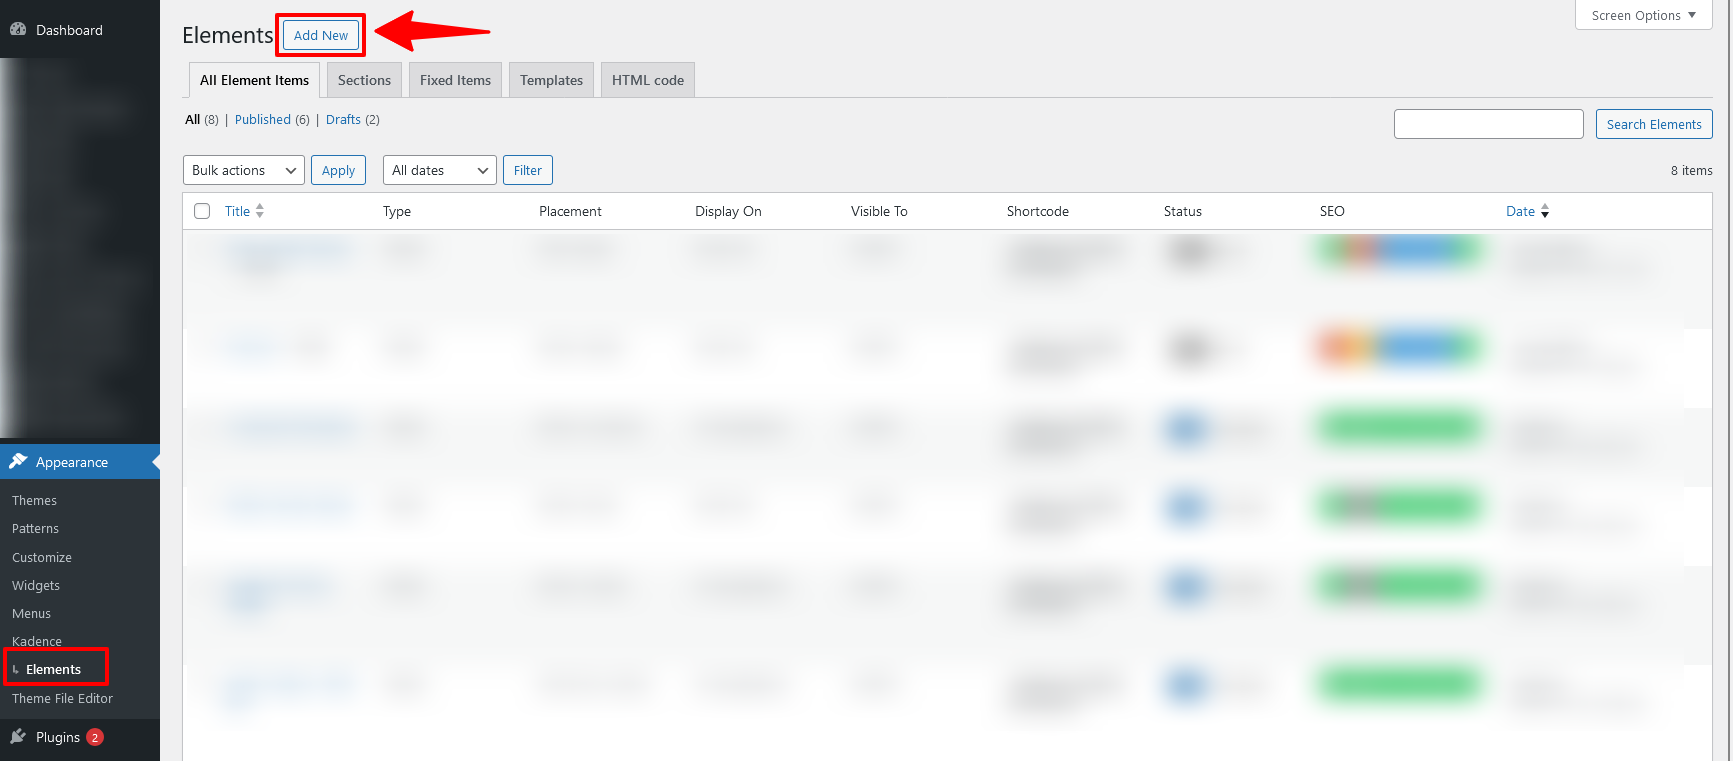
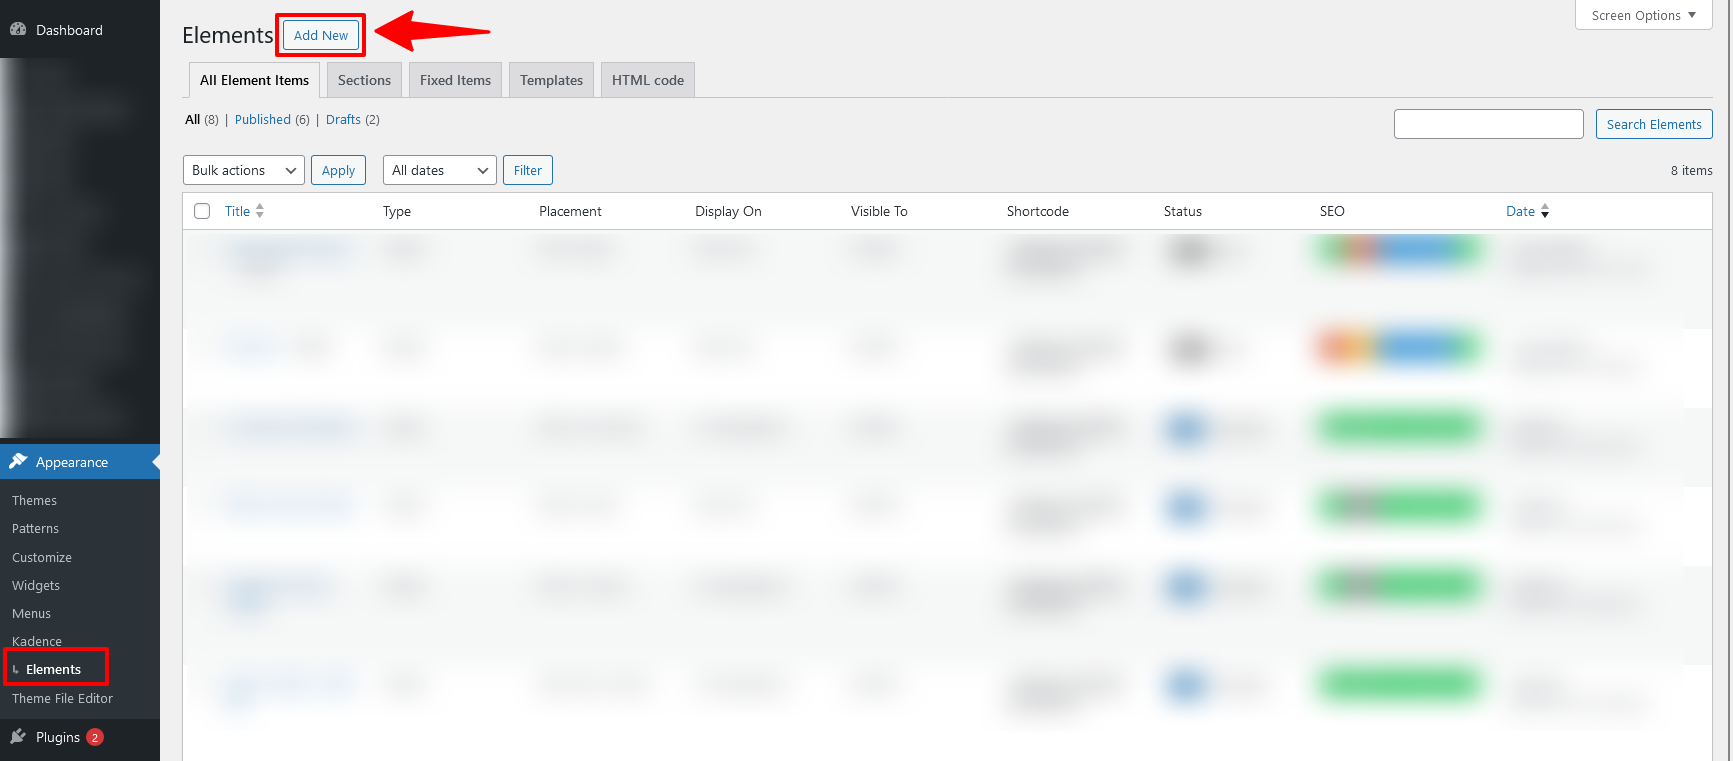
Go to Elements, click Add New to create a new one.
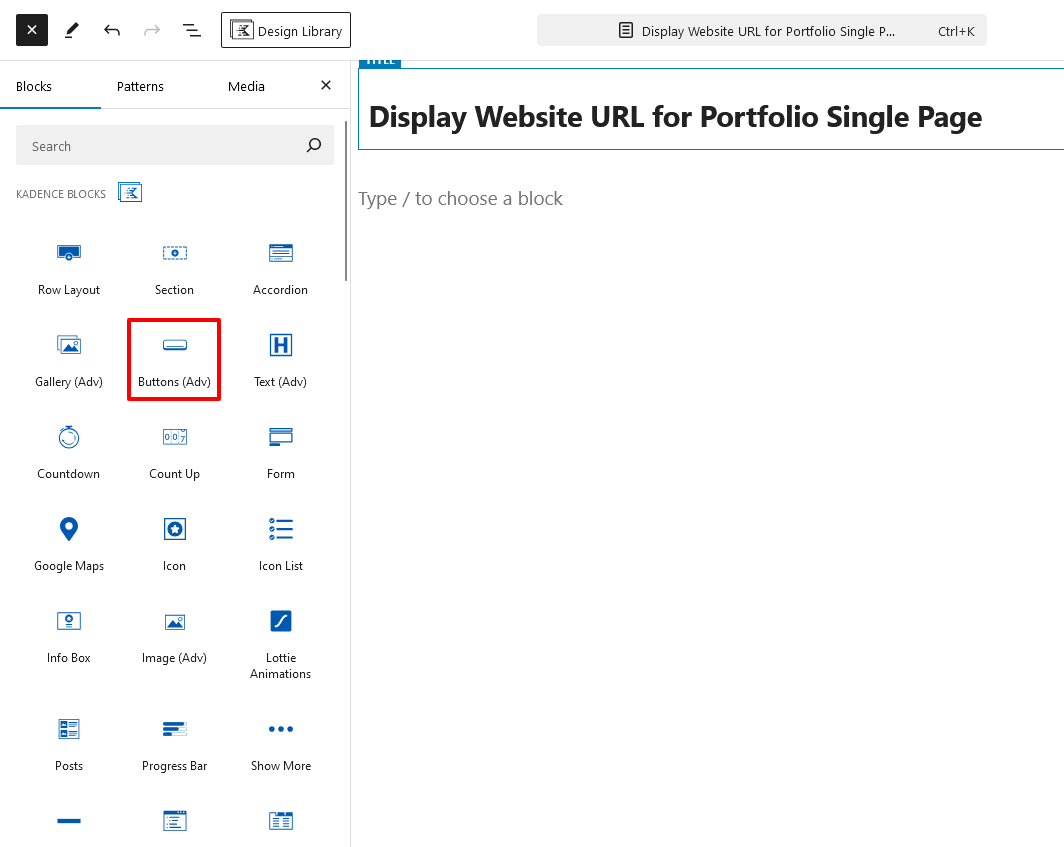
Select Content Section

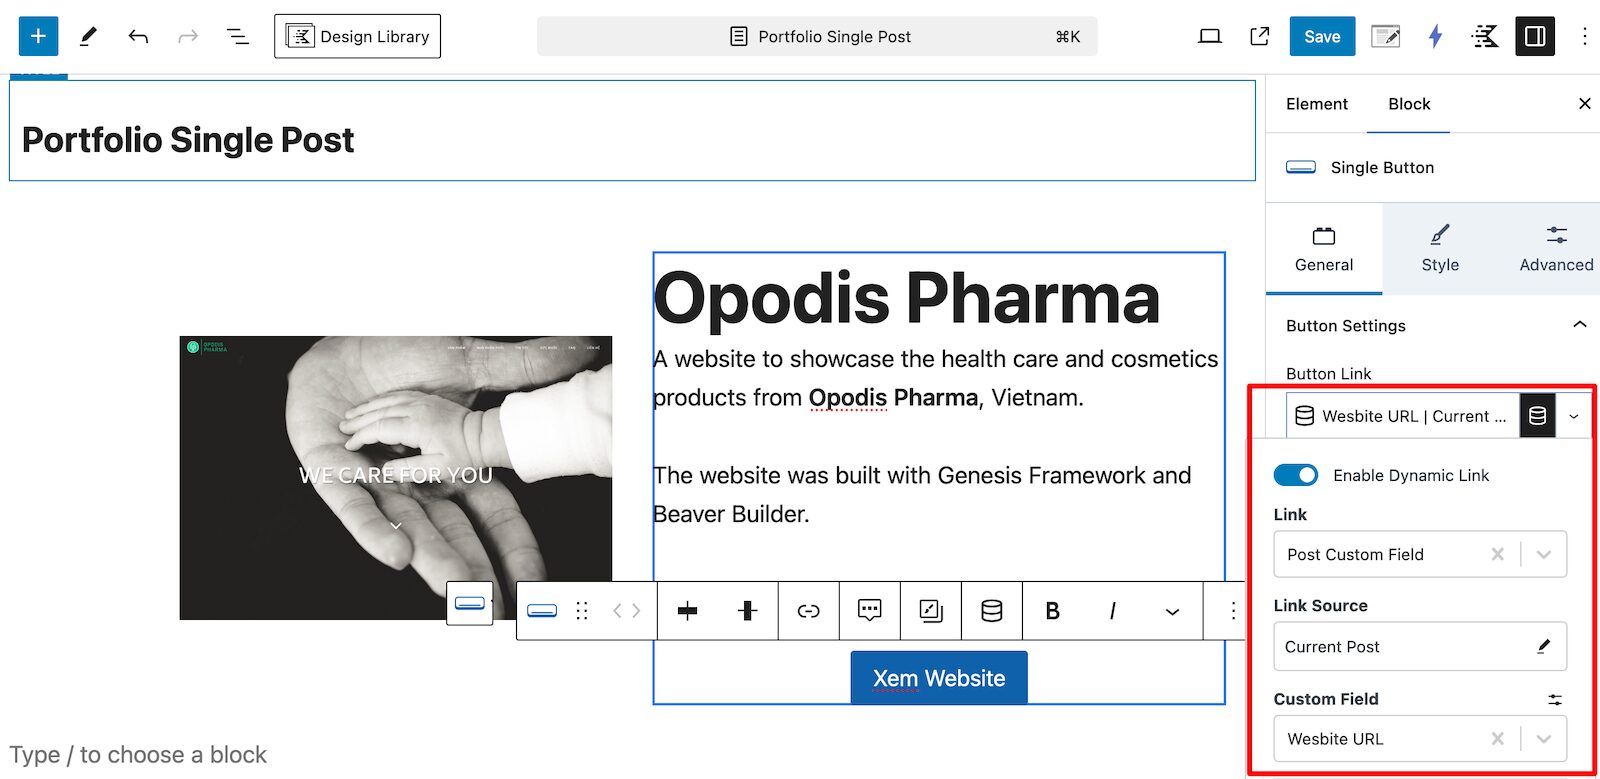
I want to display a button with the URL as the content of the custom field Website URL that was set up earlier. Insert the Button (Adv) block into the article
Next, select the button you just created, click the create link button in the menu bar.
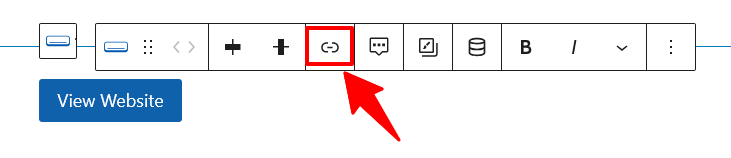
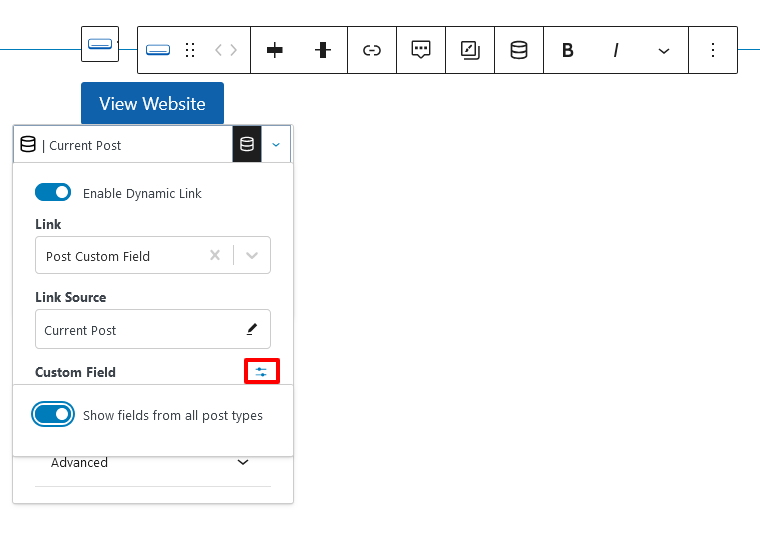
- Click on the cylinder icon and enable the Enable Dynamic Link feature.
- Link: select Post Custom Field
- Link Source: Current Post
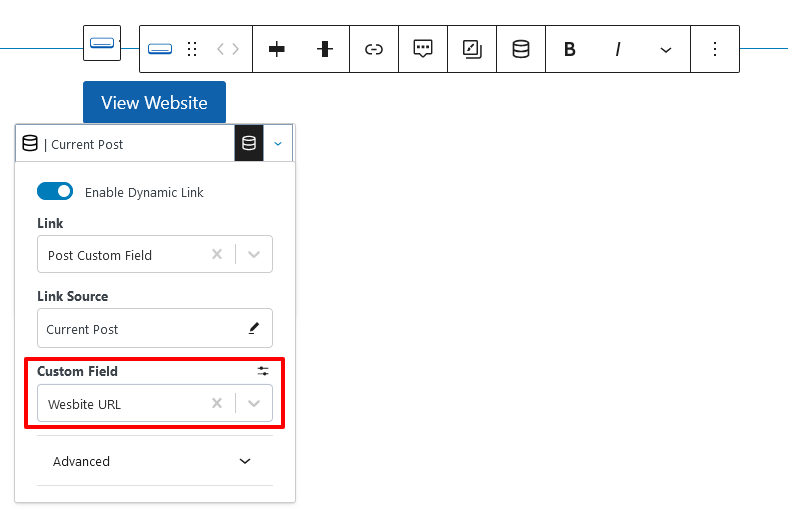
- Custom Field: click on the configuration button and enable Show fields from all post types
In the Custom Field section, the names of the Custom Fields created by the Advance Custom Fields plugin will now appear. Select Website URL
4. Hooked Element Display Configuration
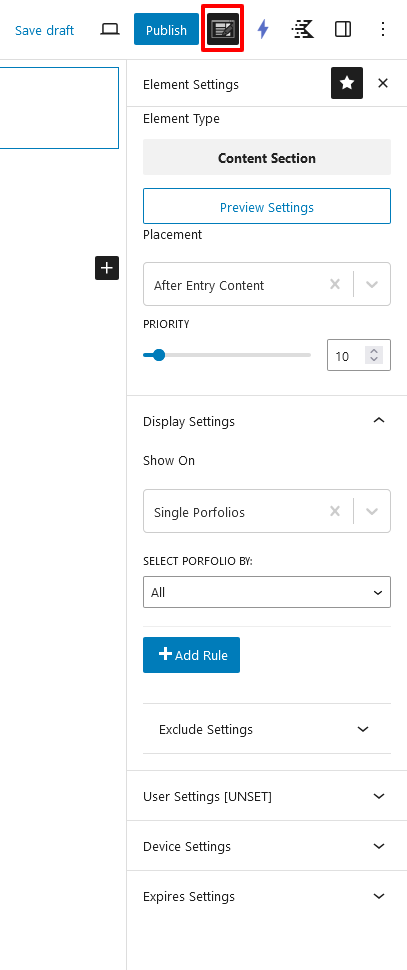
Click the Element Settings icon next to the Publish button to display the configuration for Hook Elements.
- Placement: select After Entry Content (displayed below the article content)
- Priority: 10 (default)
- Display Settings: Select Single Portfolios in the Show On section.
With this configuration, the content of the newly created Hooked Element will only be displayed on the page displaying the details of each Portfolio item, and it will be located below the content of the article.
Click Publish to finish.
5. Complete
Go back and check the Portfolio page you created earlier. Below the article content, there is now a new button with a link to the Website URL that was declared when creating the content.
III. Create Single Template for Custom Post Type
In case you want to design the interface for the custom post type completely different from the default interface of the post / page, you need to create a new single template for the custom post type.
The common way to create a single template before was to create an additional file single-tên_post_type.php in the folder of the theme you are using, for example single-portfolio.phpthen write code in this file to customize the interface.
Now, I can create a single template for a custom post type visually from the WordPress Dashboard via the Hooked Elements feature of Kadence Pro. You can refer to the instructions below.
1. Preparation requirements
- WordPress site using Kadence theme, plus Kadence Pro upgrade (starting at $149/year).
- Install Kadence Blocks plugin(free) and Kadence Blocks Pro.
2. Create Template Element
Create New Hooked Element
Select TEMPLATE
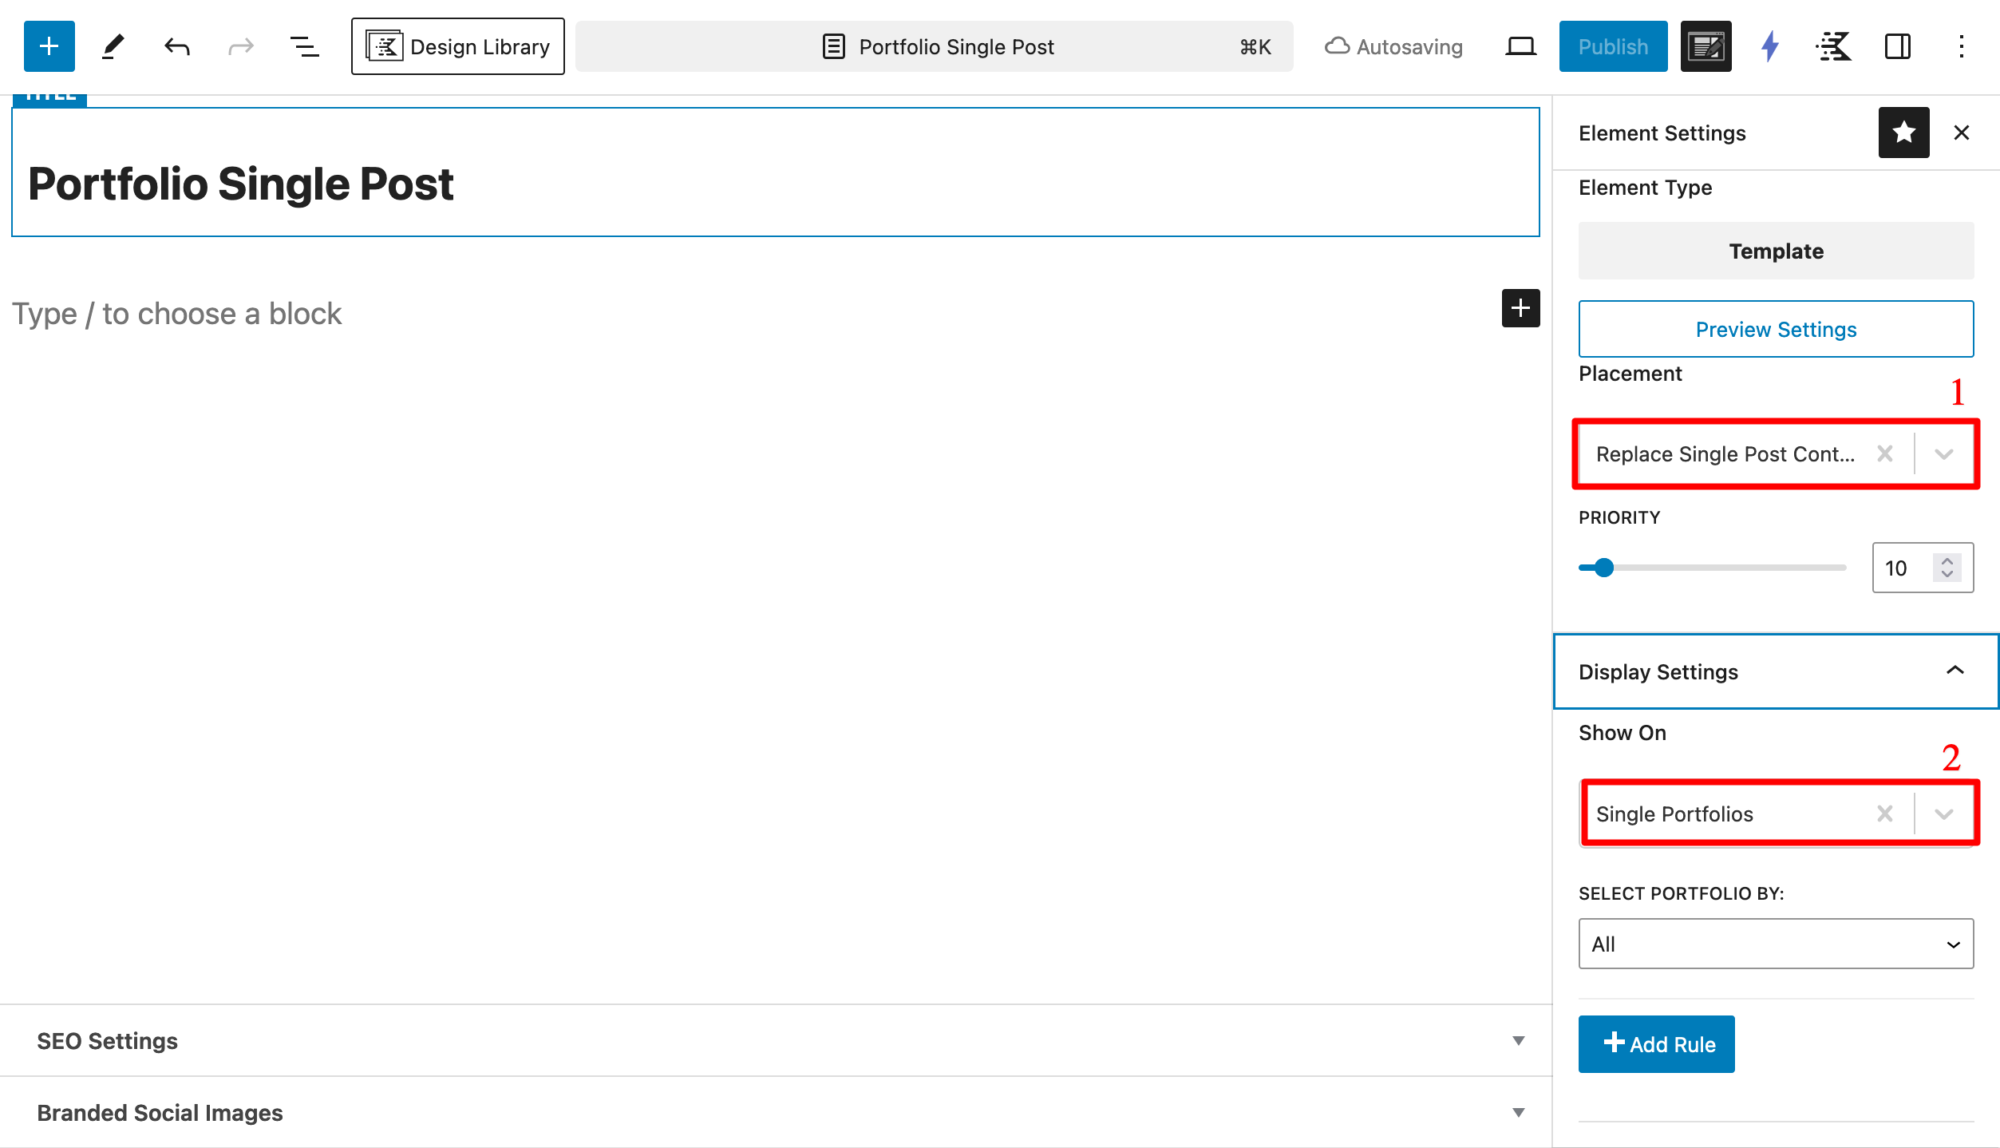
Click the Element Settings icon next to the Publish button to display the configuration for Hook Elements.
- Select Relace Single Post Content
- Select Single Portfolios
3. Interface design
First, I create 1 Row with 2 Columns.
a. Featured Image
On the left, add the Image (Adv) block.
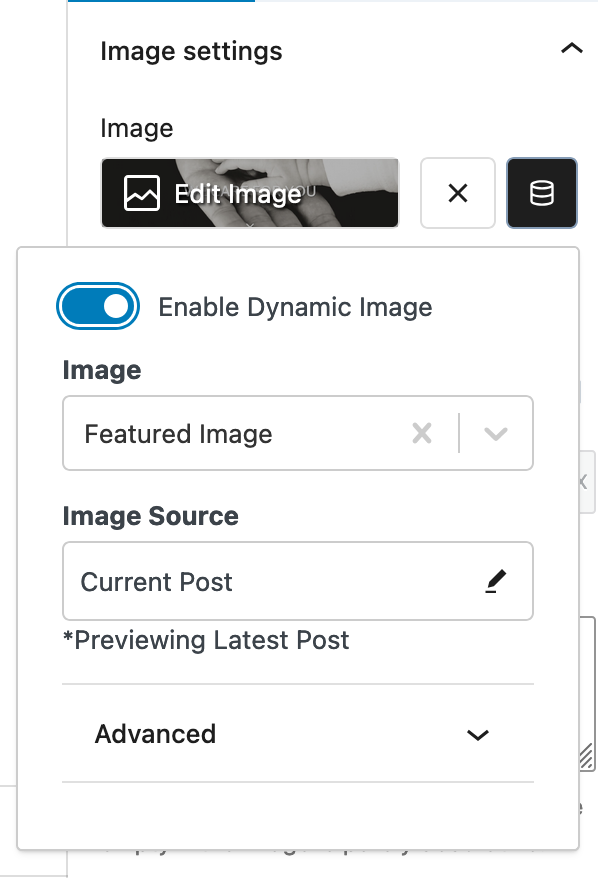
Click on icon number 1, then enable Enable Dynamic Image feature
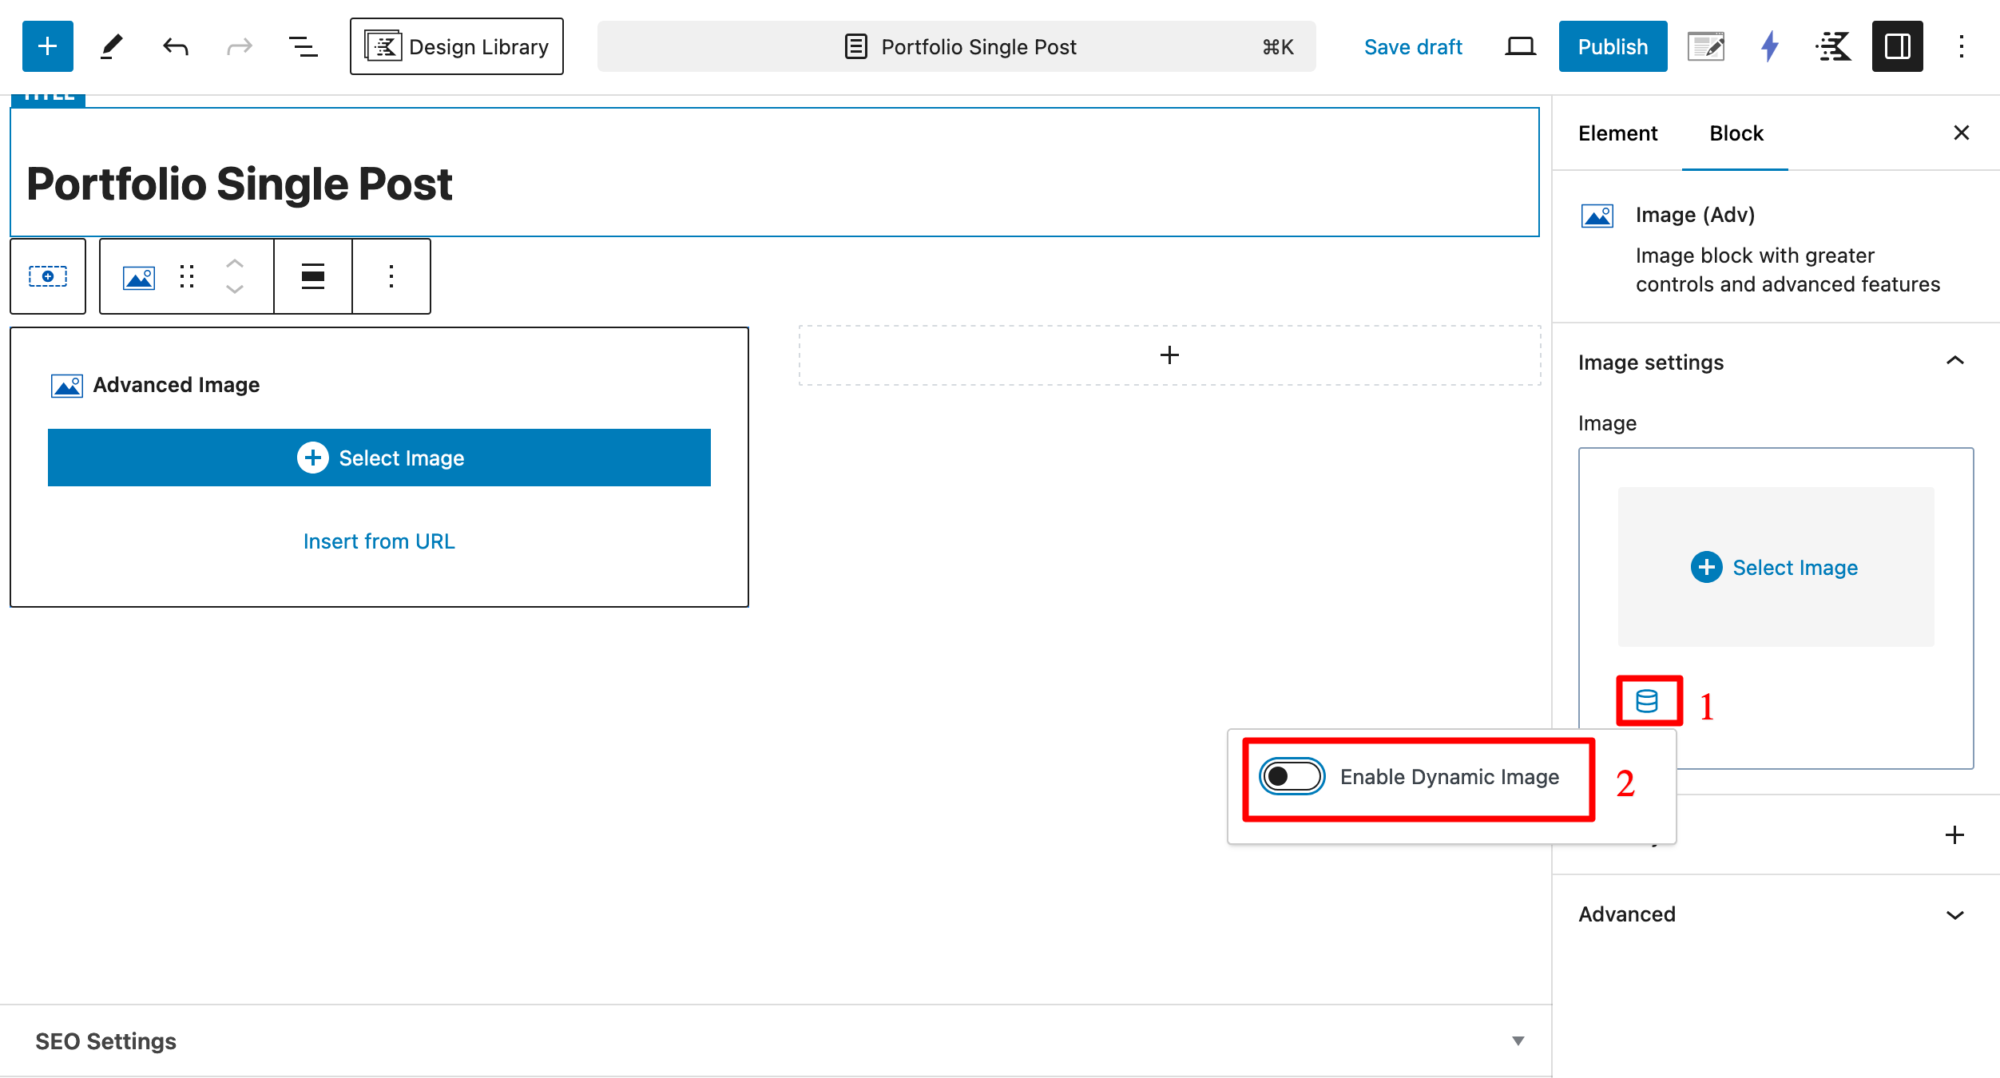
Then select Featured Image under Image, and Current Post under Image Source.
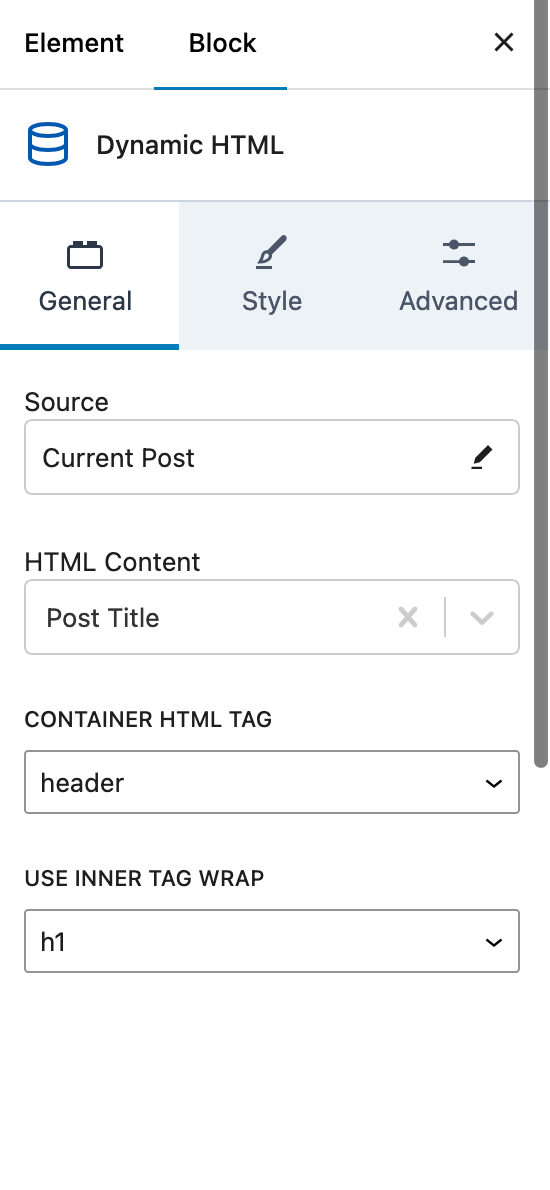
b. Article title
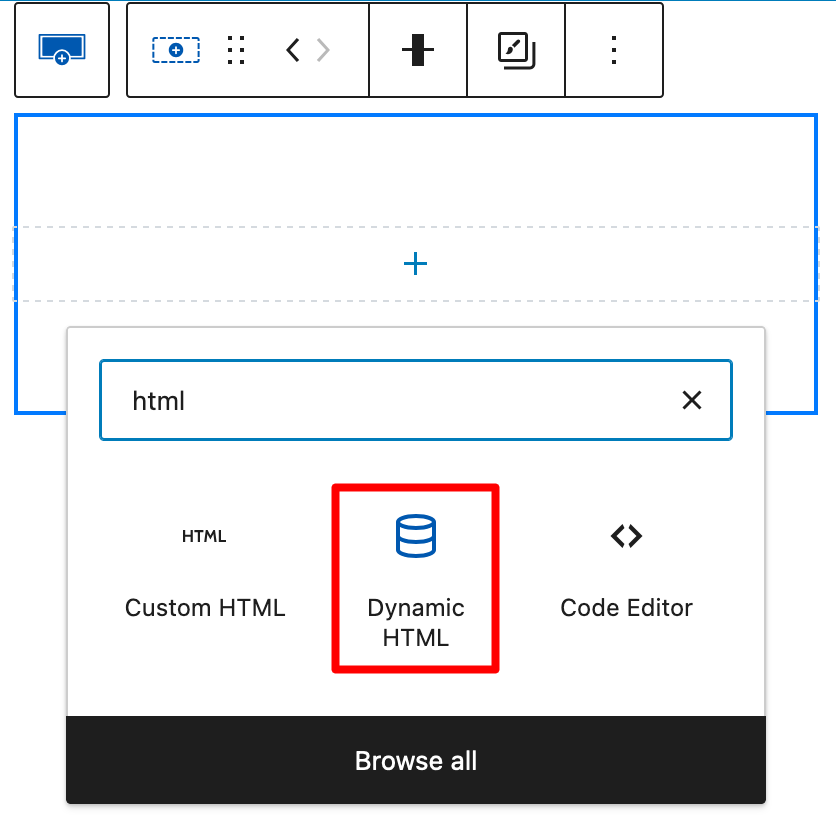
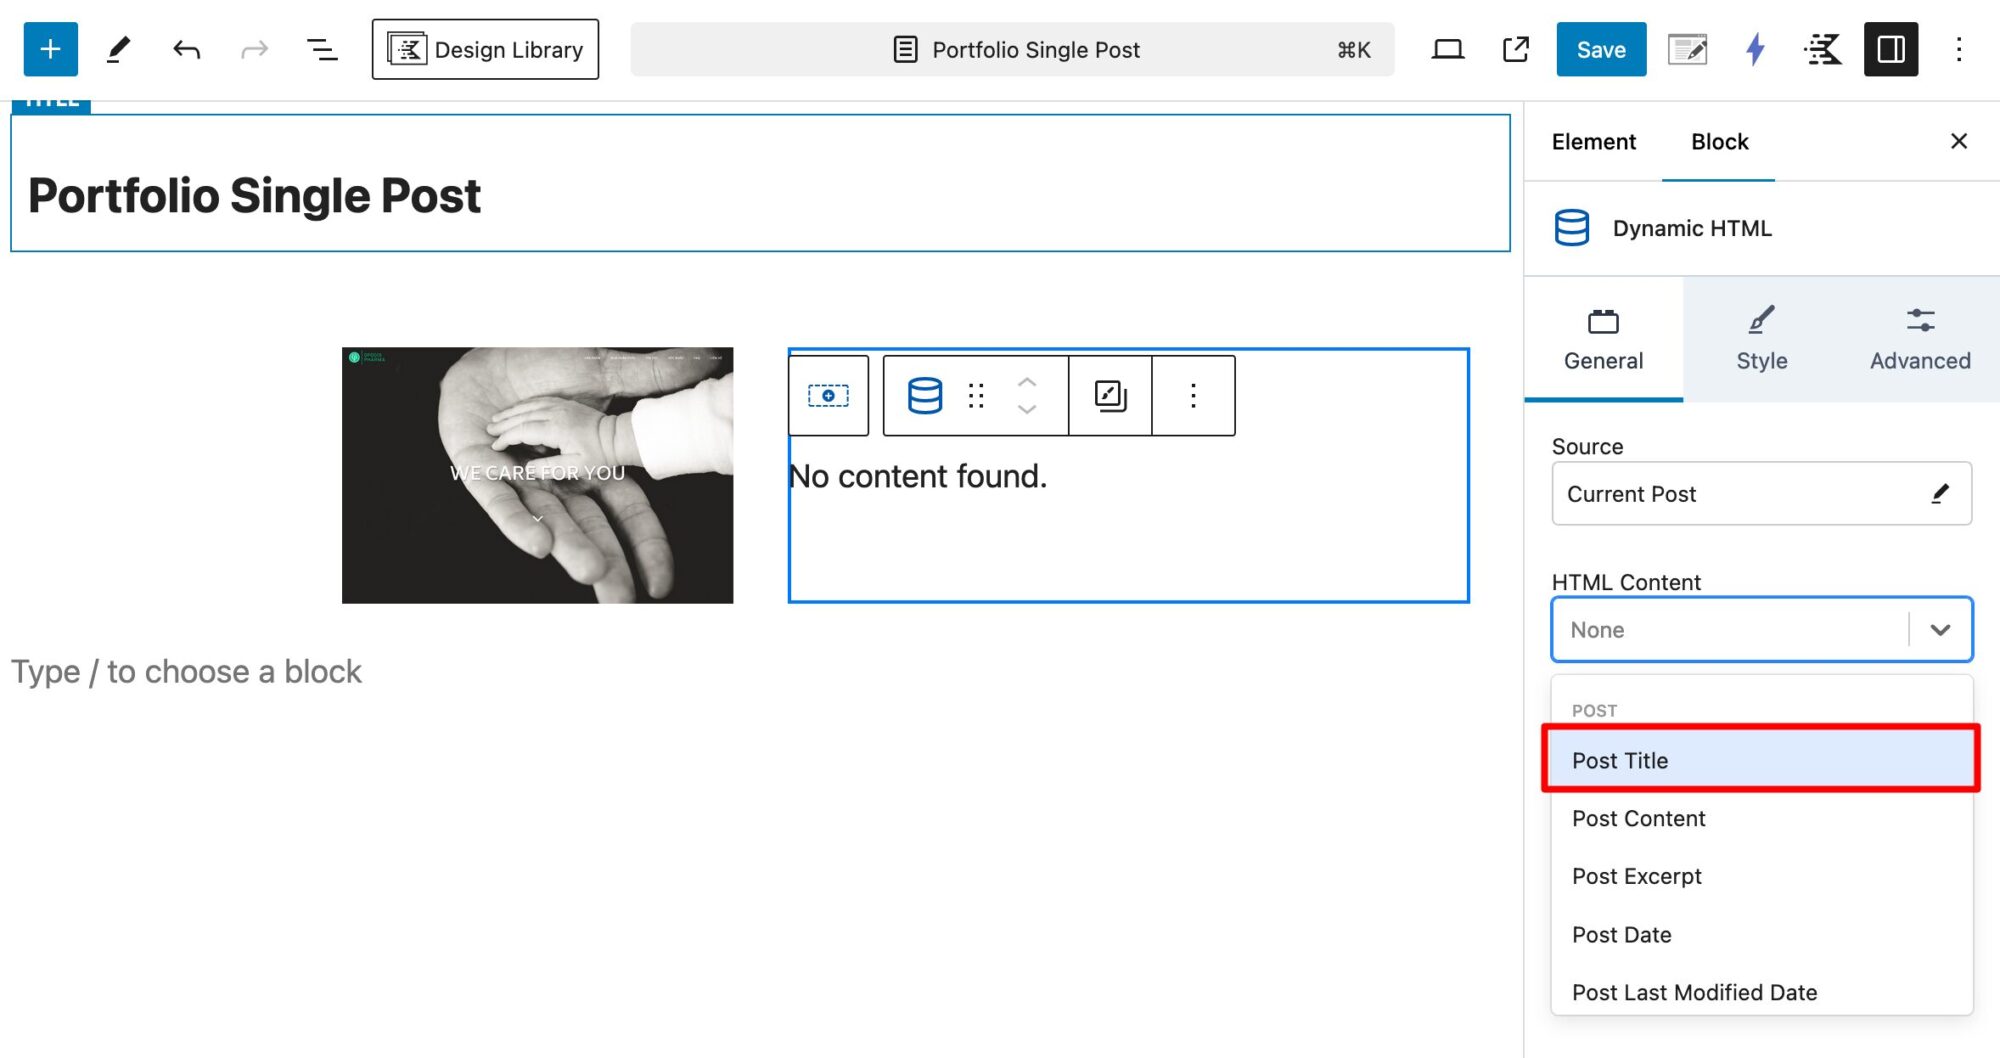
In the right column, I added a Dynamic HTML block.
In the Dynamic HTML block configuration section, select Post Title in the POST section.
Additional configuration:
- Container HTML Tag: header
- Use Inner Tag Wrap: h1
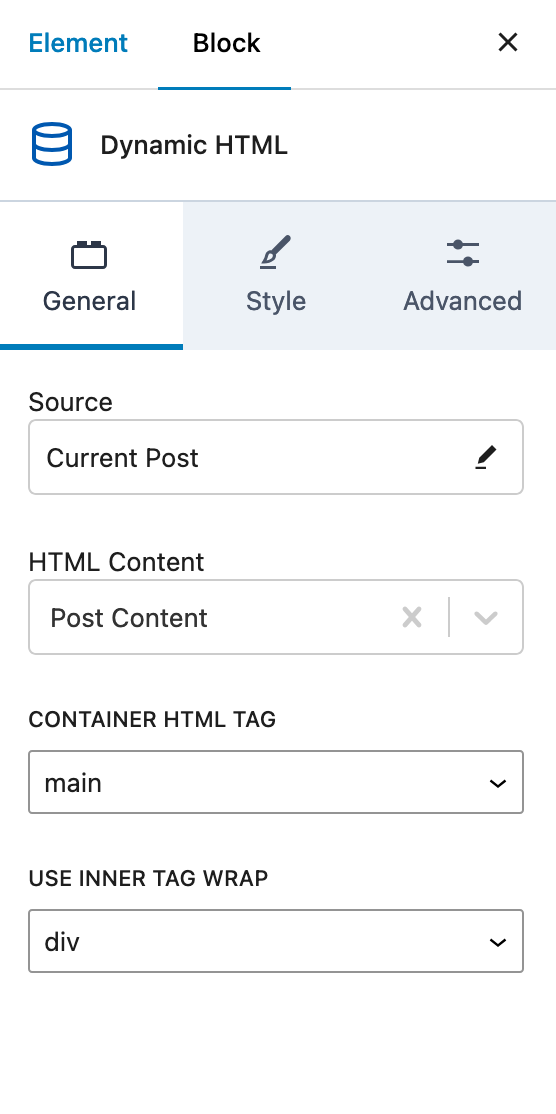
c. Article content
Add the same Dynamic HTML block as above, but this time choose different parameters
- HTML Content: Post Content
- Container HTML Tag: main
- Use Inner Tag Wrap: div
d. Button
Add a button to link to the custom field Wesbite URL. Operations are shared in article part II.Create custom post type and custom field.
Click Save to save the Template.
4. Complete
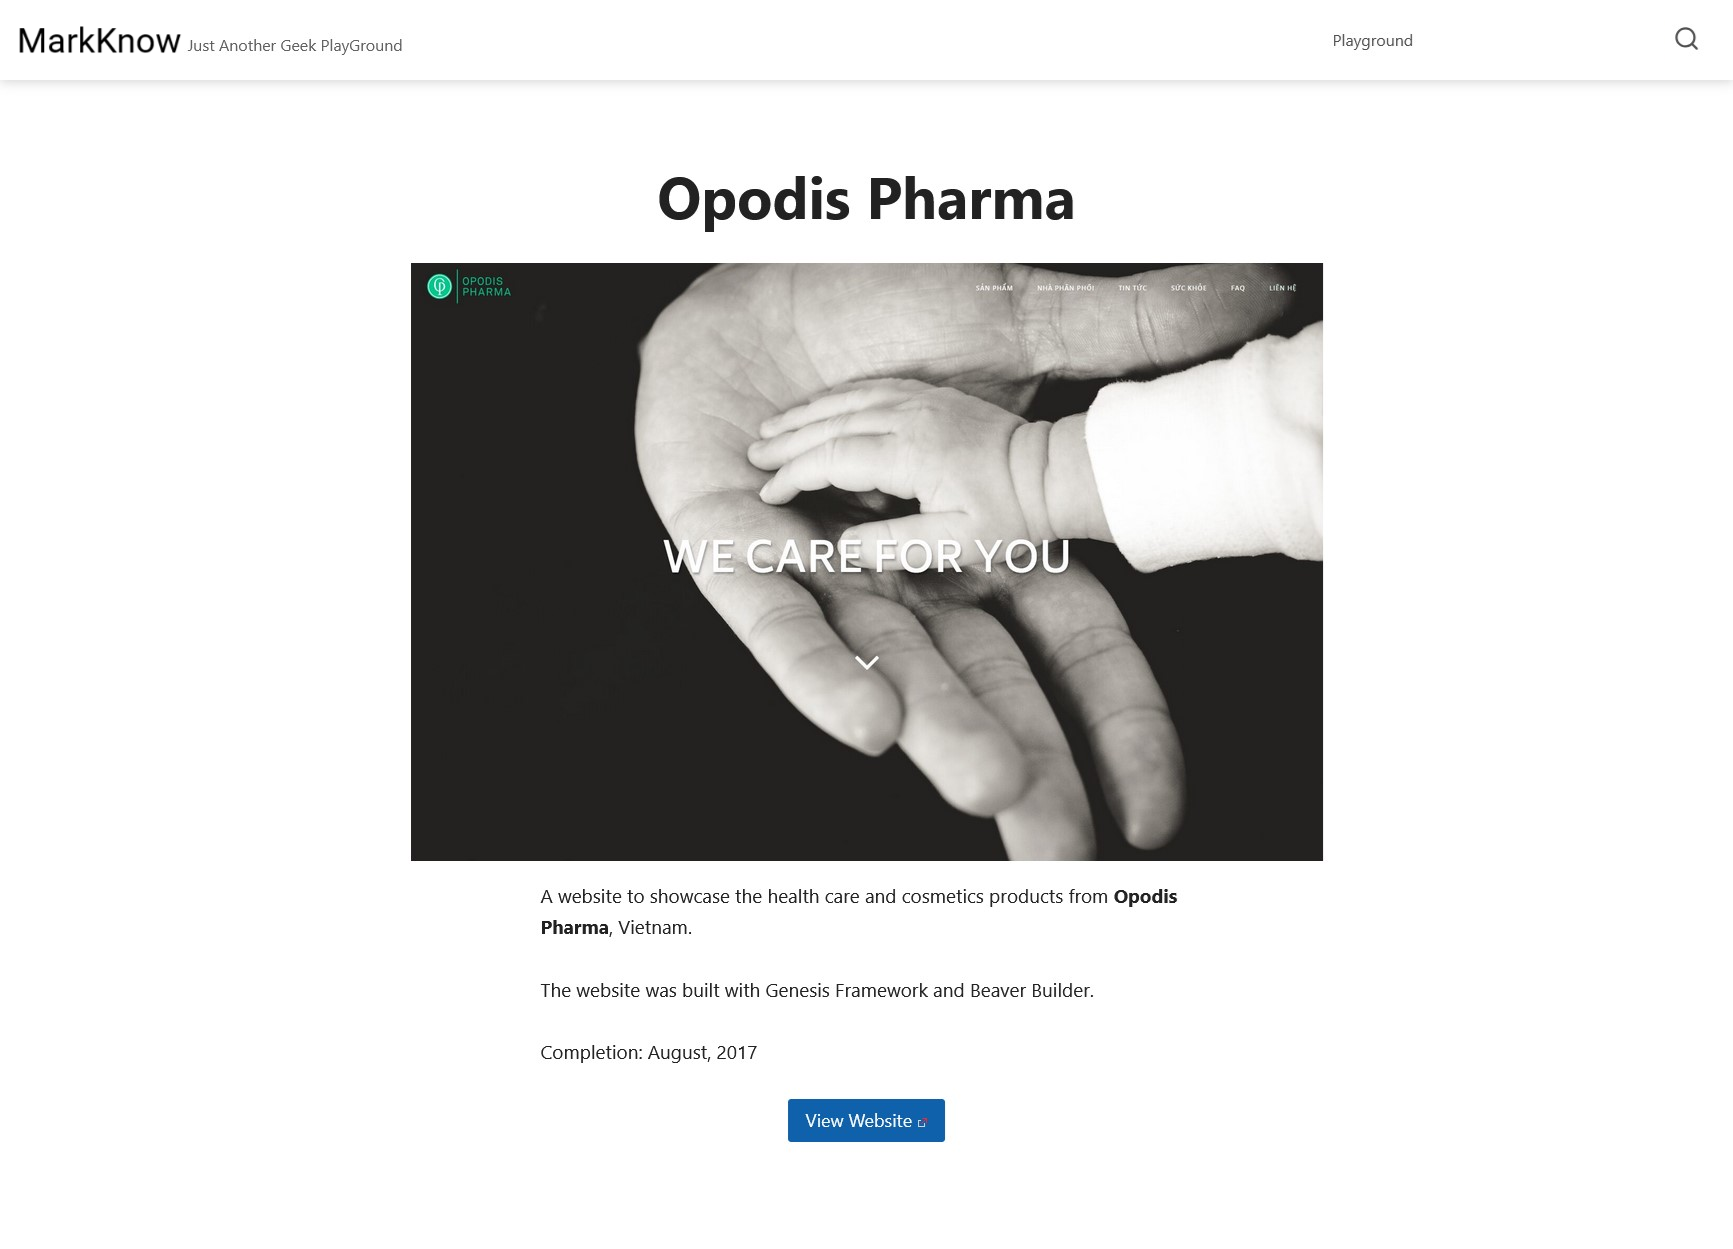
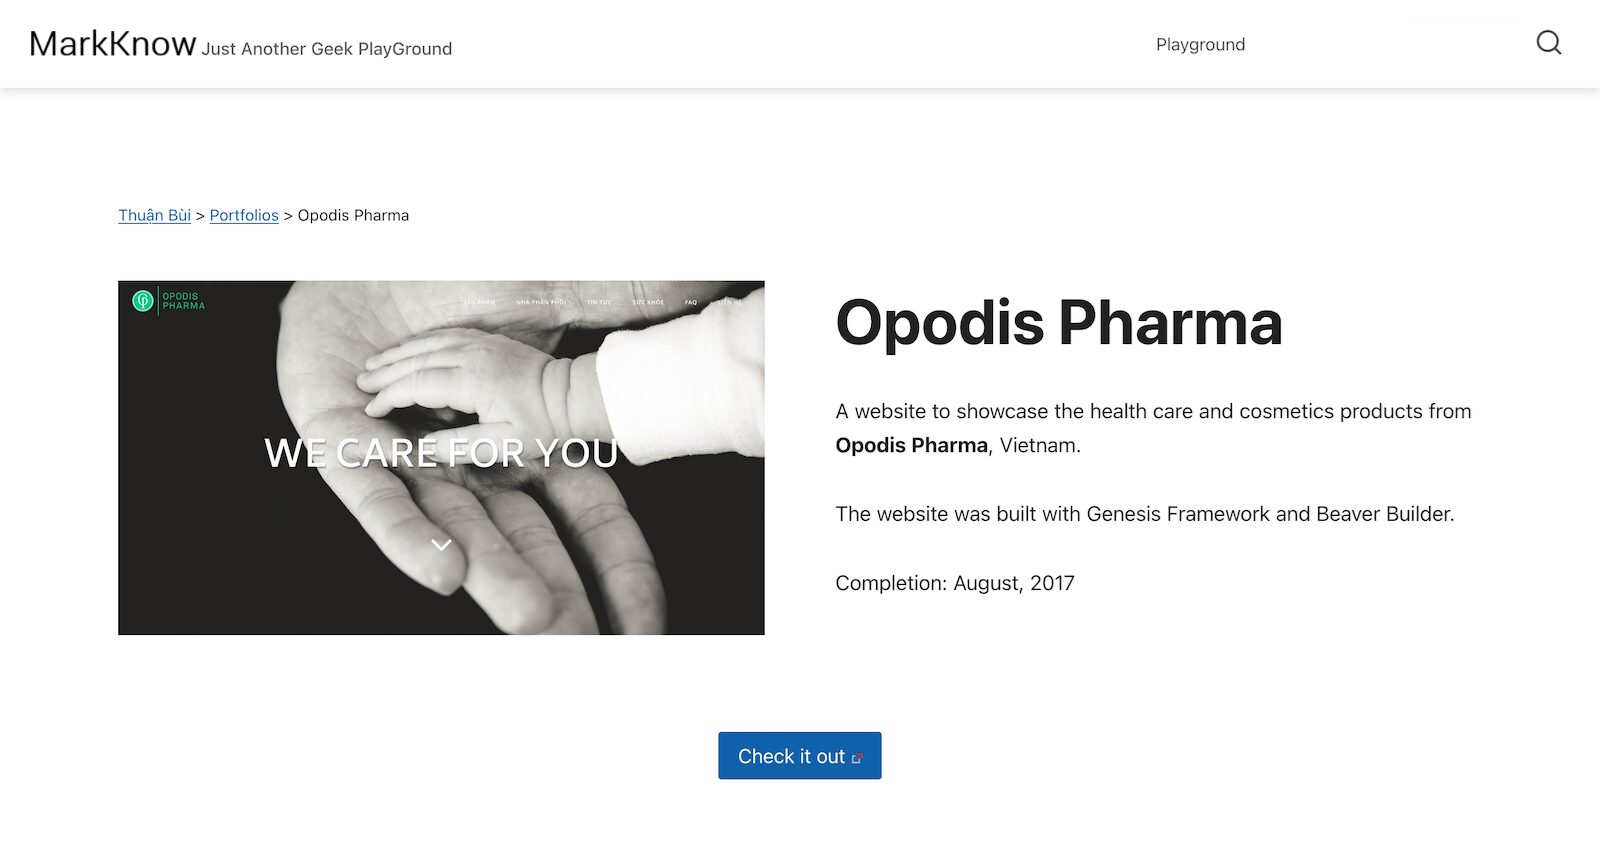
This is what the Portfolio page looked like before creating the Single Template.
After creating a separate Single Template, the Portfolio page is now updated with a 2-column layout as shown below.
If my article provides useful information and knowledge to you, don’t hesitate to invite me for a beer to have more motivation to share more. Thank you!
Comment Policy: We truly value your comments and appreciate the time you take to share your thoughts and feedback with us.

Note: Comments that are identified as spam or purely promotional will be removed.

To enhance your commenting experience, consider creating a Gravatar account. By adding an avatar and using the same e-mail here, your comments will feature a unique and recognizable avatar, making it easier for other members to identify you.

Please use a valid e-mail address so you can receive notifications when your comments receive replies.