Previously, I shared an article instructing how to set up USB Pass-through for virtual machines on the XCP-ng platform . This time, it will be similar instructions, as applied to virtual machines on the Proxmox platform.
What is USB Passthrough?
In the virtualization world, USB Passthrough is a hypervisor feature that allows virtual machines to directly access USB devices plugged into the USB port of a bare metal host (physical server).
For example, you plug two USB hard drives named USB-1 (32GB) and USB-2 (16GB) into two USB ports on the host. With the USB Passthrough setting, you can allow the AAA virtual machine to access USB-1 directly while the BBB virtual machine accesses USB-2, or vice versa.
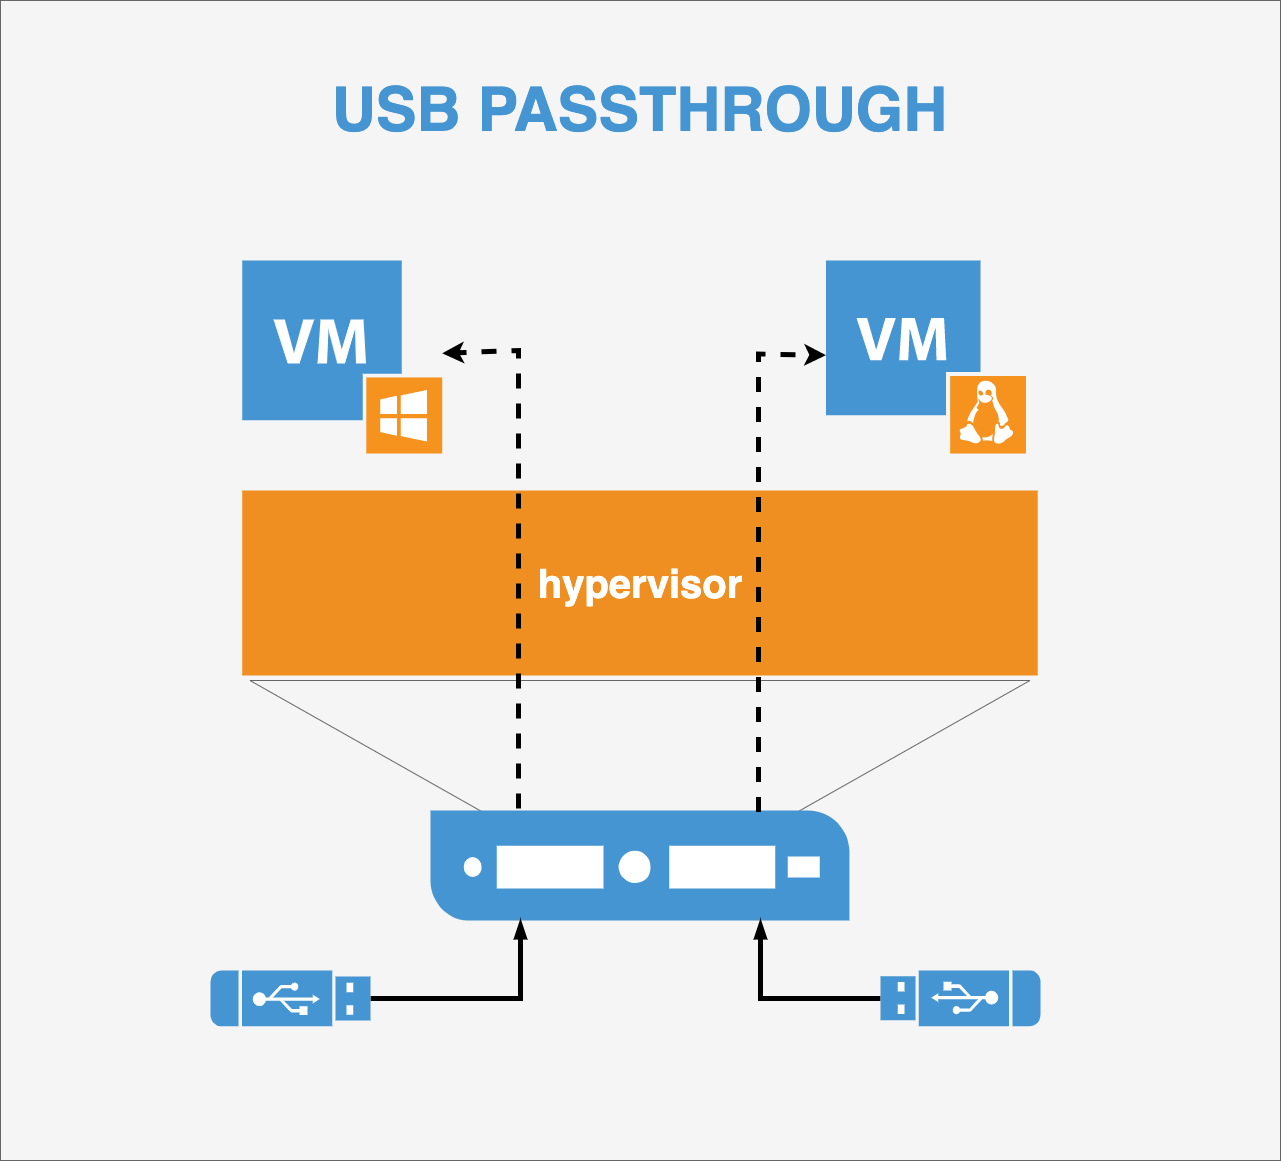
Here is a guide on how to set up USB Passthrough for KVM virtual machines on Proxmox.
Set up USB Passthrough for KVM virtual machine
Compared to XCP-ng, setting up USB Passthrough on Proxmox is much simpler. Everything can be done through the Web UI interface , no need to type any command lines.
Before setting up USB Passthrough, you need to Shutdown the virtual machine. You can still set up while the virtual machine is running, but you must then Shutdown and then turn it back on.
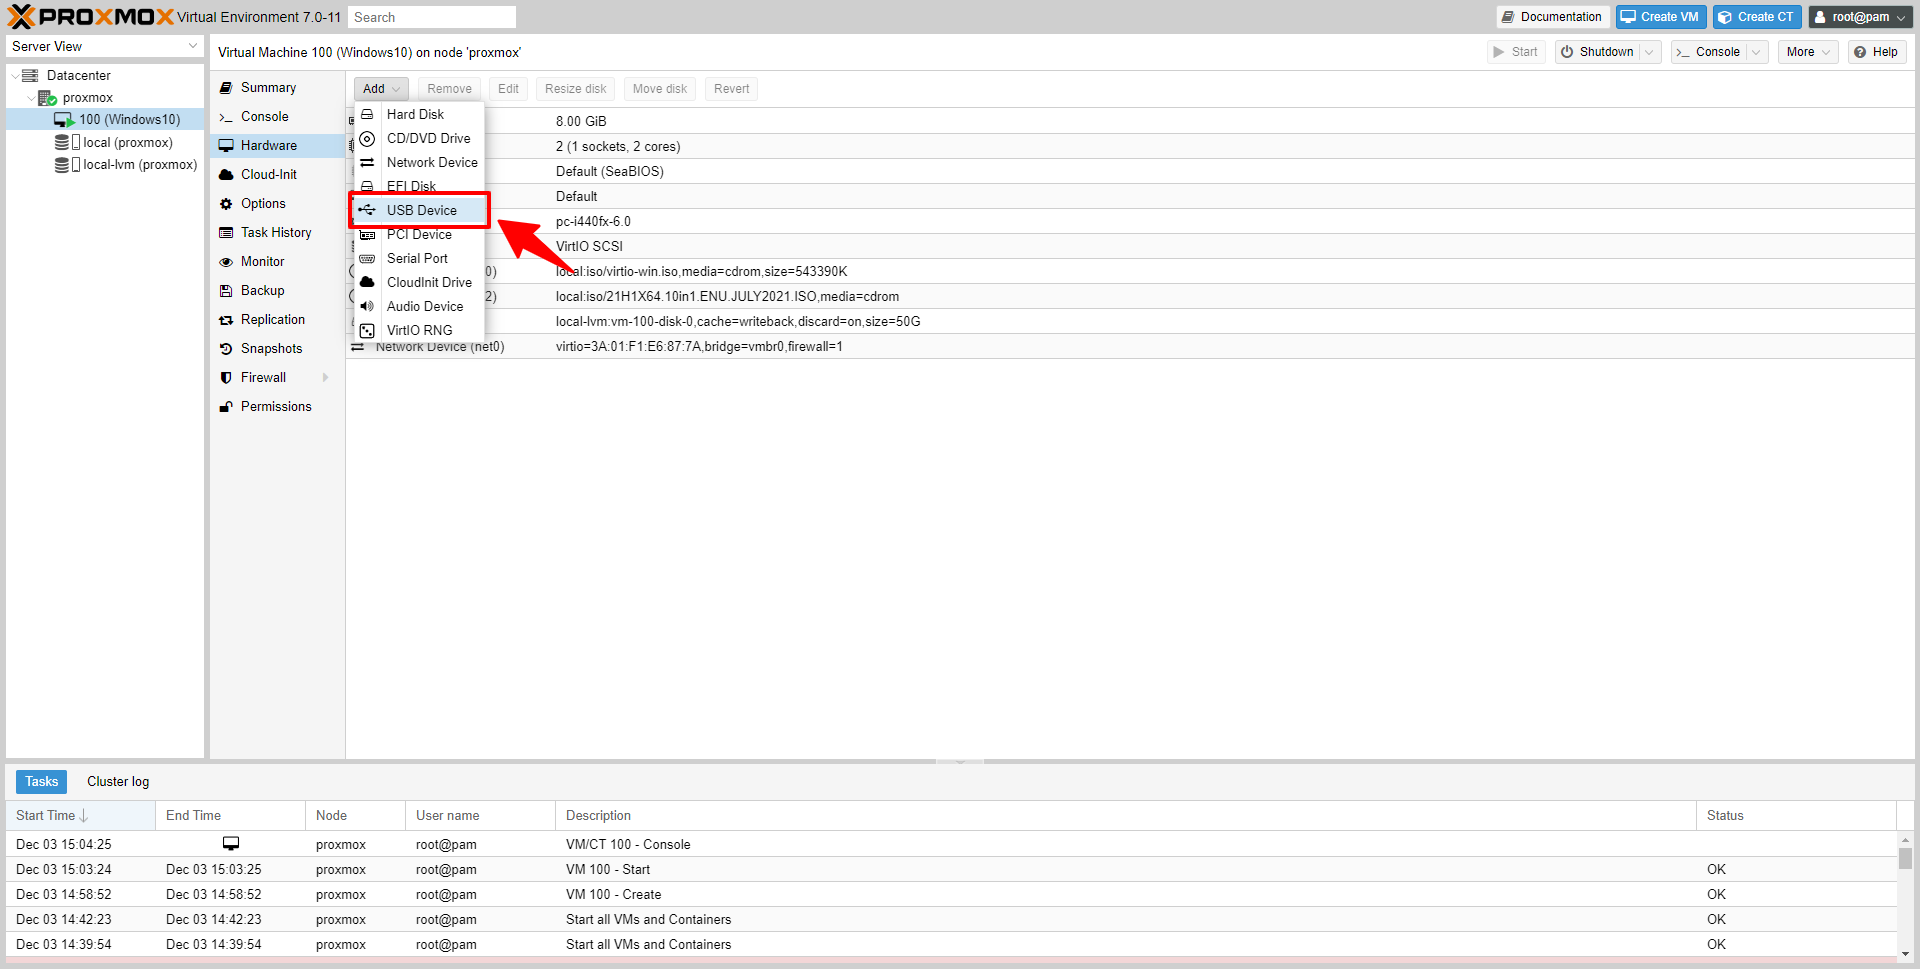
Plug the USB into the USB port on the computer. Then access Proxmox, go to Hardware, select Add –> USB Device
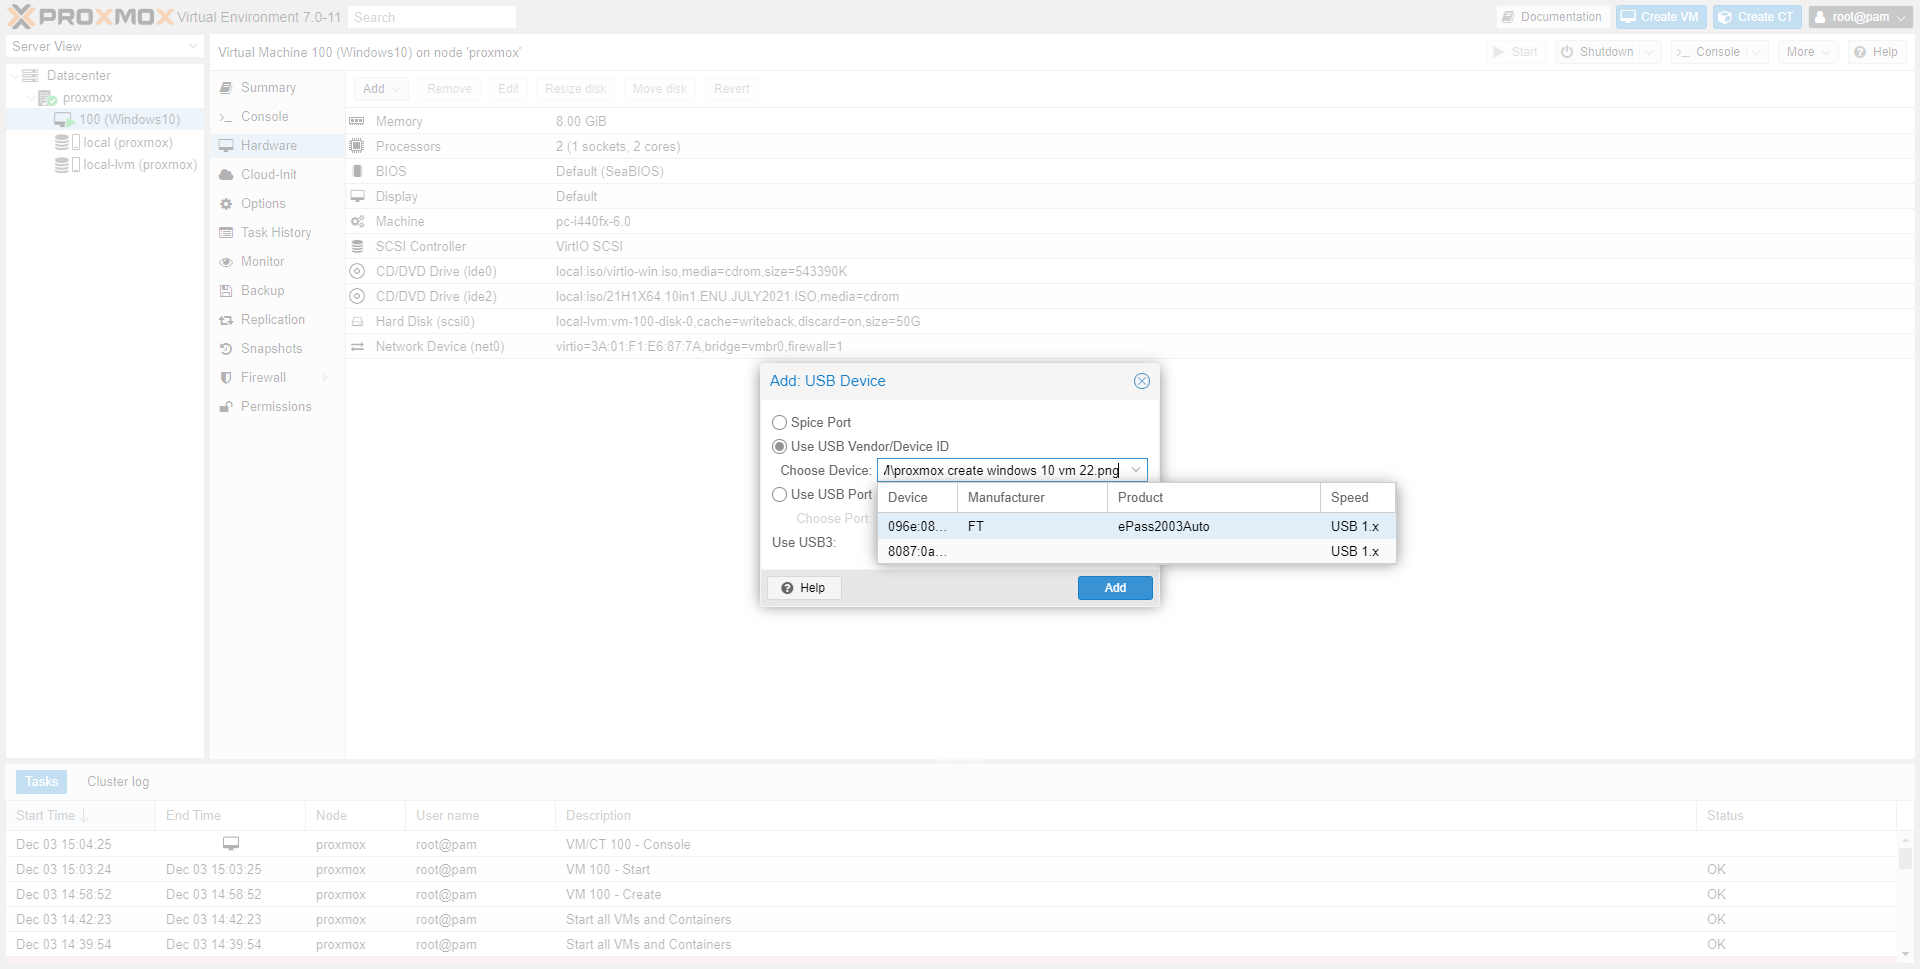
In the Use USB Vendor/Device ID section, select the USB device you want to connect to the virtual machine. Then click Add
The USB Device after being added to the virtual machine will appear in the hardware list under Hardware.
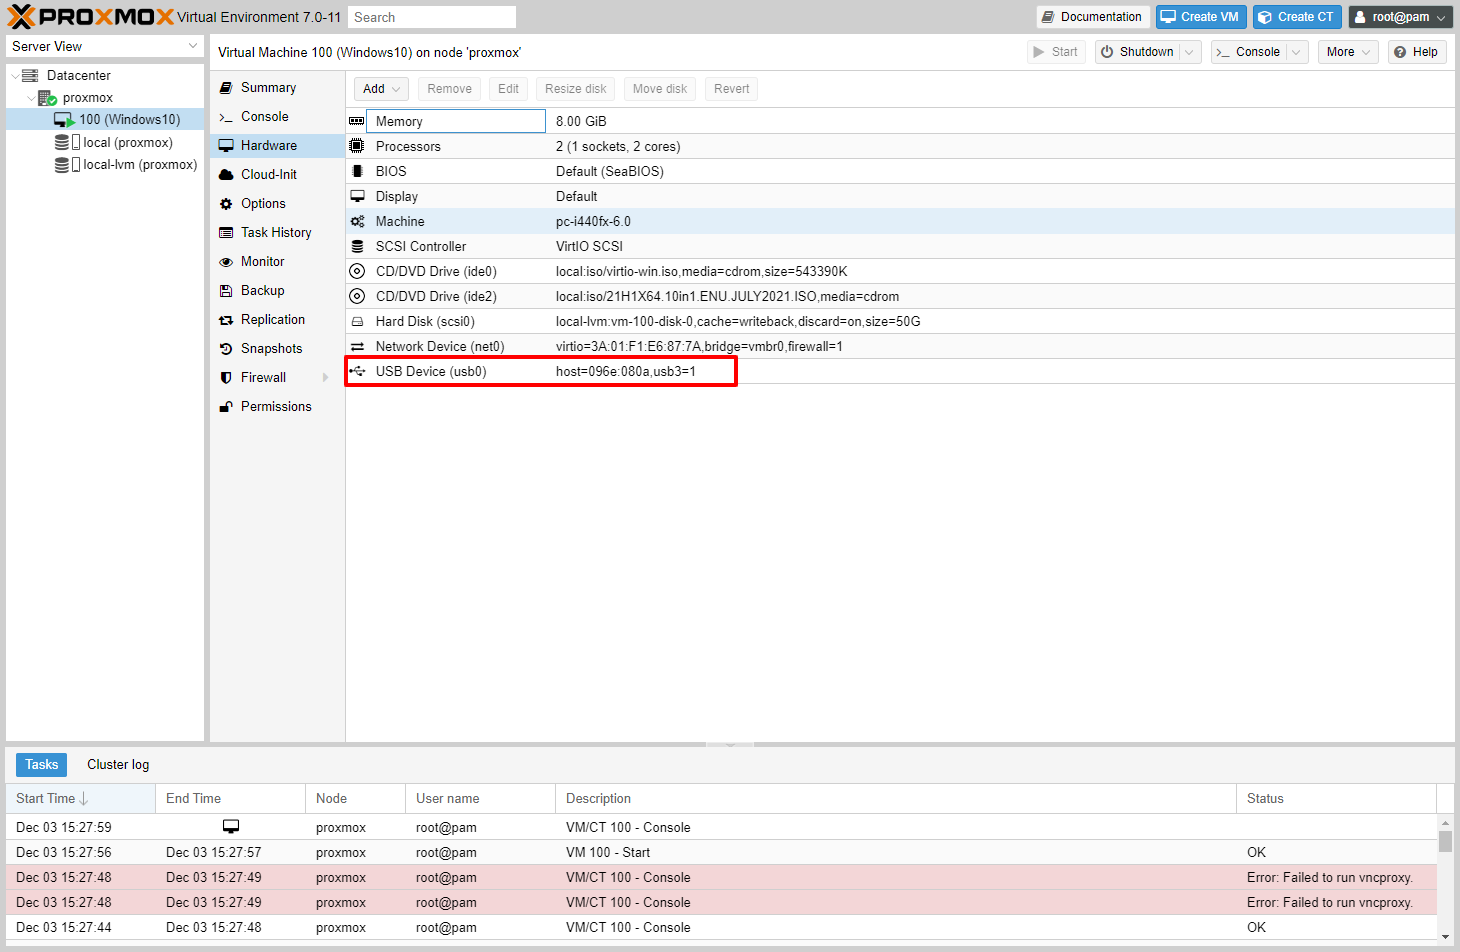
Restart the virtual machine, access Windows 10, I saw the virtual machine recognize the USB device: [USB Name] .
Note: You can only access the USB e-Token when connecting to the virtual machine via Console or Teamviewer / UltraViewer. When connecting via RDP (Remote Desktop Protocol), the e-Token will not work.
Comment Policy: We truly value your comments and appreciate the time you take to share your thoughts and feedback with us.
Note: Comments that are identified as spam or purely promotional will be removed.
To enhance your commenting experience, consider creating a Gravatar account. By adding an avatar and using the same e-mail here, your comments will feature a unique and recognizable avatar, making it easier for other members to identify you.
Please use a valid e-mail address so you can receive notifications when your comments receive replies.
