After successfully installing Proxmox on the Server, virtual machine control and administration can be performed through the included Web UI interface at the address
https://<IP-server>:8006Code language: JavaScript (javascript) 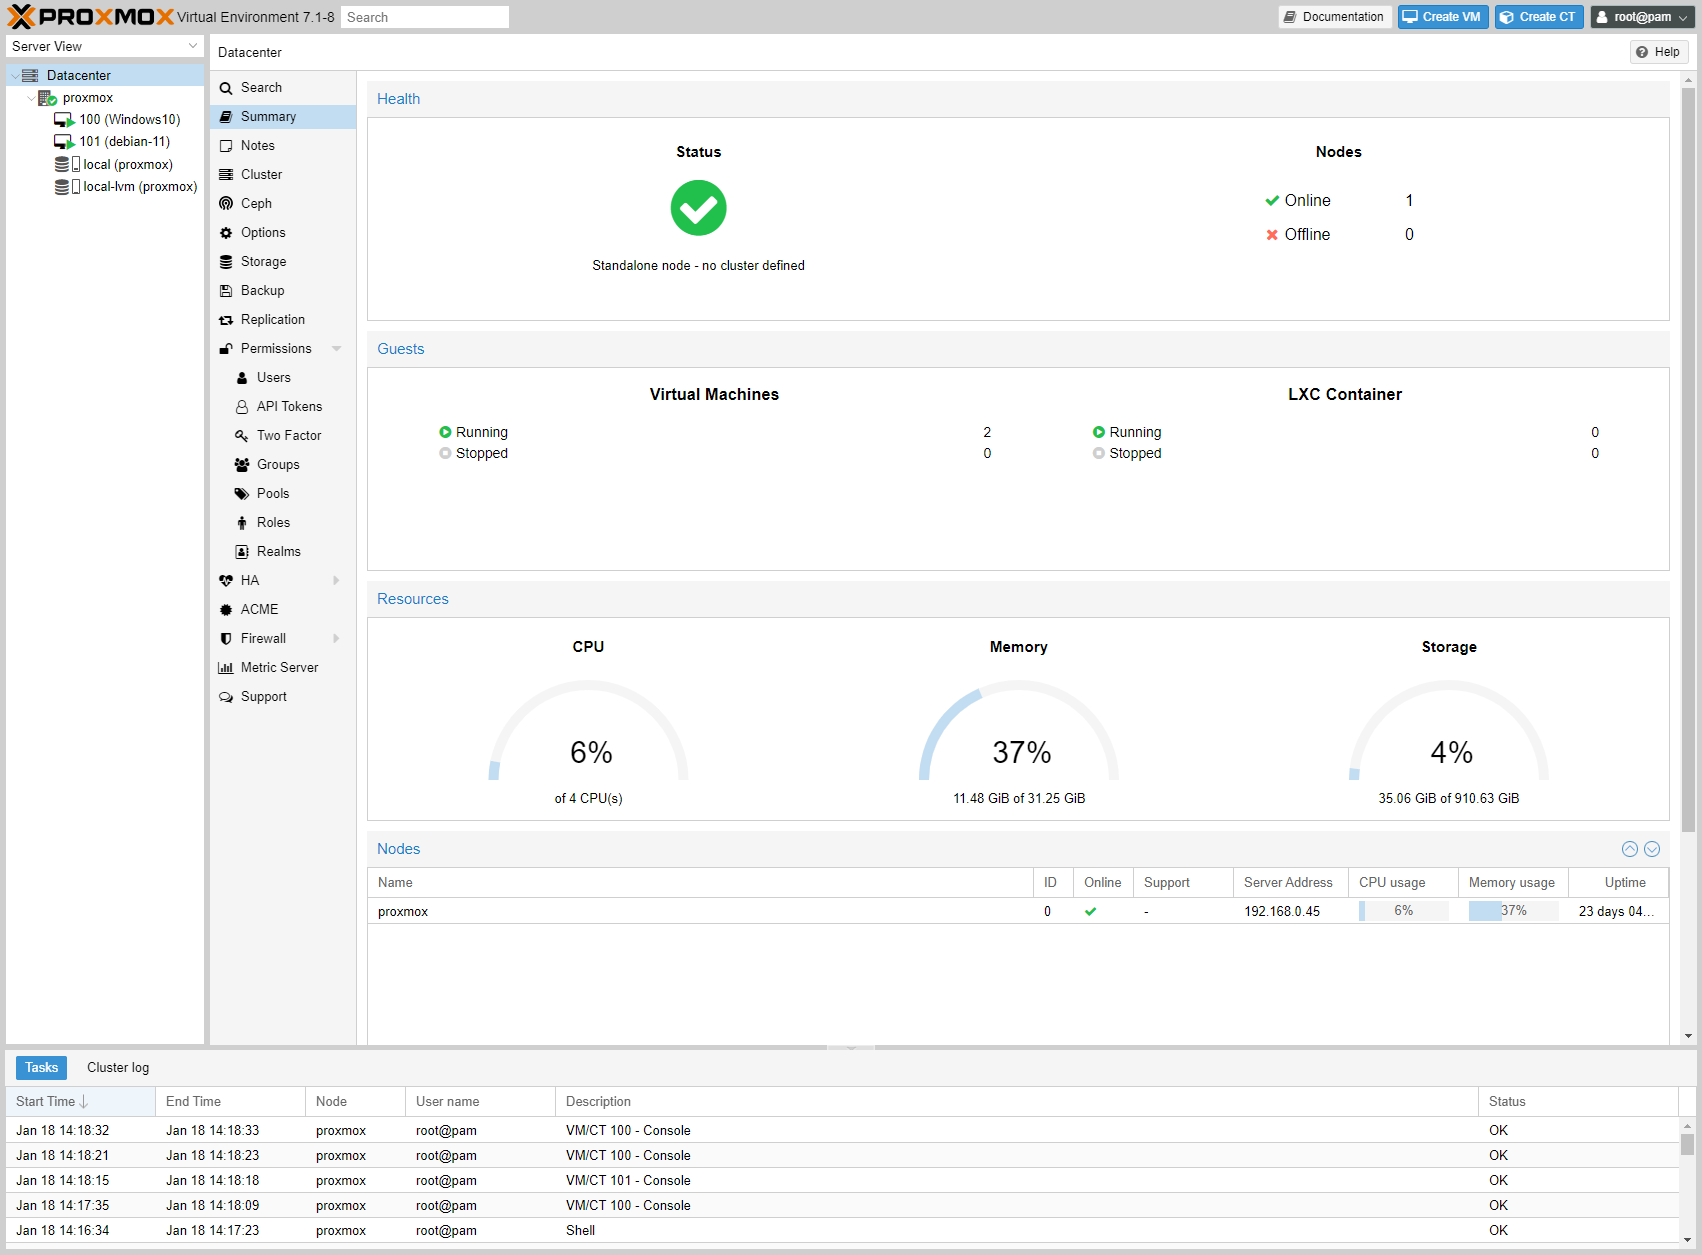
My first impression when accessing Proxmox’s Web UI was that its interface looked complicated, difficult to use, not as friendly and intuitive as the XOA interface on XCP-ng. It took me a few days of exploring and getting used to it to grasp the basic operations of Proxmox: viewing system information, creating VM virtual machines, creating LXC containers,…
In this article, I will guide you to get familiar with the Web UI interface of Proxmox VE. Once you understand how to use it, you will manage virtual machines on Proxmox more effectively.
I. Main Interface
Access the Web UI management interface at the address below and log in with the root account.
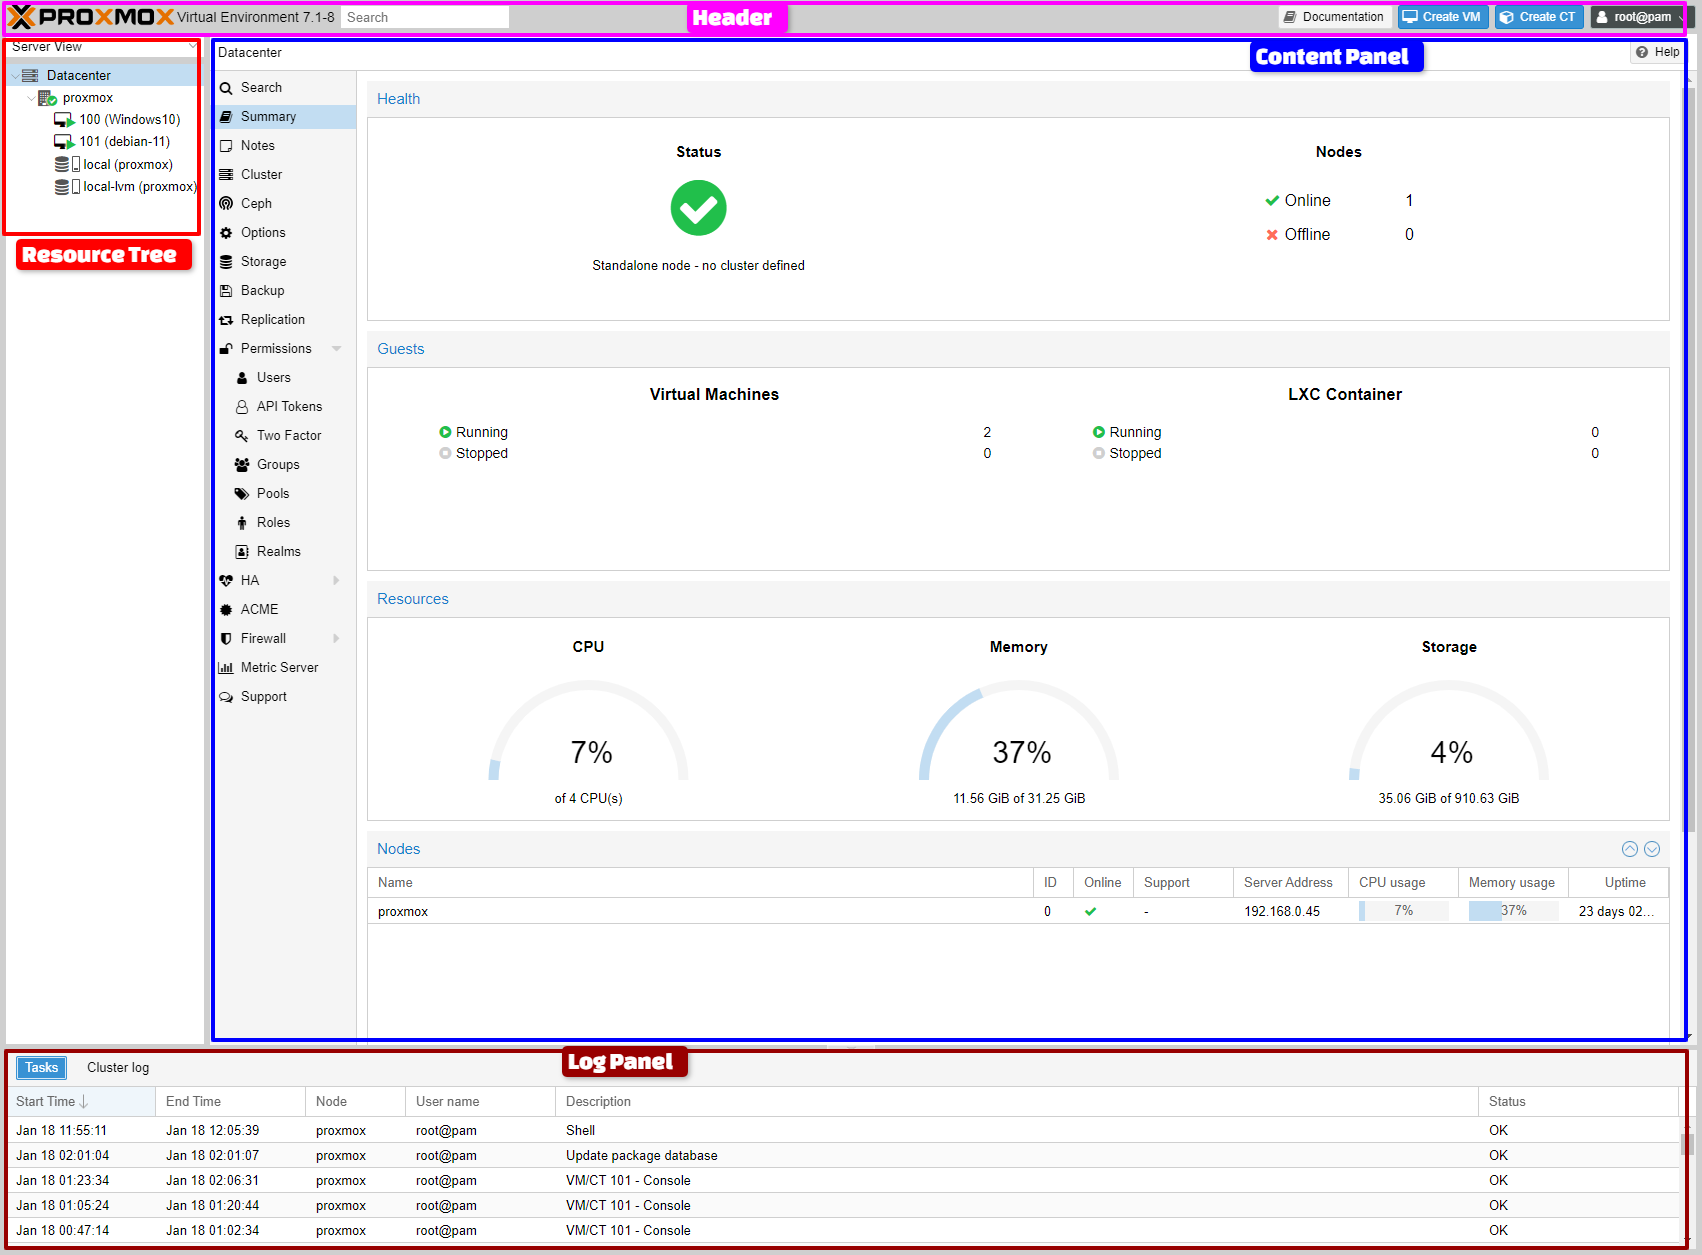
https://<IP-Server>:8006Code language: JavaScript (javascript)The Proxmox interface is divided into 4 areas:
- Header: located at the top, displays the search box, account information and two most important operation buttons: Create VM (create KVM virtual machine), Create CT (create LXC container)
- Resource Tree: located on the far left, displays management objects for you to choose from: Datacenter, Proxmox Node, VM, CT, Storage
- Content Panel: located in the middle of the screen, displays detailed information of each selected object in the Resource Tree section.
- Log Panel: located at the bottom, records activities occurring on the system.
II. Resource Tree
The Resource Tree on the left is used to select management objects on Proxmox.
- Datacenter: General management of the entire system, including many different Proxmox servers
- Node: represents a Proxmox server
- Guest: VMs, LXC containers, and templates
- Storage: storage object
- Pool: a group of nodes for centralized management.
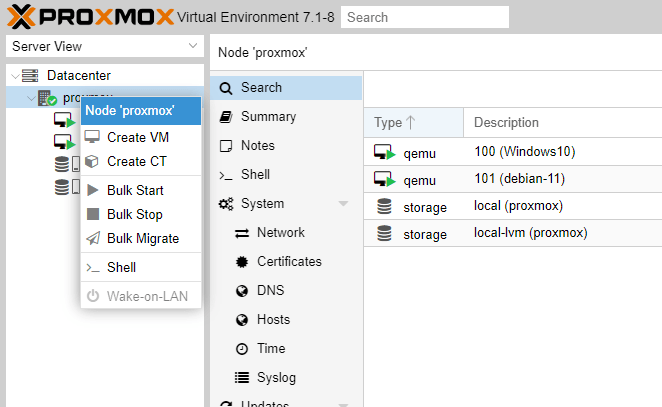
You can right-click on Node or Guest to display the management menu bar for each item.
|
|
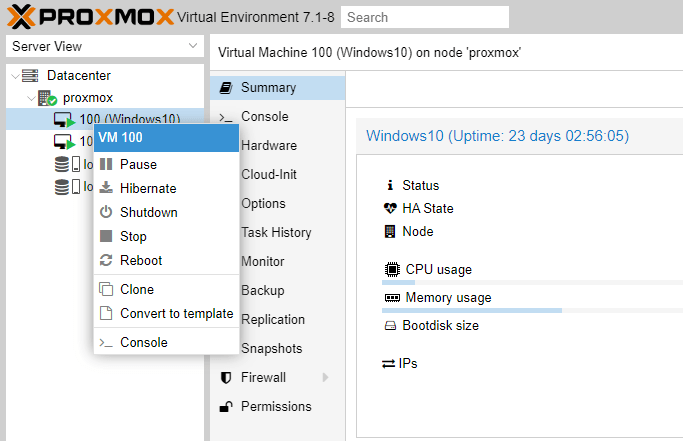 |
| Right click on Proxmox node | Right click on virtual machine |
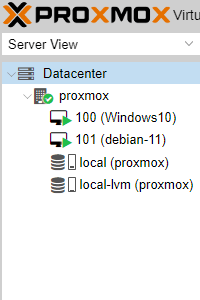
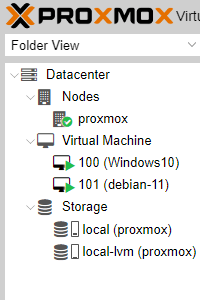
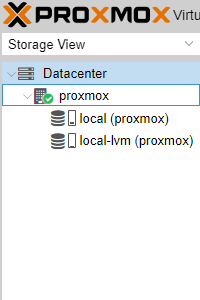
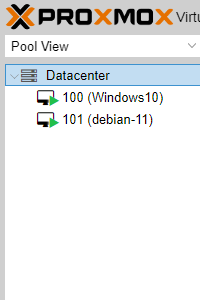
By default, the Resource Tree item will be displayed in Server View mode, you can change to other display modes.
- Server View: displays all objects, grouped by node
- Folder View: displays all objects, divided into groups of each type of object.
- Storage View: displays only storage objects, divided into groups of nodes.
- Pool View: shows only virtual machines and containers, divided into groups of pools.
 |
 |
 |
 |
III. Content Panel
Content Panel is the central component of Proxmox, where you spend most of your time when accessing the Web UI. Inside the Content Panel is divided into 2 parts, the left side is the Navigation Menu with many items to choose from and the right side will display the corresponding information.
Depending on the object you select in the Resource Tree, the Content Panel will change accordingly.
1. Datacenter
This is the interface when clicking Datacenter in the Resource Tree section
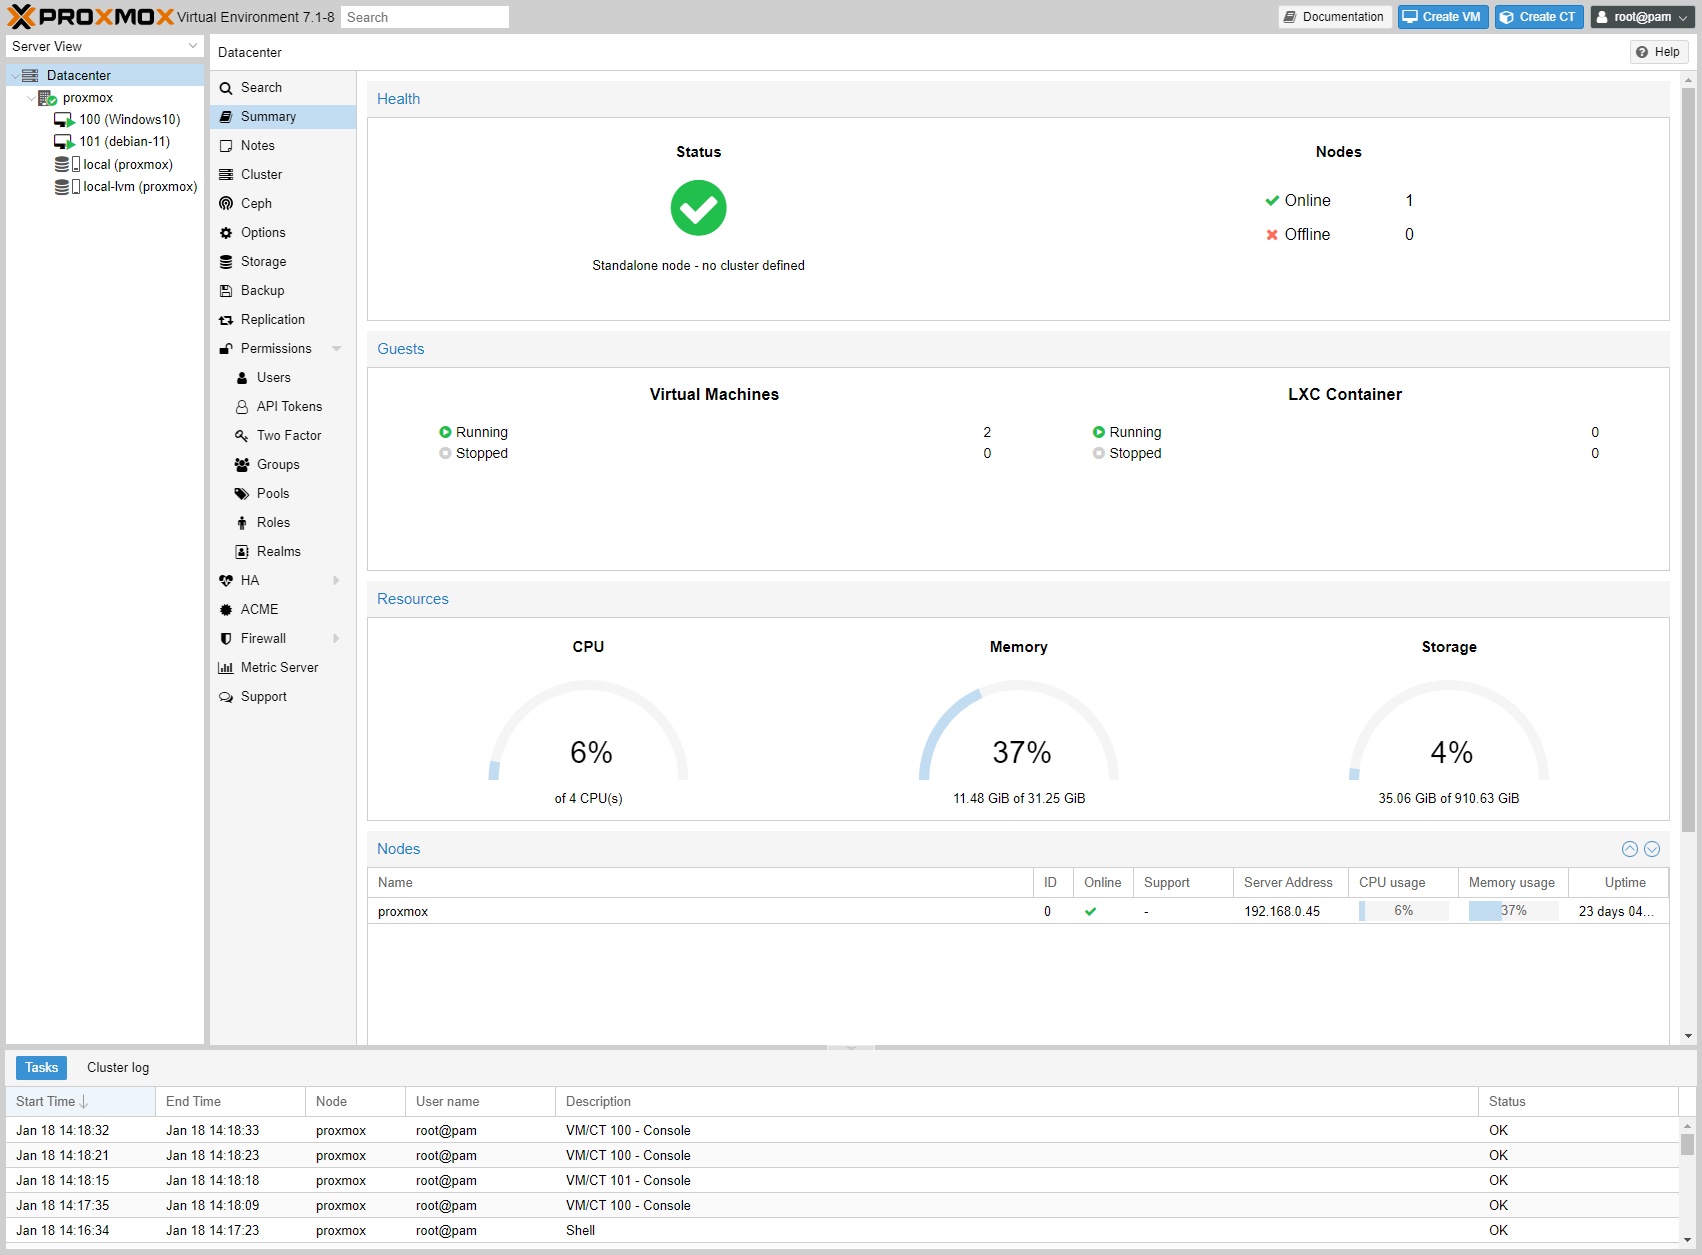
Inside the Content Tree section will display the following settings:
- Search: Search for objects across the system.
- Summary: Summary of system information and resource usage.
- Notes: used for notes
- Cluster: Provides cluster creation and join functionality.
- Ceph: Ceph management
- Options: View and manage system settings
- Storage: Manage storage objects.
- Backup: Schedule backups for virtual machines/containers across the system.
- Replication: View and manage copies.
- Permissions: Manage accounts, groups, API tokens, LDAP,…
- HA: High Availability feature management.
- ACME: Set up SSL certificates using ACME (Let’s Encrypt) for each node.
- Firewall: firewall configuration
- Metric Server: Configure external metric server for Proxmox
- Support: Displays information about the Proxmox subscription plan (if subscribed).
2. Node
Each server that installs Proxmox in the system is called a Node.
Click on the proxmox node under the Datacenter section in the Resource Tree, you will see the settings in the Content Panel will change accordingly.
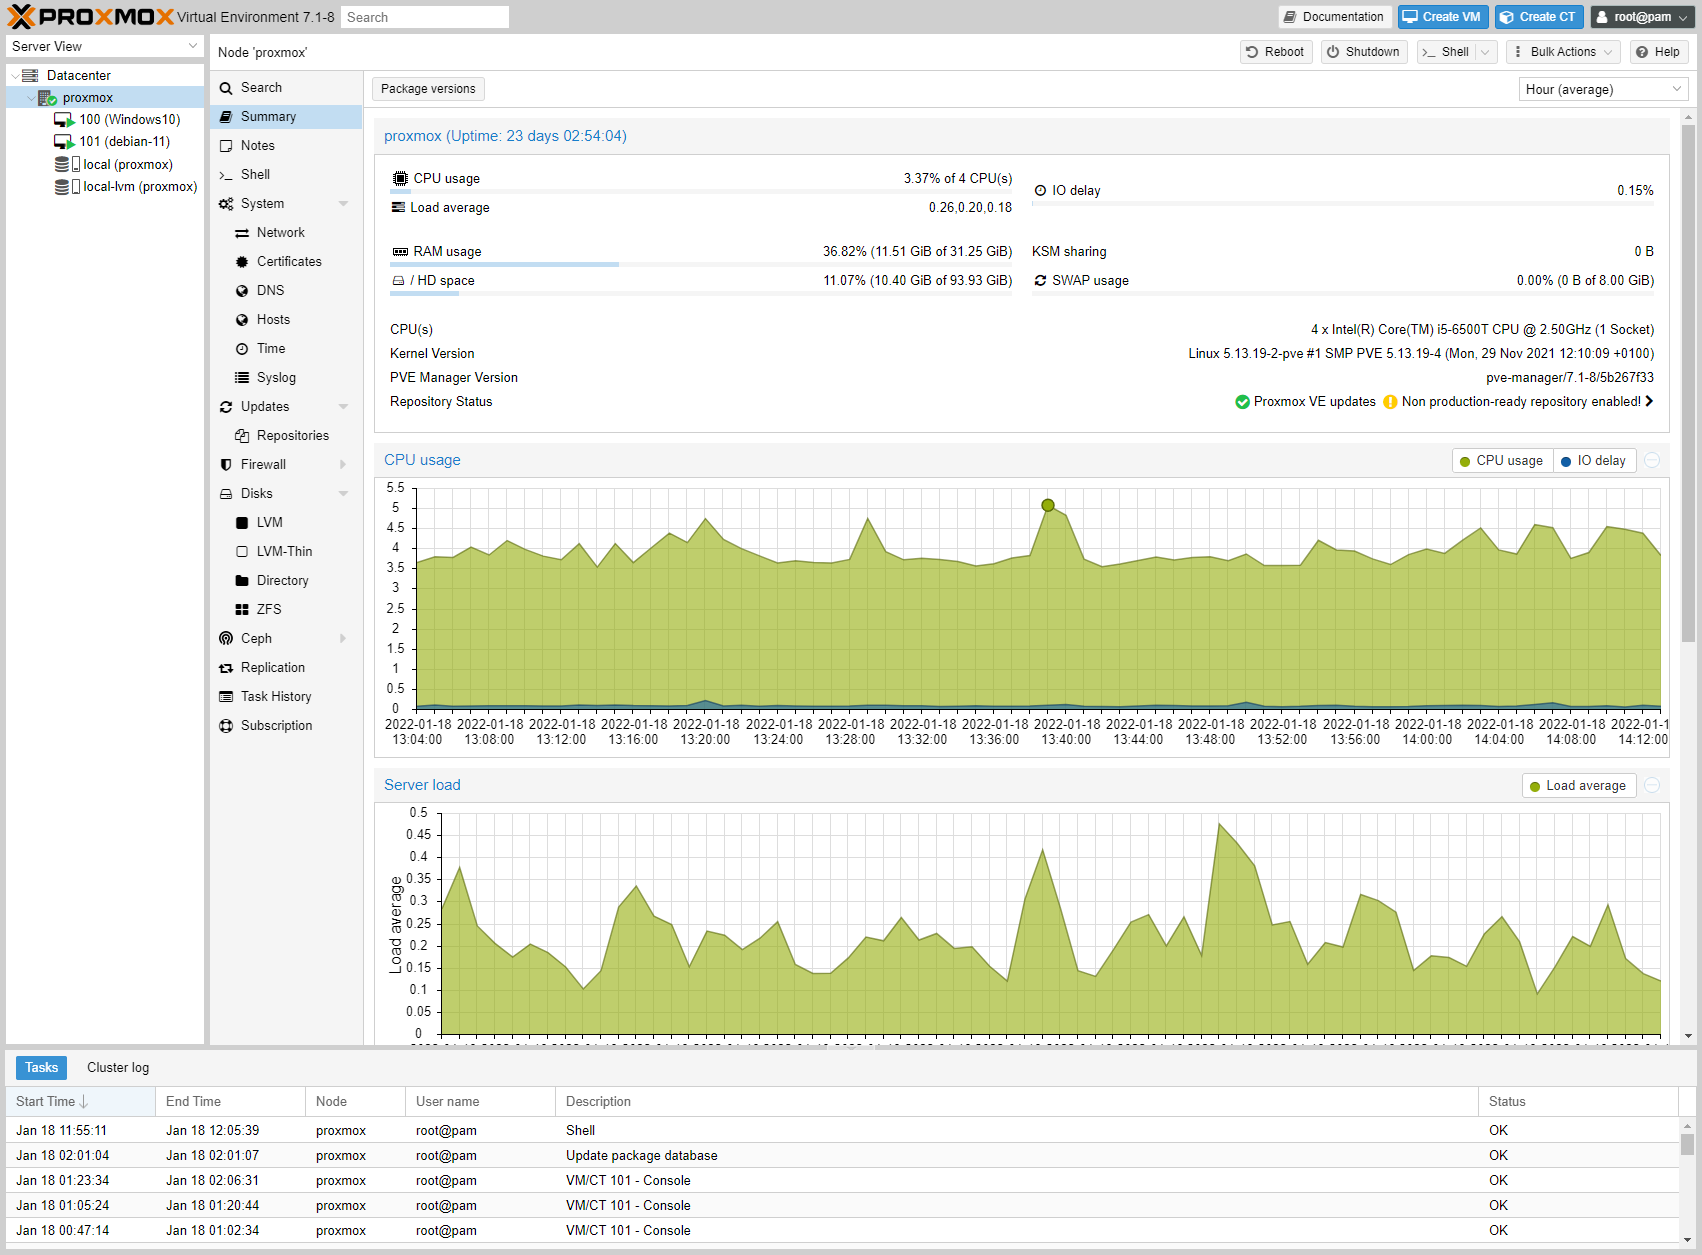
At the top are the management buttons: Reboot, Shutdown, Shell, Bulk Actions and Help
On the left are the configuration options for the Proxmox server.
- Search: search virtual machines, containers, pools
- Summary: node resource information summary.
- Notes: note.
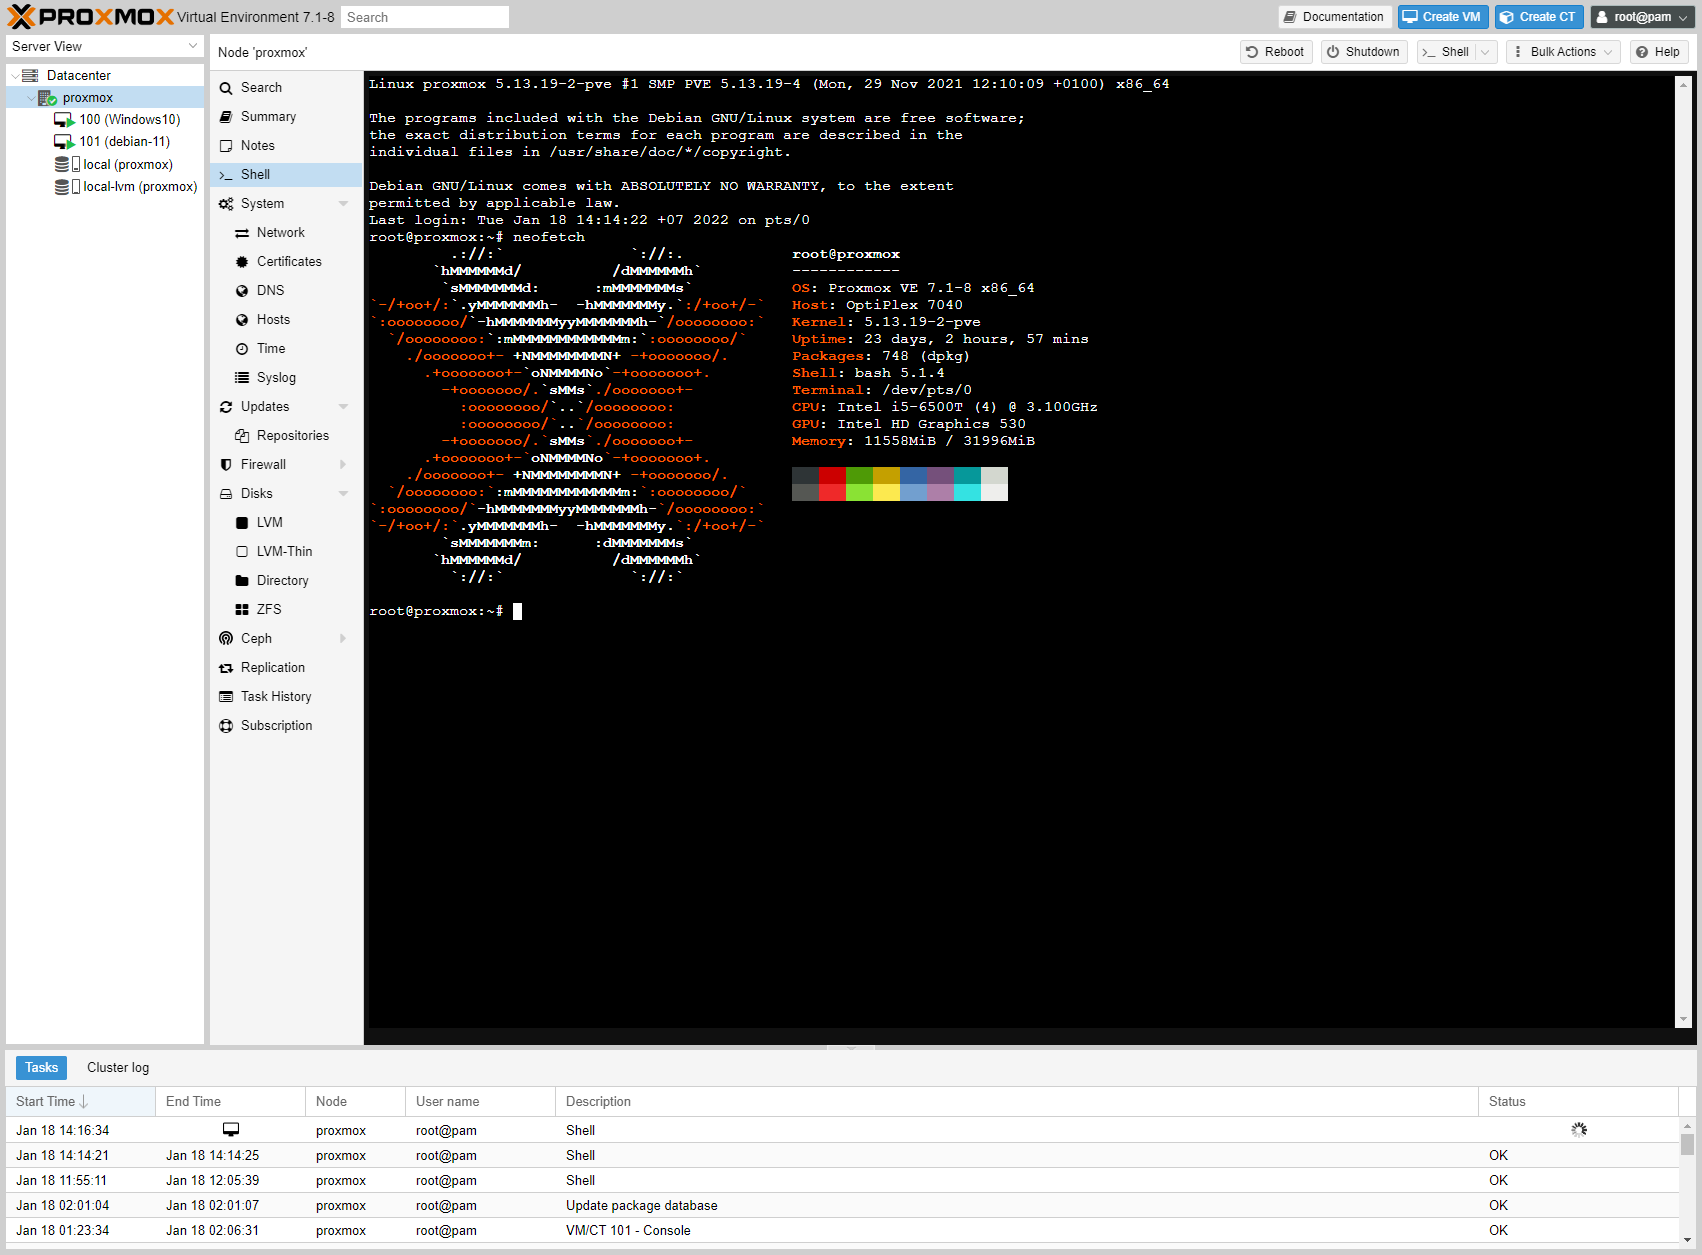
- Shell: access the node shell interface.
- System: Network management, DNS, Certificates,…
- Updates: software update
- Firewall: firewall management for node.
- Disks: Display information of the node’s hard disks.
- Ceph: Ceph management.
- Replication: View and set up copies
- Task History: activity history
- Subscription: Subscriber registration and management.
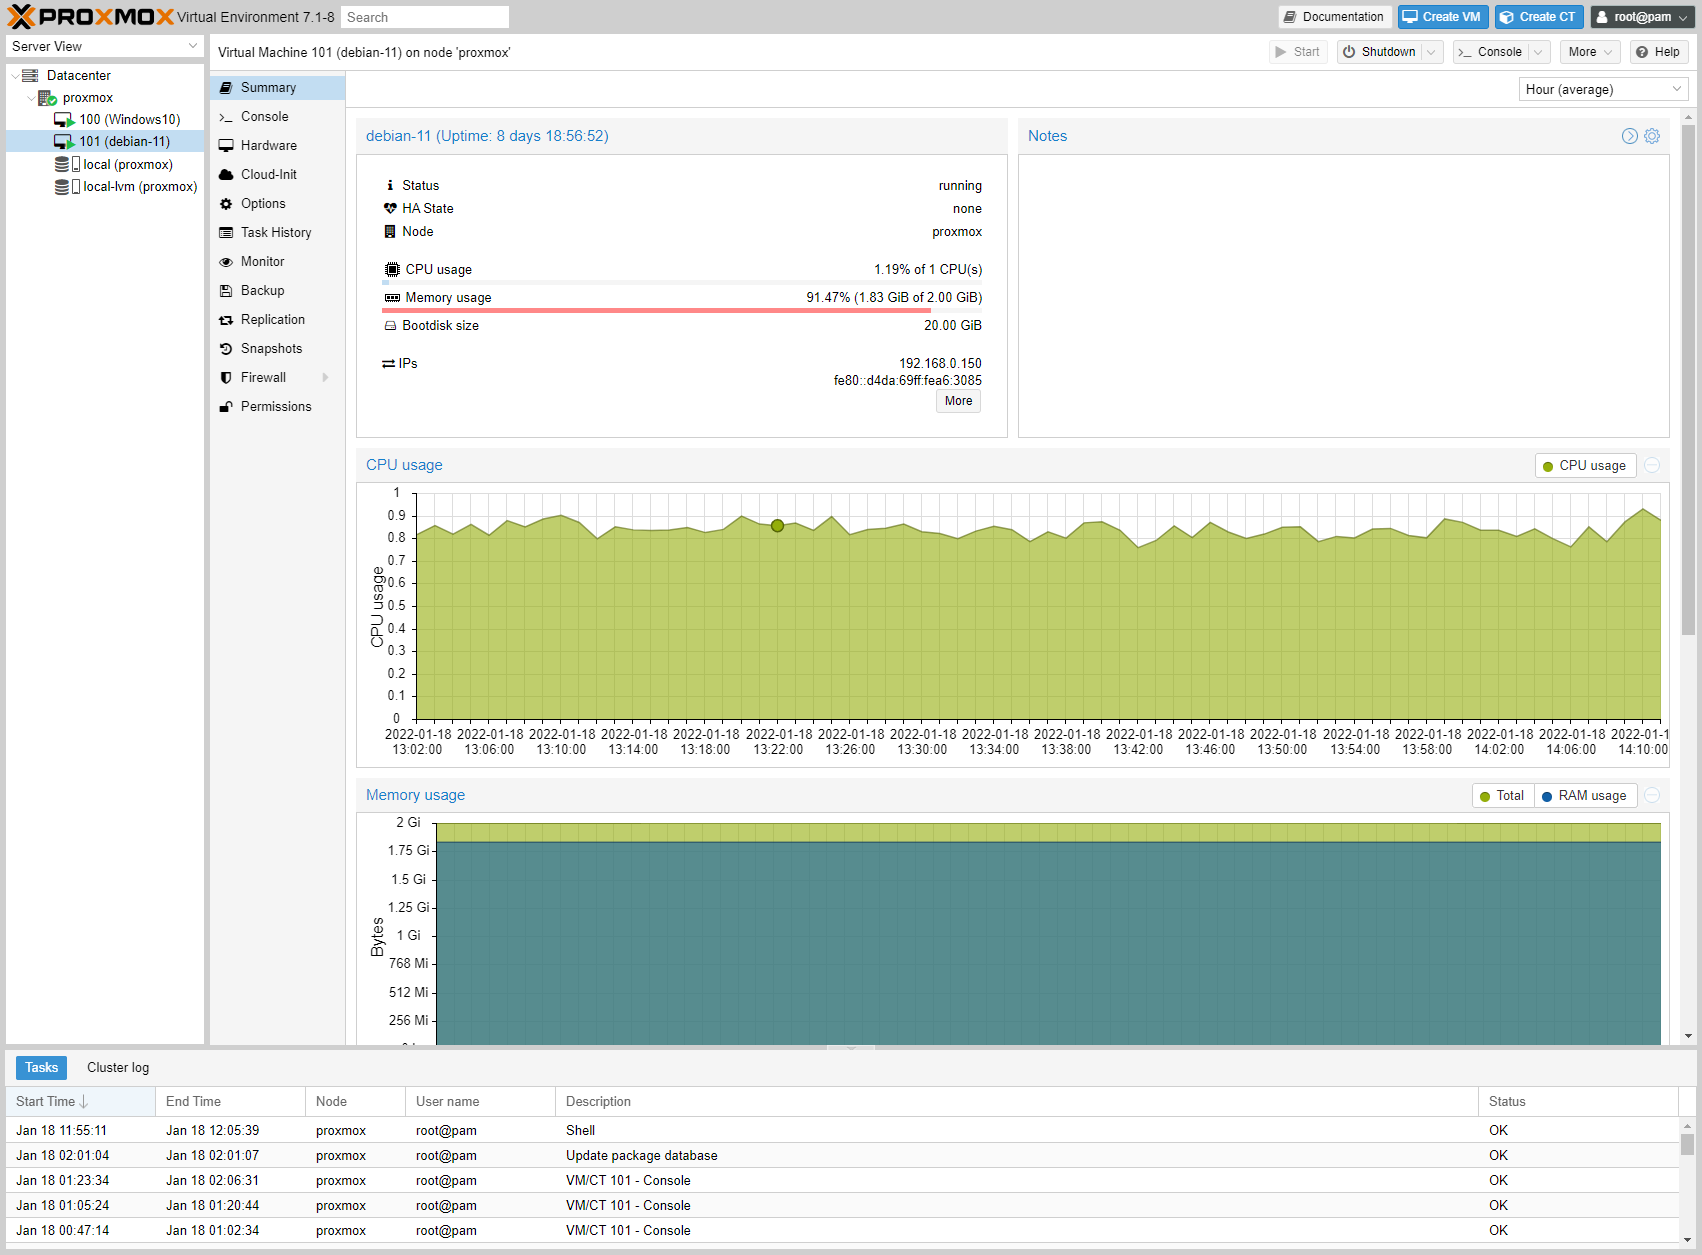
3. Guests (KVM / LXC)
KVM virtual machines / LXC containers on Proxmox are collectively referred to as Guests.
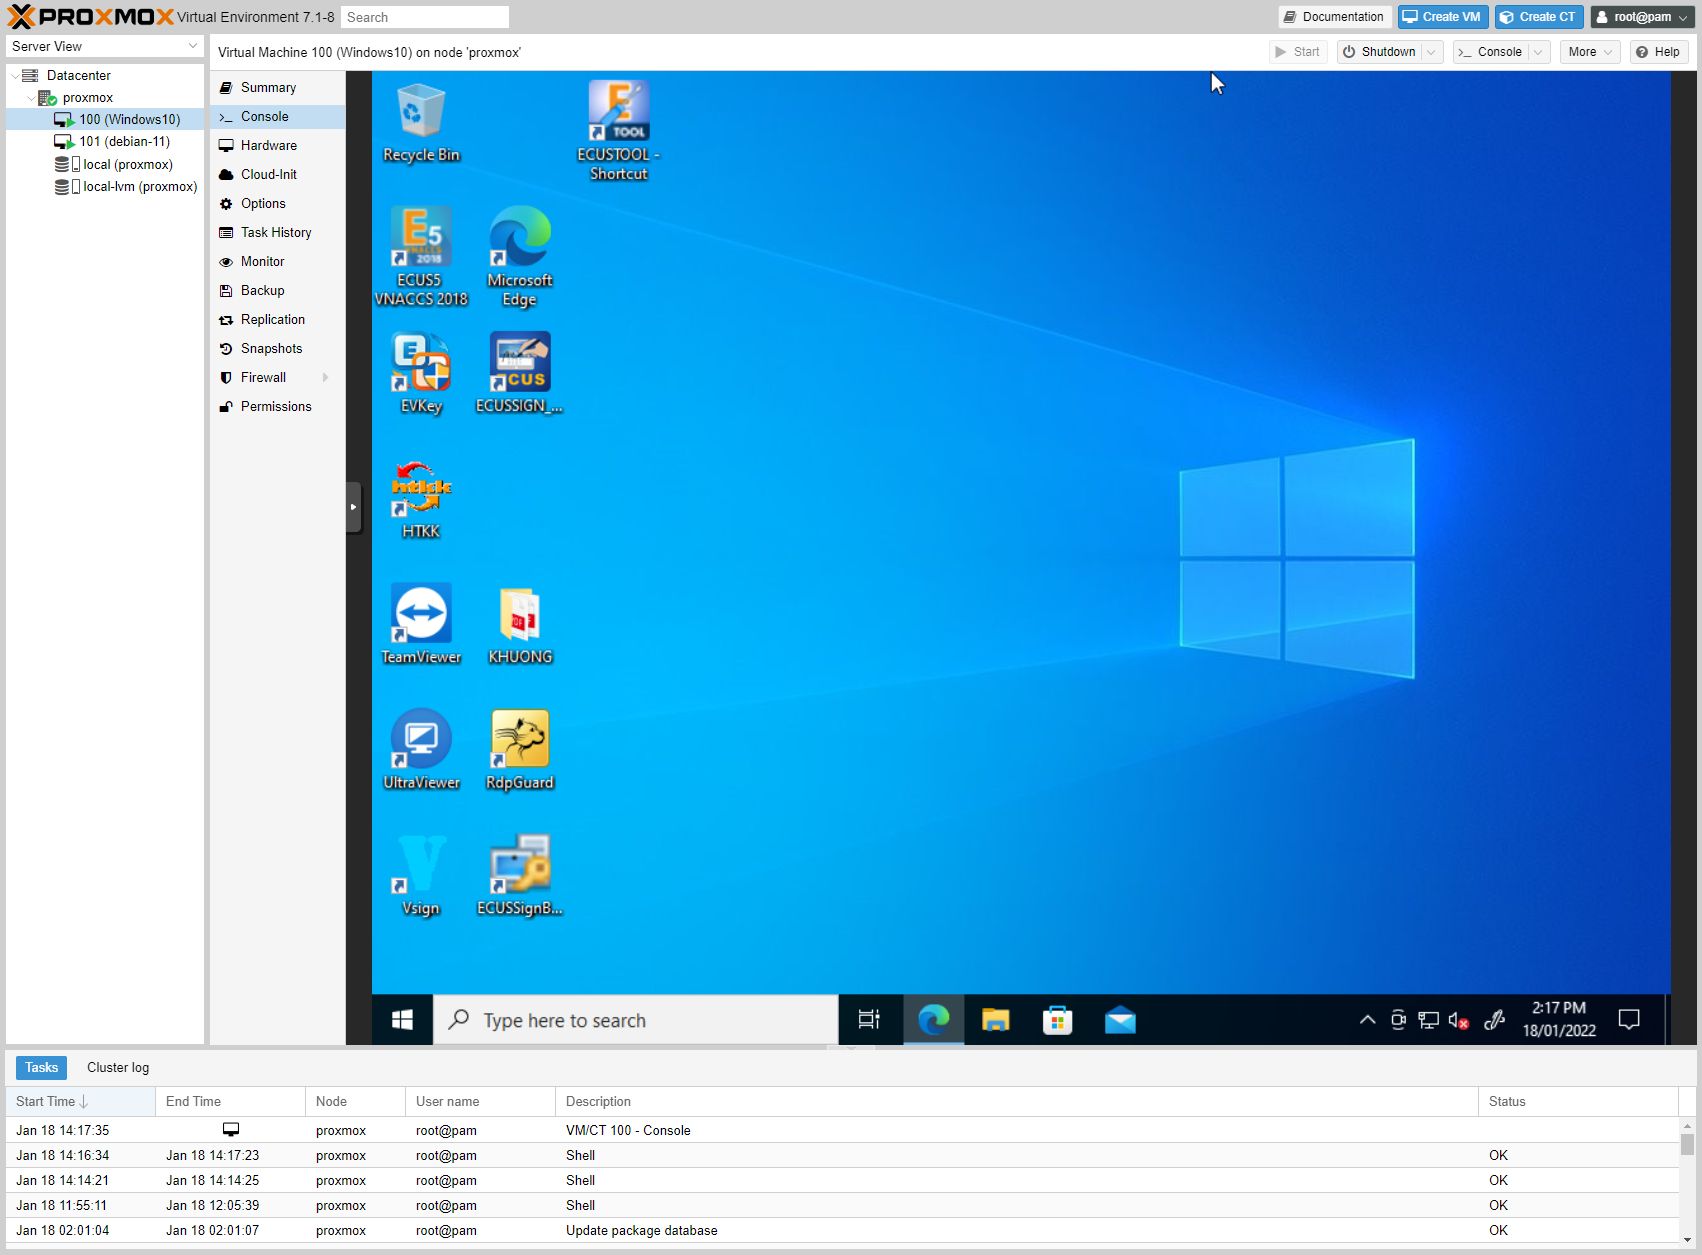
Guest will include the following configuration items in the Content Panel
- Summary: Summary of virtual machine operation and configuration.
- Notes: note
- Console: access the management interface of the virtual machine/container
- Hardware (KVM): Hardware configuration for KVM virtual machine
- Resources (LXC): Configure system resources for LXC.
- Network (LXC): Network configuration for LXC.
- DNS (LXC): Configure DNS settings for LXC.
- Options: Common configuration for KVM/LXC.
- Task History: View activity history.
- Monitor (KVM): Direct connection to KVM process settings.
- Backup: Create a backup of your virtual machine and restore it when needed.
- Replication: View and manage virtual machine copies.
- Snapshots: Create and restore snapshots of virtual machines.
- Firewall: firewall configuration
- Permissions: access management
4. Storage
If you install Proxmox with default settings, Proxmox configures the hard drive as LVM (Logical Volume Manager) and automatically creates 2 storage objects:
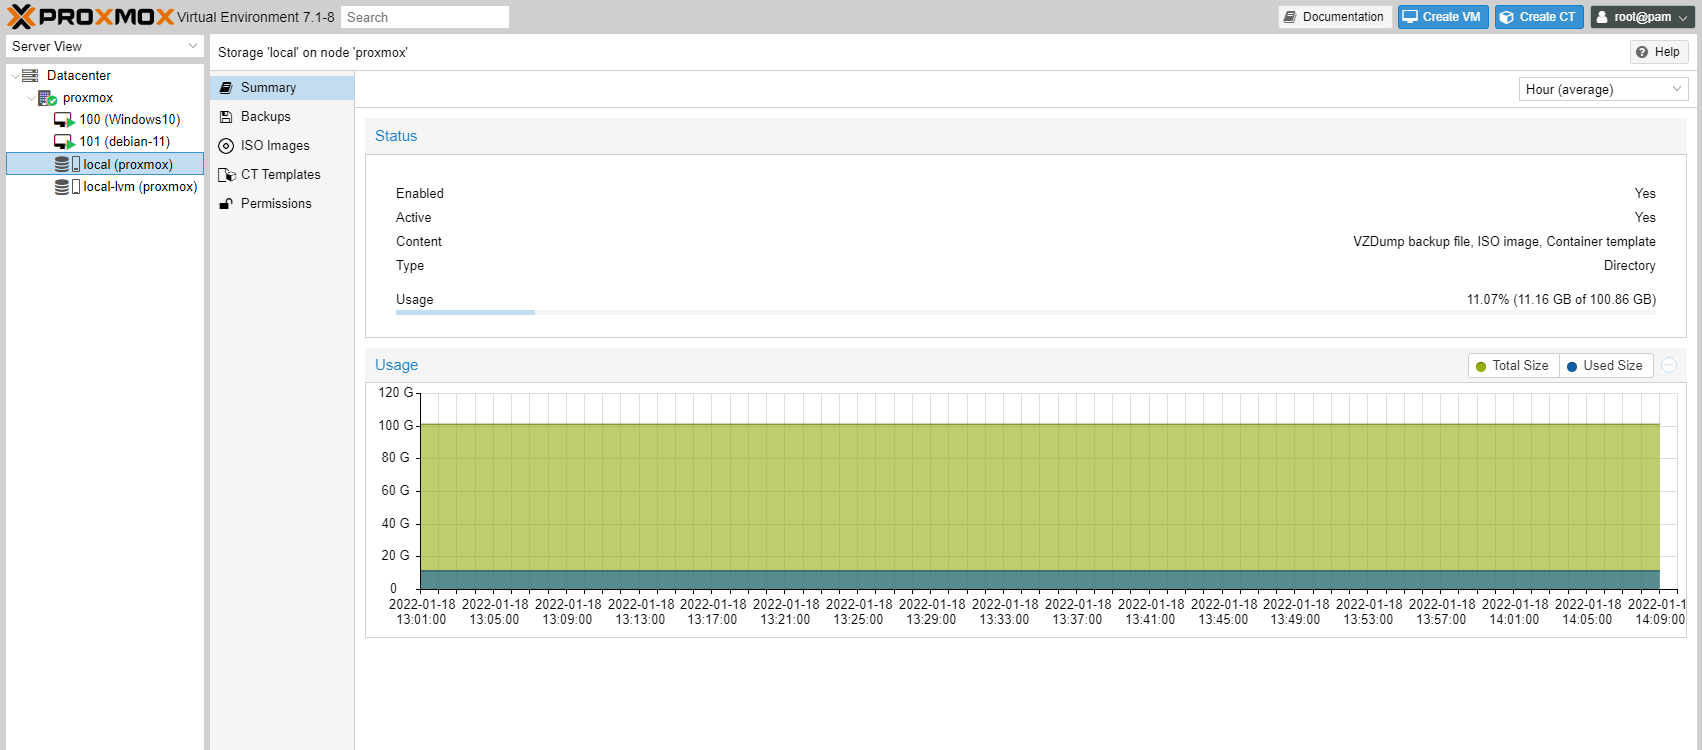
- local: used to save ISO images (used to install KVM virtual machines), CT Templates (used to create LXC containers), and backups of virtual machines.
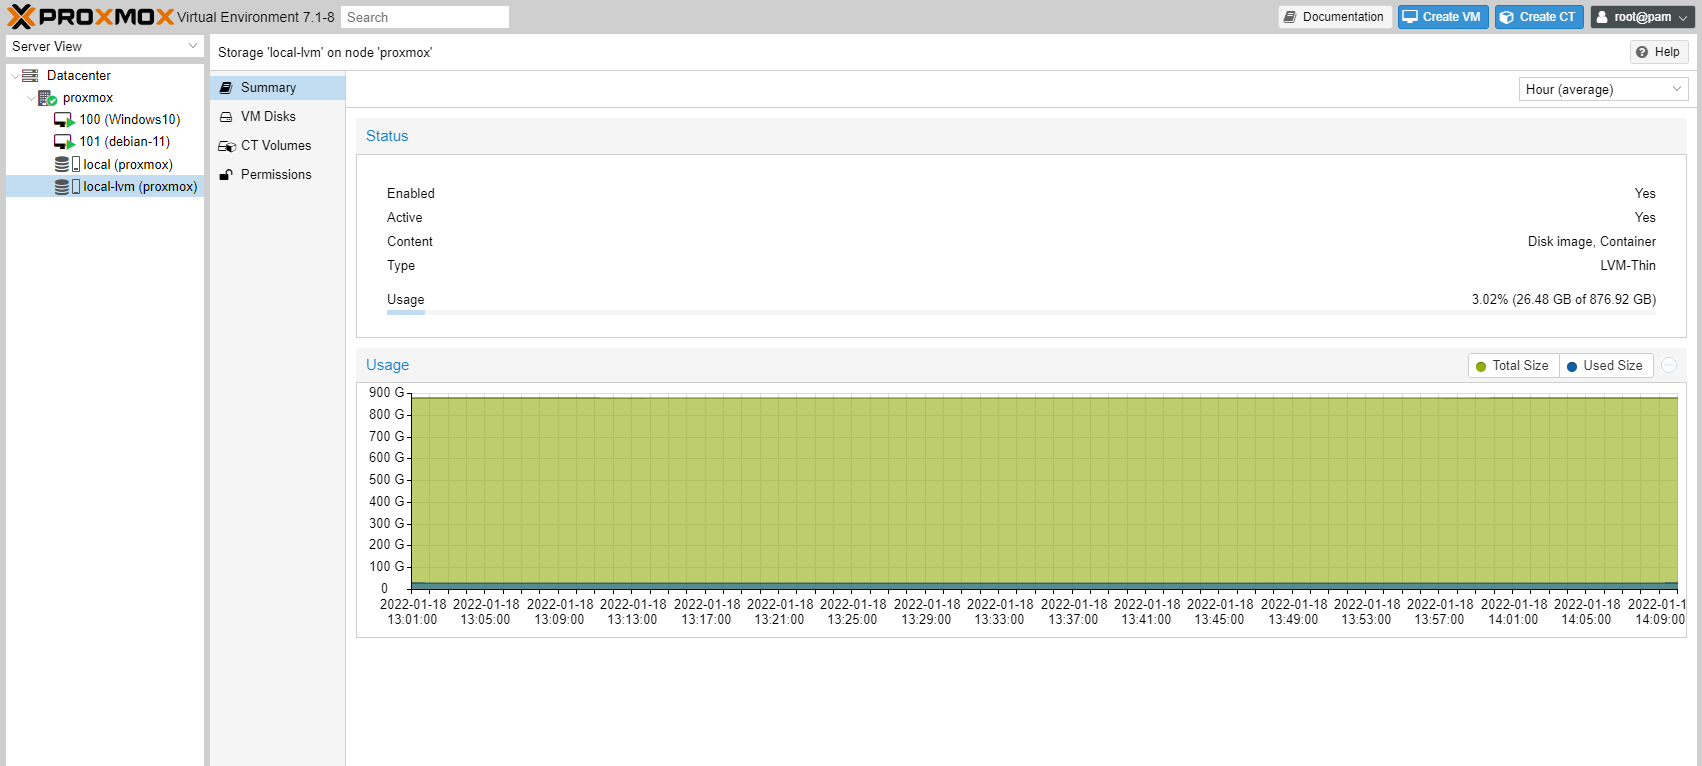
- local-lvm: used to store hard drives of KVM virtual machines and LXC containers
When selecting local storage objects, the Content Panel section will have additional items:
- Summary: Displays information about storage: classification, usage, and remaining capacity.
- Backup: manage backups of virtual machines/containers.
- ISO Images: Manage ISO files used to install KVM virtual machines.
- CT Templates: manages templates used to set up LXC containers
- Permissions: access management
When selecting the local-lvm storage object, the Content Panel section will have the following items:
- Summary: Displays information about storage: classification, usage, and remaining capacity.
- VM Disks: Manage KVM virtual machine hard drives.
- CT Volumes: manage data partitions of LXC containers
- Permissions: access management
That’s all there is to the Proxmox user interface. In the next article, I will guide you how to create a KVM virtual machine on Proxmox.
Comment Policy: We truly value your comments and appreciate the time you take to share your thoughts and feedback with us.

Note: Comments that are identified as spam or purely promotional will be removed.

To enhance your commenting experience, consider creating a Gravatar account. By adding an avatar and using the same e-mail here, your comments will feature a unique and recognizable avatar, making it easier for other members to identify you.

Please use a valid e-mail address so you can receive notifications when your comments receive replies.
