Today’s article I will share about Proxmox Backup Server – VM and LXC container backup solution for the Proxmox virtualization platform. This is an indispensable tool to ensure the safety of your Proxmox system.
1. Introduction to Proxmox Backup Server
Proxmox Backup Server (PBS) is a VM / LXC Container backup and recovery solution. By supporting incremental and deduplicated backups, PBS helps minimize system bandwidth and storage space for backups. In addition, it is equipped with encryption features to ensure the security of backups.
Proxmox Backup Server is a sibling of Proxmox and can be considered the best solution for backing up VMs and LXC containers set up on Proxmox. PBS has an intuitive web interface similar to Proxmox for more convenient management.
2. Install PBS
As directed from official website we need to download the ISO and then create a Boot USB to install directly on the server. This method is called bare-metal installation.
I don’t want to install bare-metal, so I choose to install using Docker for quickness and convenience. I can also use existing VPS to backup Proxmox.
I use this repo: https://github.com/ayufan/pve-backup-server-dockerfiles
Requires a server/virtual machine with Docker & Docker Compose installed.
Create new folder for PBS and file compose.yml
mkdir ~/pbs
cd ~/pbs
nano compose.ymlCode language: Bash (bash)
Enter the following Content
services:
  pbs:
    image: ayufan/proxmox-backup-server:latest
    ports:
      - 8007:8007
    mem_limit: 2G
    volumes:
      - ./pbs_etc:/etc/proxmox-backup
      - ./pbs_logs:/var/log/proxmox-backup
      - ./pbs_lib:/var/lib/proxmox-backup
      - ./backups:/backups
    tmpfs:
      - /run
    cap_add:
      - SYS_RAWIO
    devices:
      - /dev/sda
    restart: unless-stopped
    stop_signal: SIGHUP
Code language: YAML (yaml)
Enable Proxmox Backup Server
docker compose up -dCode language: Nginx (nginx)Access PBS at https://<IP>:8007
3. Log in to PBS
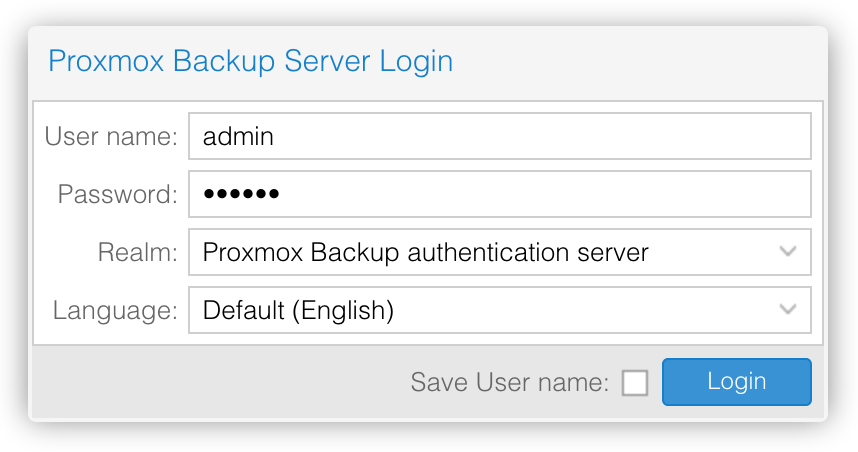
On first login, use the default information as follows
- Username:
admin - Password:
pbspbs - Realm: Proxmox Backup authentication server
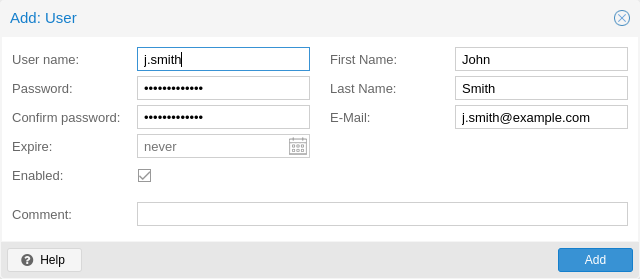
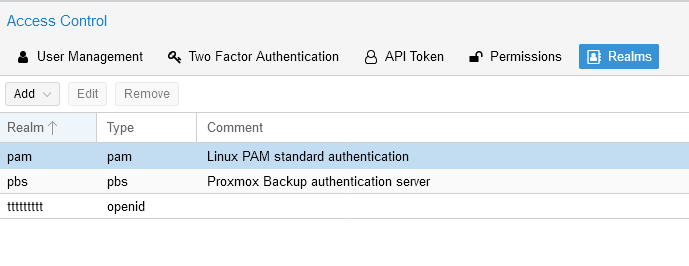
After logging in, I will access the Access Control section, click the Add button to create a new account.
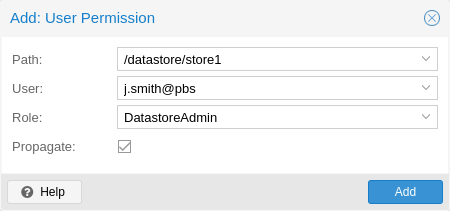
Next, go to the Permission tab, click the Add button to grant admin rights to the newly created account.
Next, log out of the admin account and log in to the new account. Then delete the admin account to optimize security.
4. Create Datastore on PBS
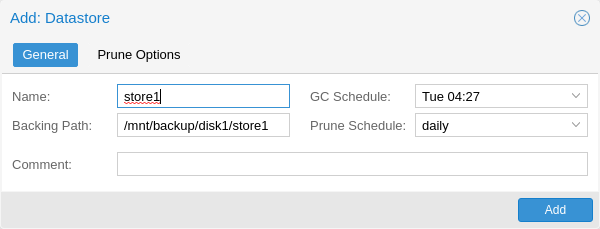
Click the Add Datastore button on the left menu, then enter the information as shown. Backing Path: /backups is the path declared in line 11 of the file compose.yml in step 2.
A new datastore called backups has appeared in the Proxmox Backup Server management interface.
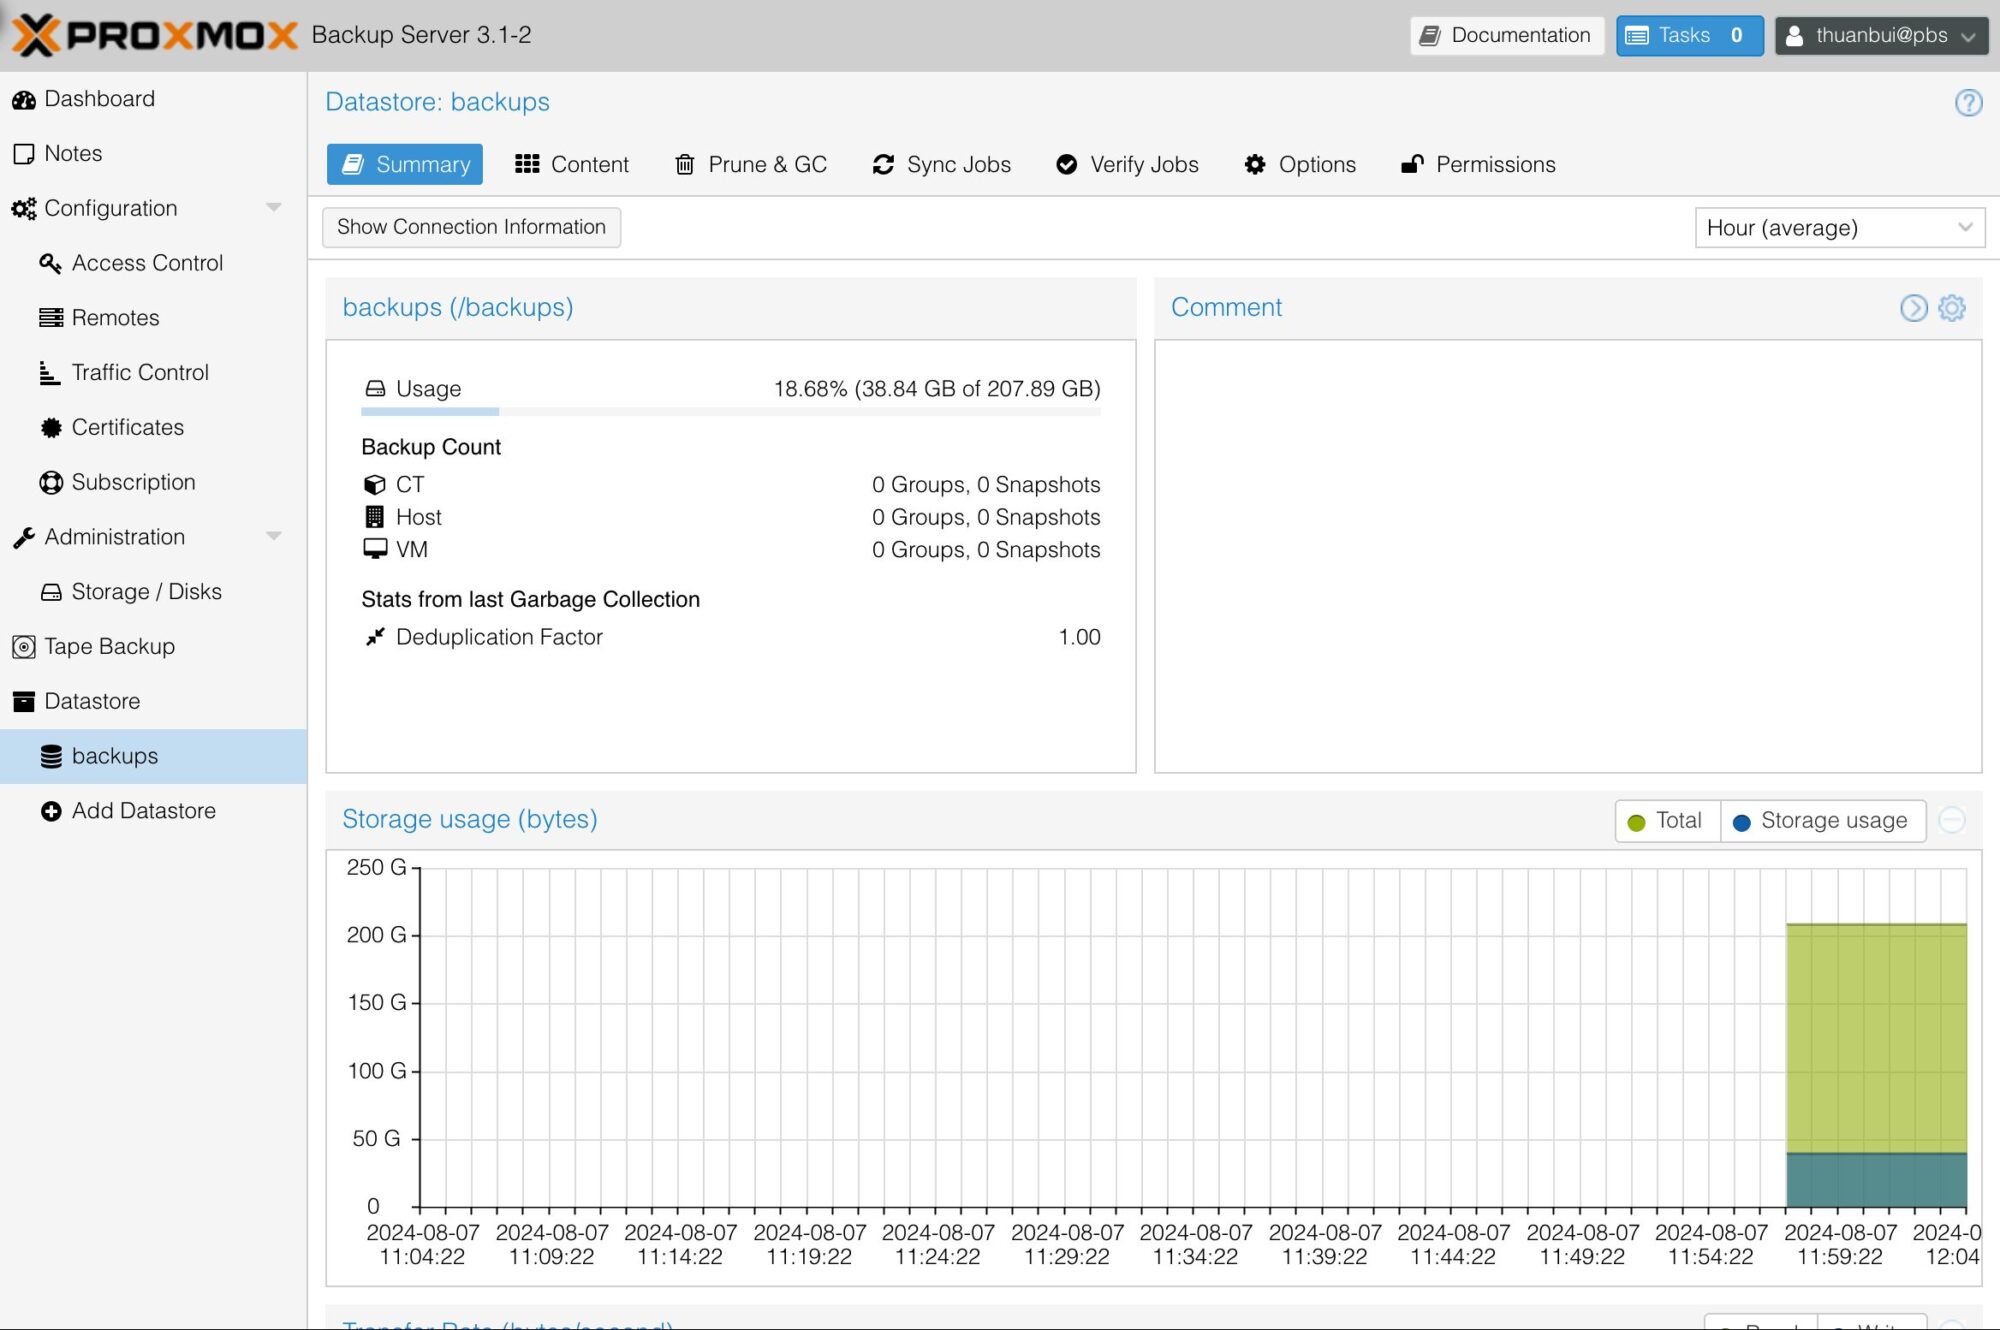
Click the Show Connection Information button to view detailed information about this datastore. The information displayed will be used to configure Storage on Proxmox in the next step.
5. Create new Storage on Proxmox
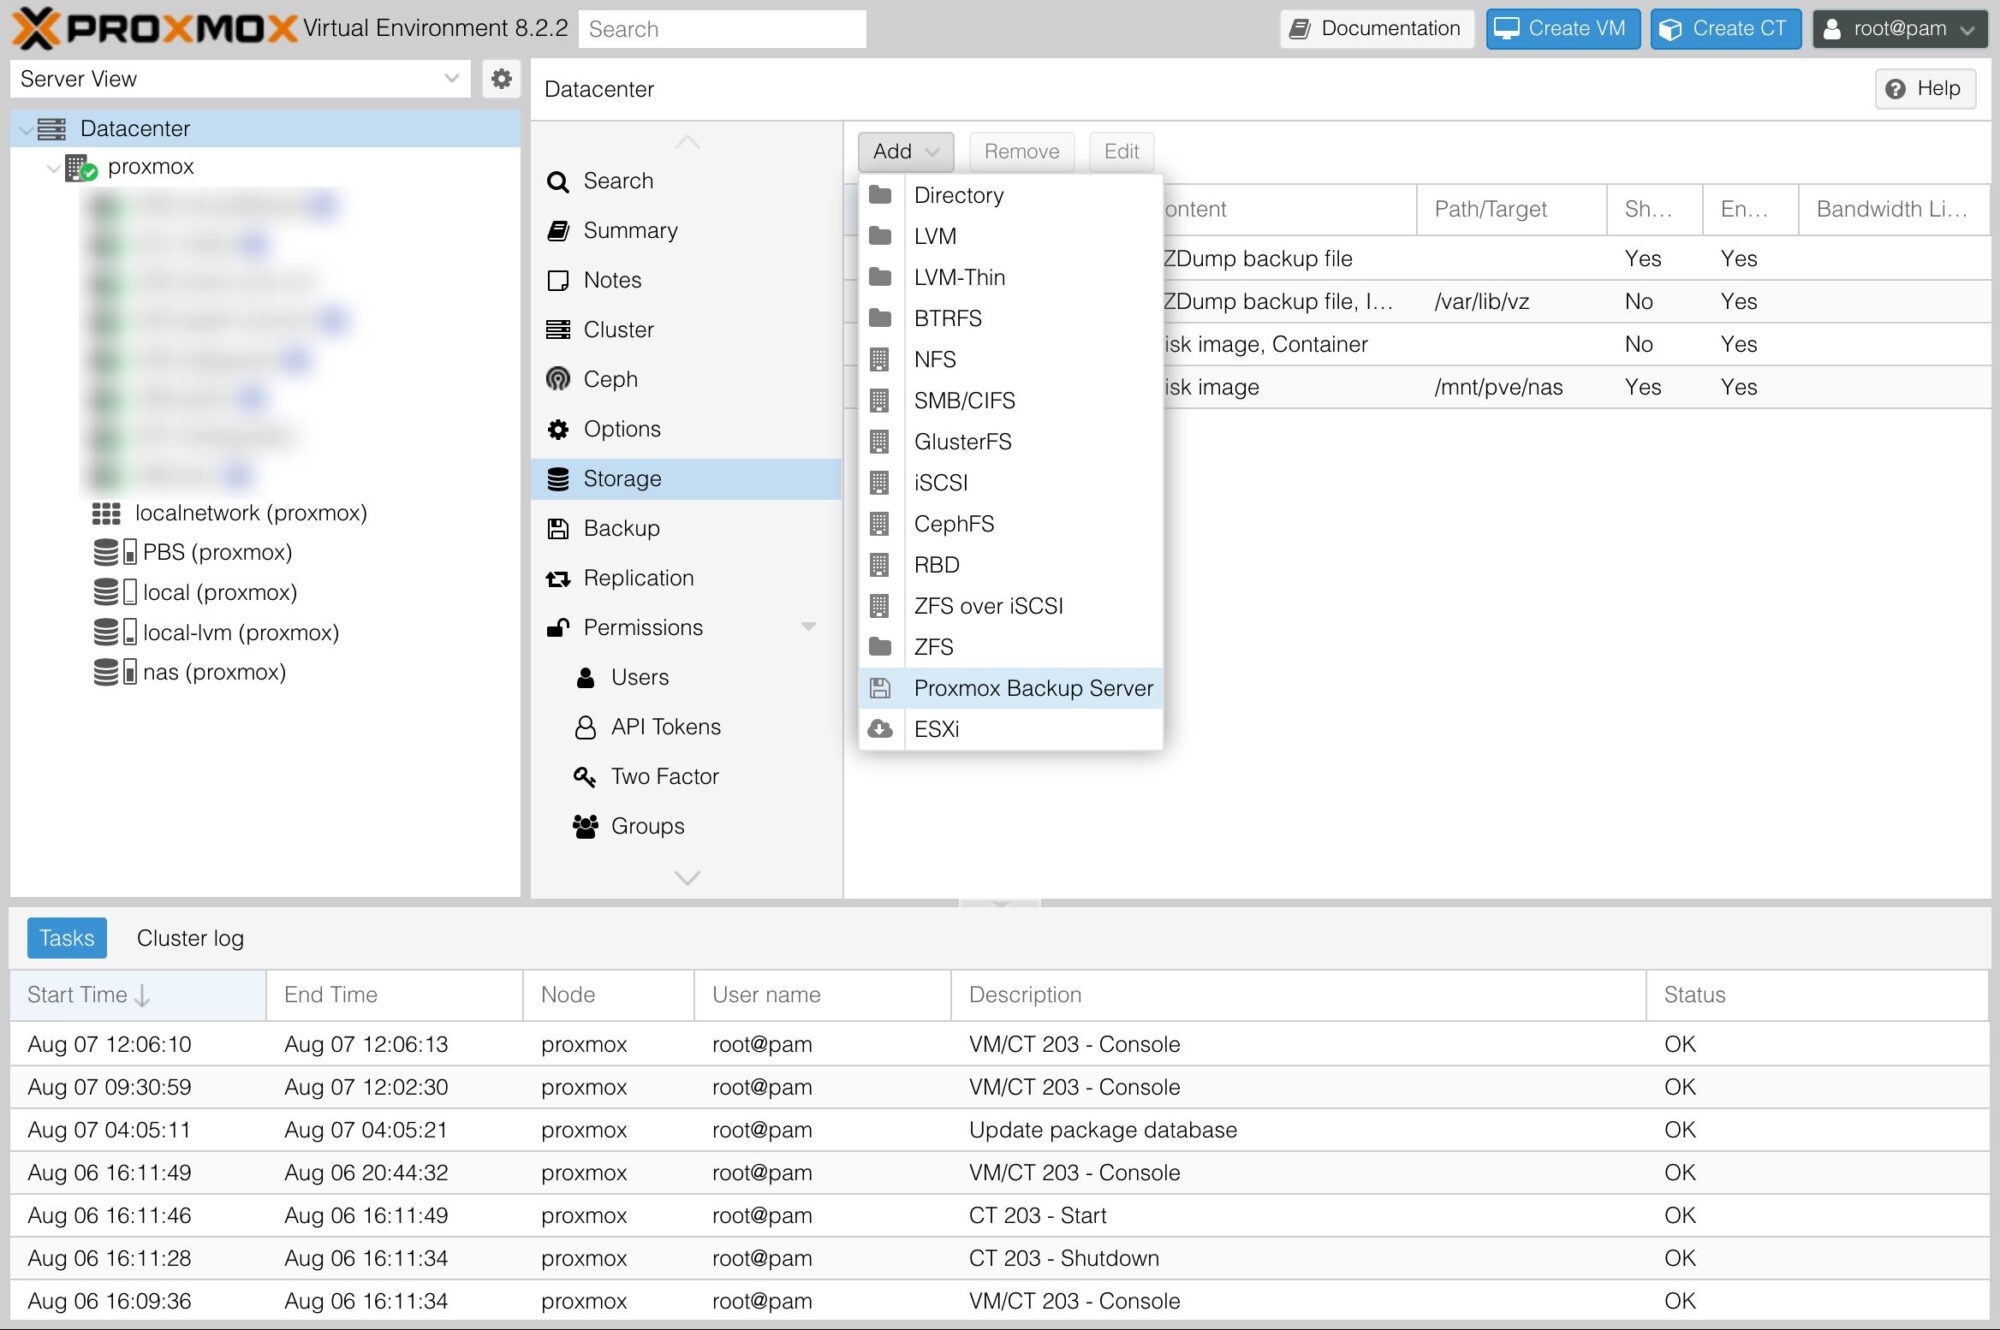
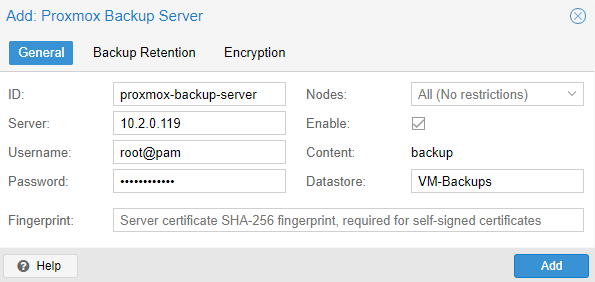
Access Proxmox, select Datacenter –> Storage, click Add button and select Proxmox Backup Server
Enter the Proxmox Backup Server information shown in step 4.
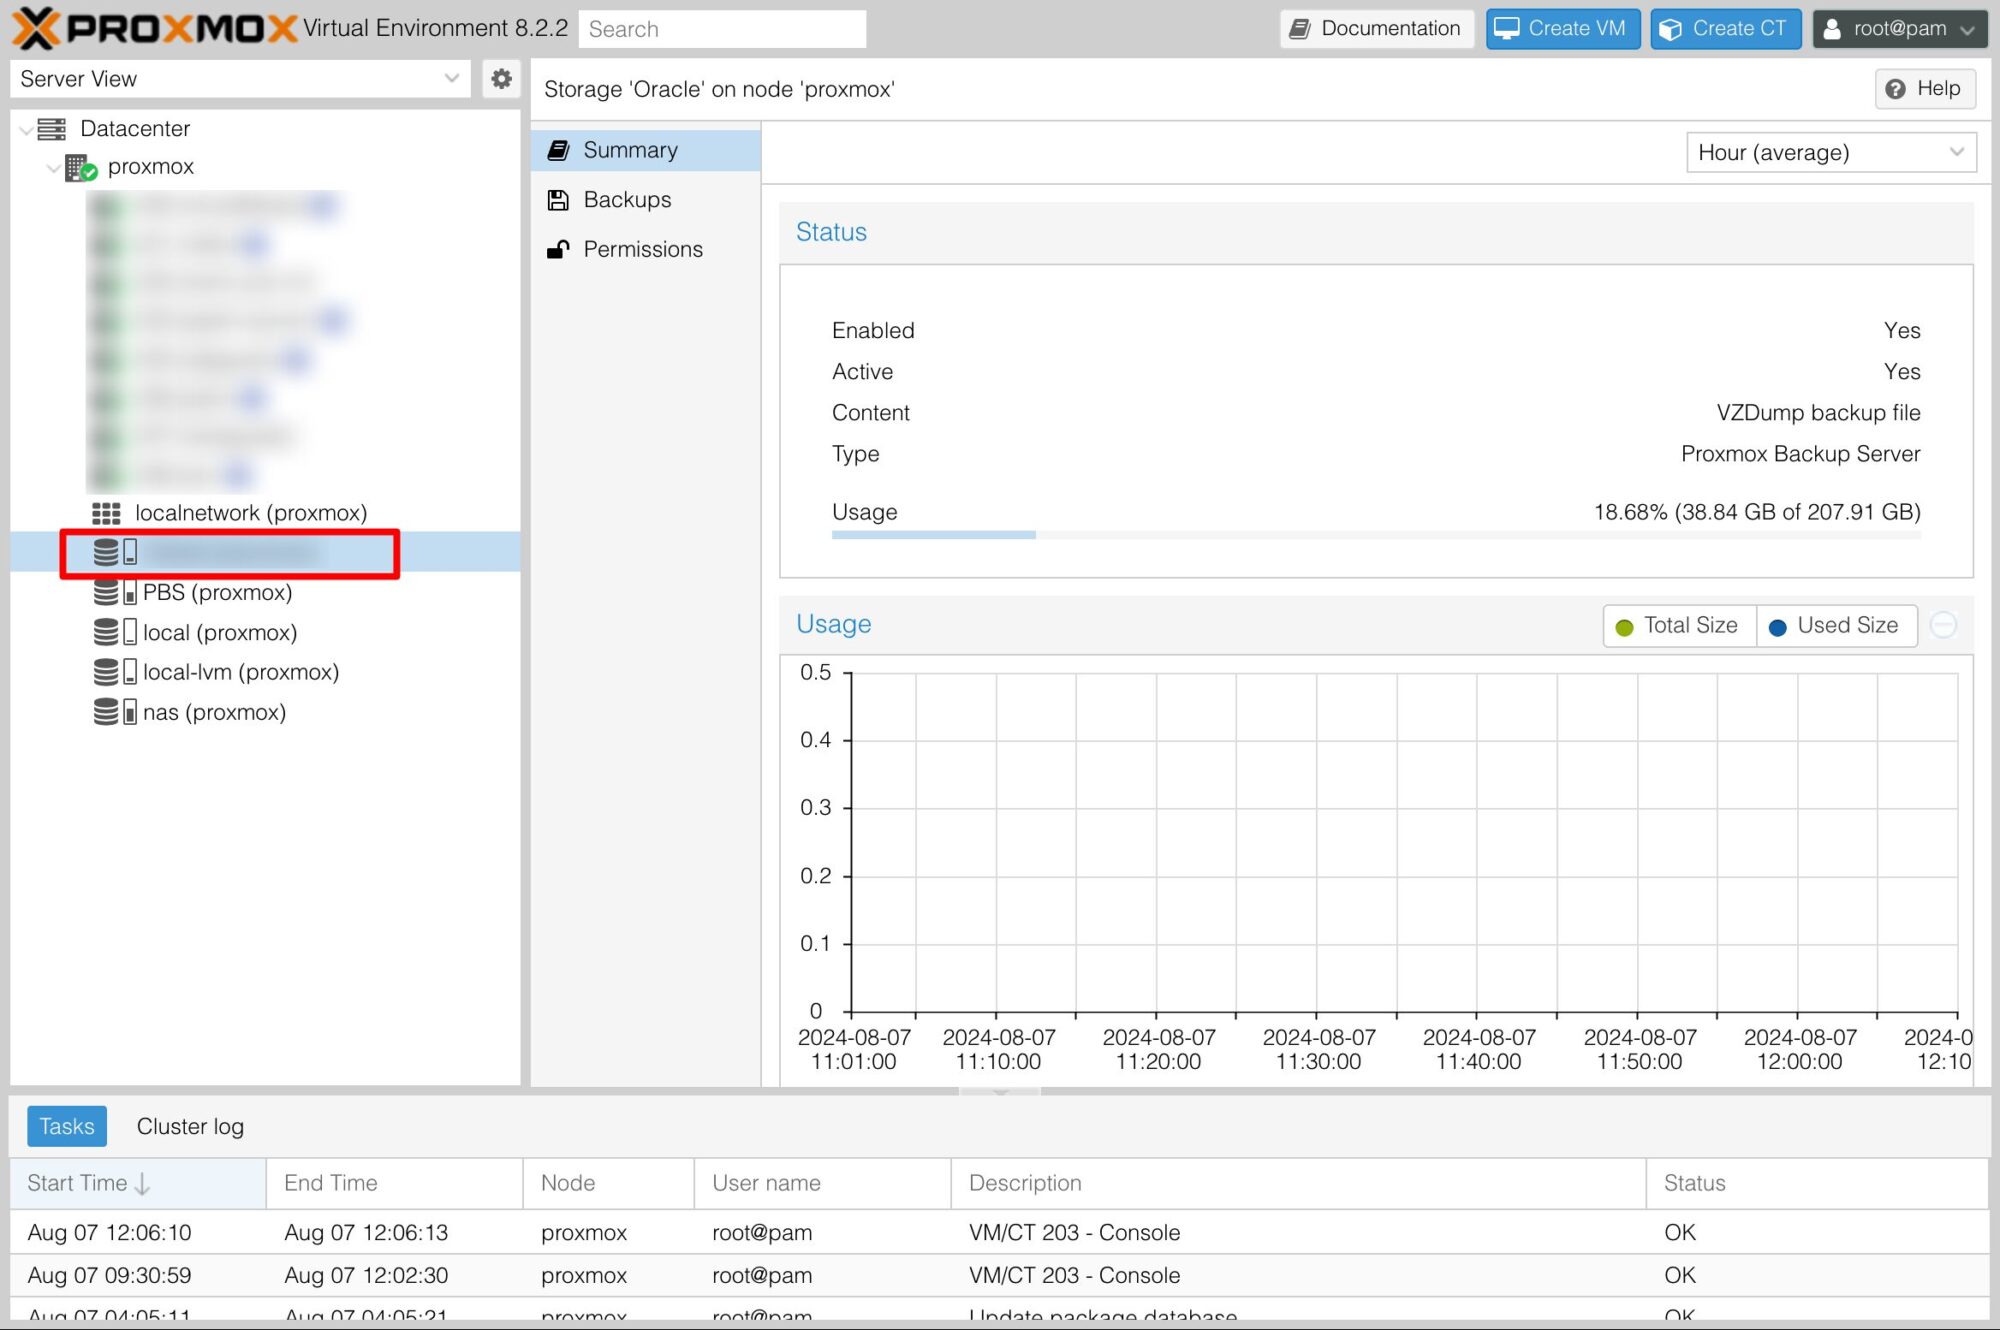
Once completed, you will see a new storage area appear in the left menu of Proxmox.
6. Schedule VM/LXC backups
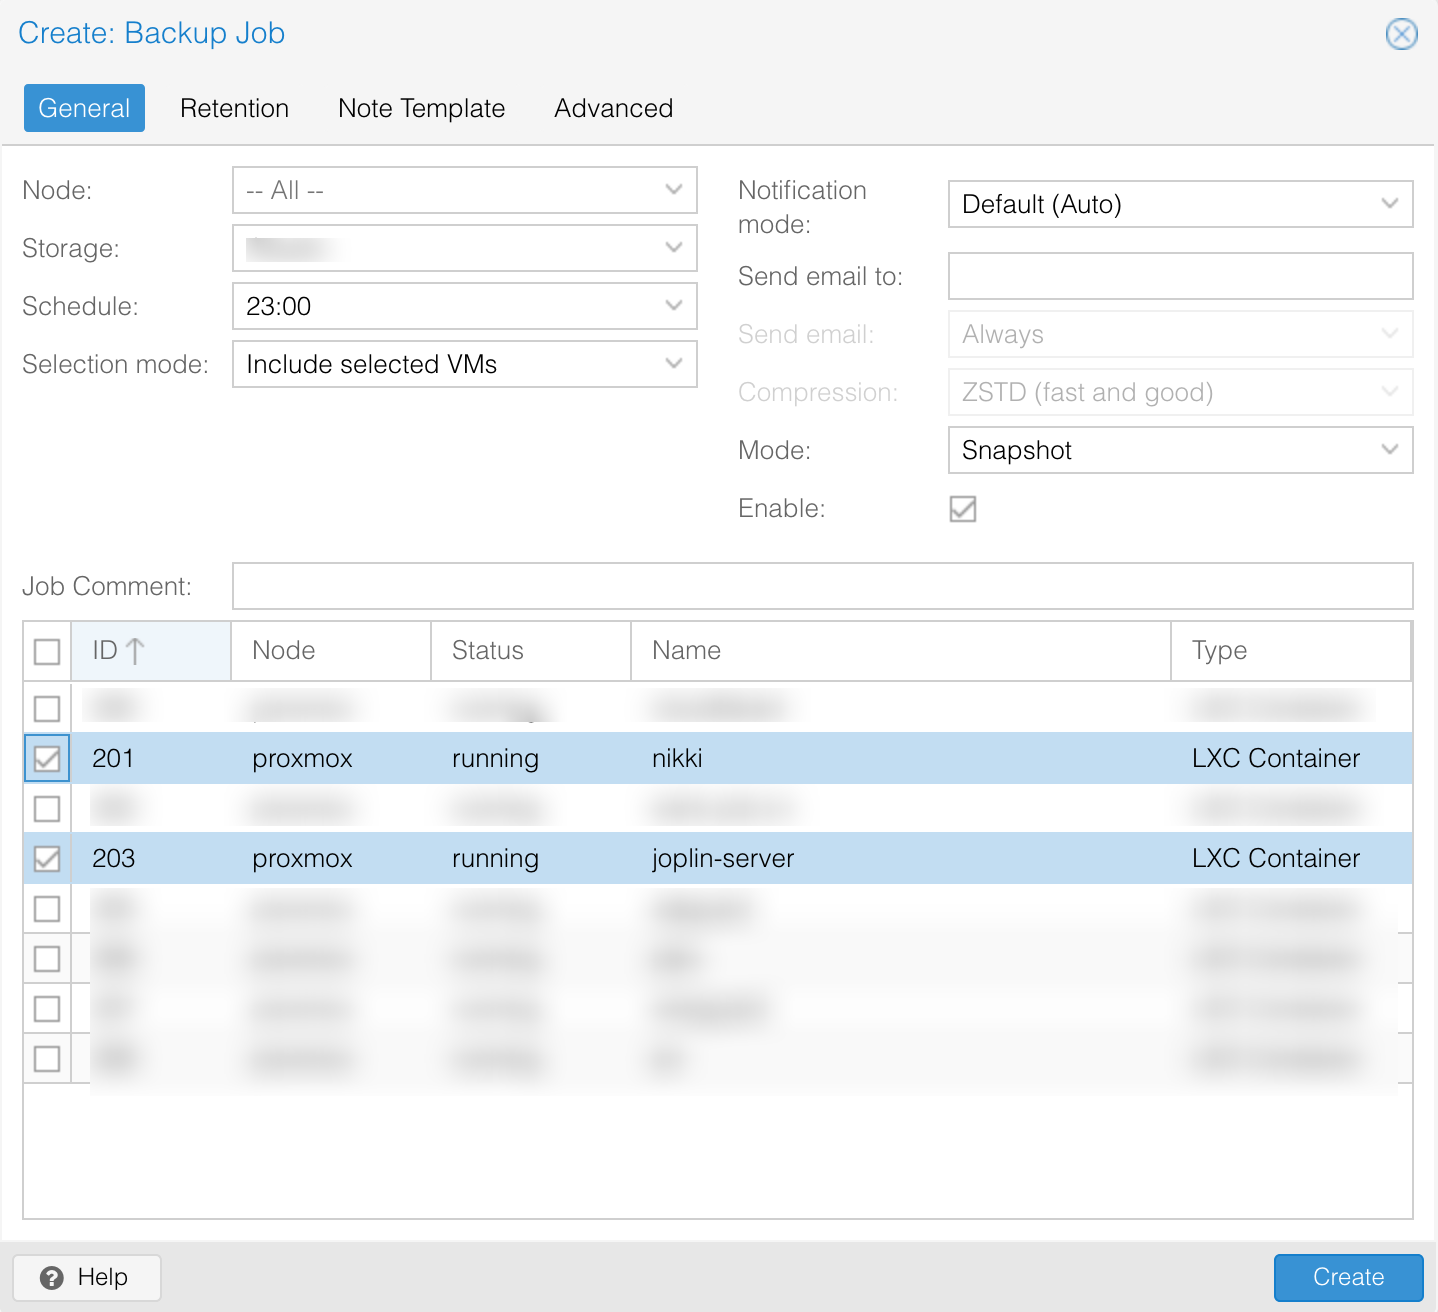
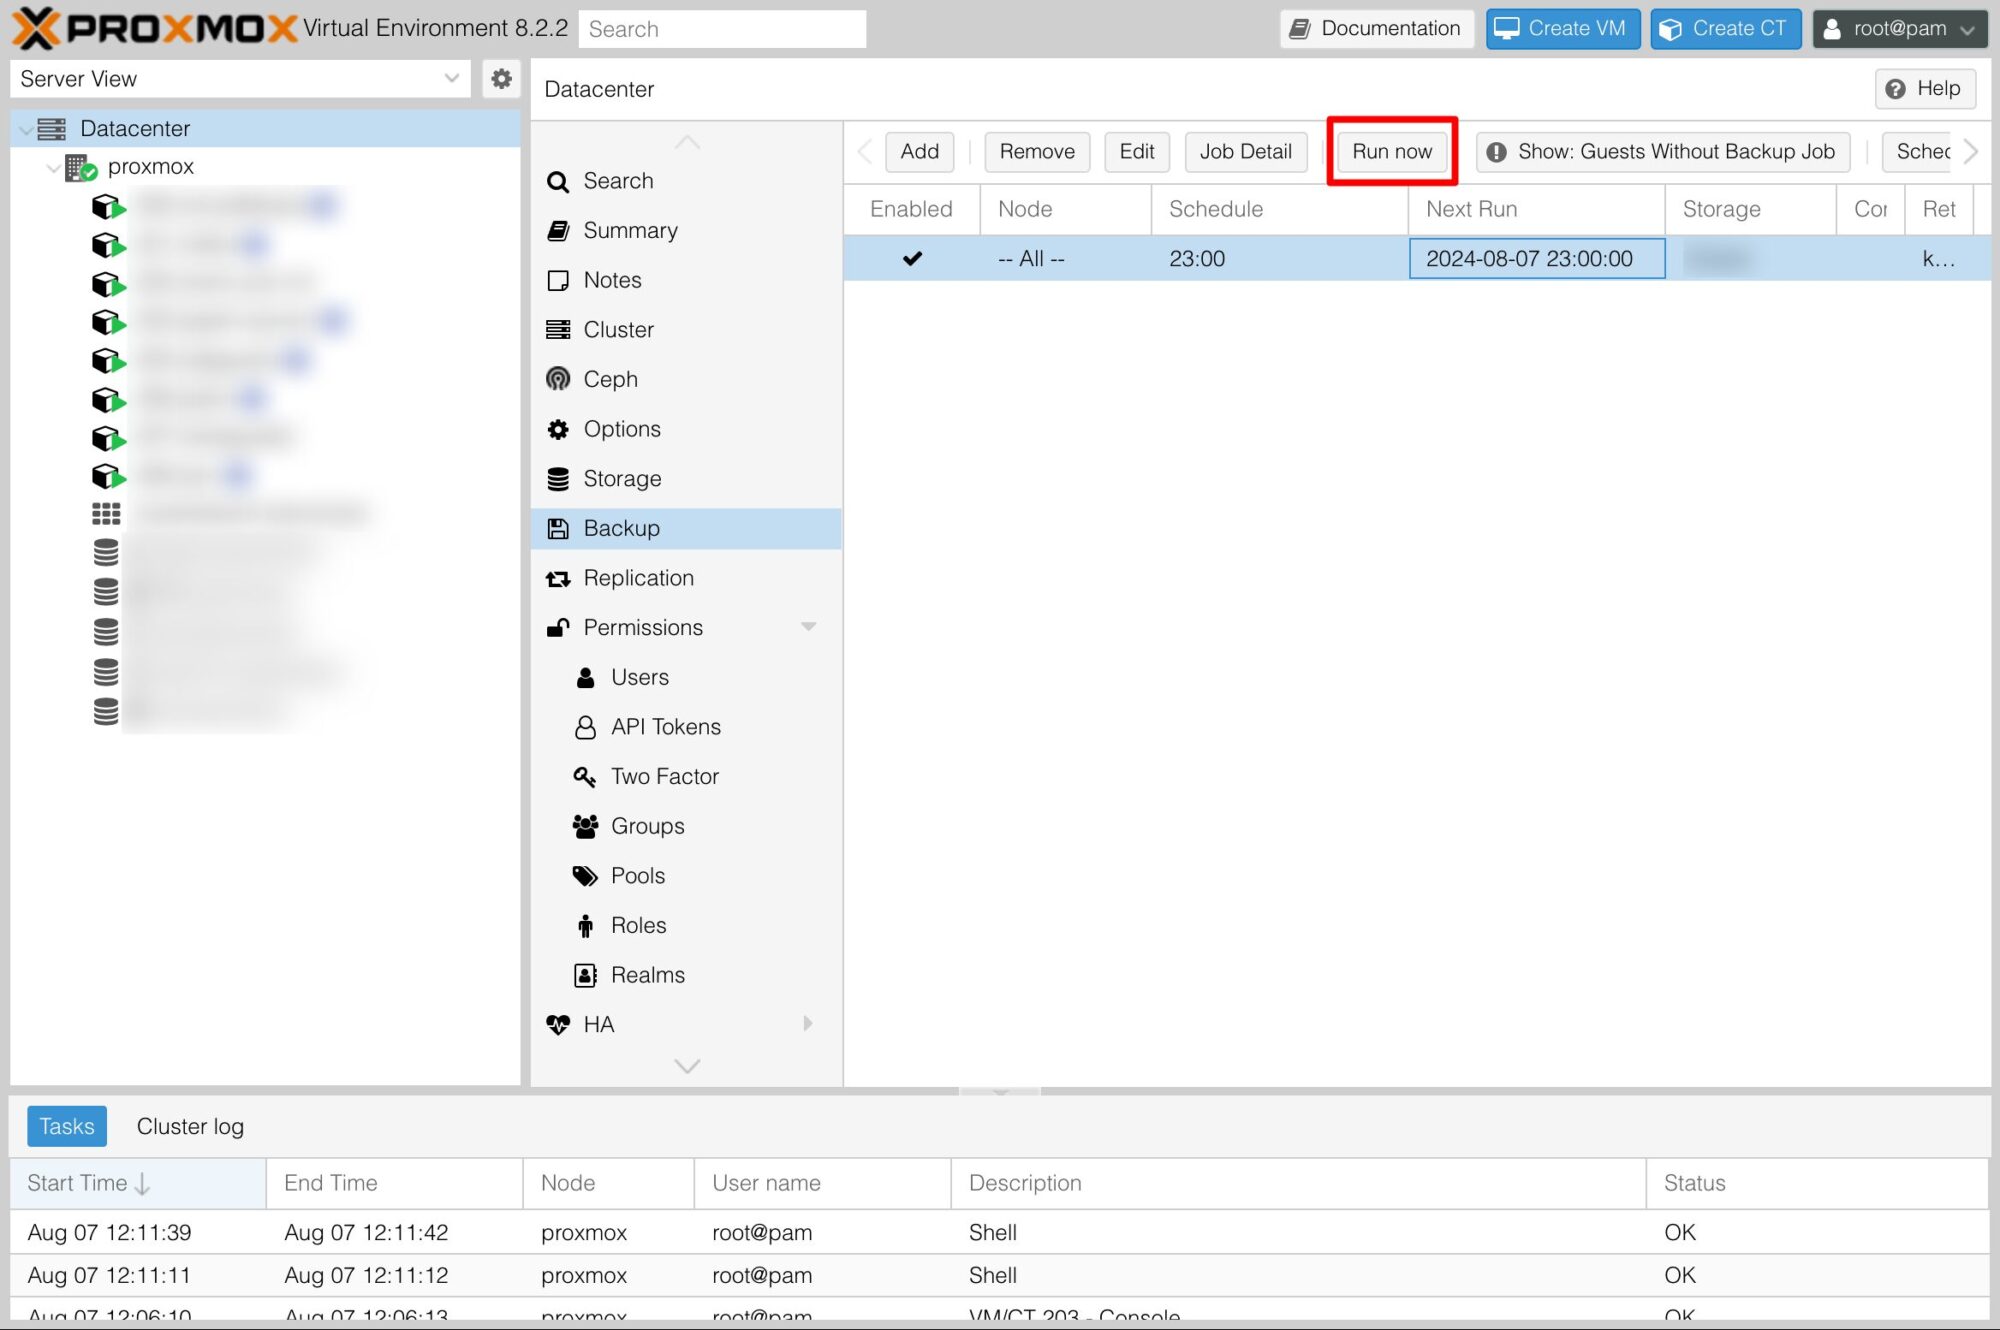
Go to Datacenter -> Backup, click Add button to create a new backup schedule.
- Storage: select the name of the PBS just added to Proxmox
- Schedule: select a backup schedule according to your needs
- Selection mode: Include selected VM, then select the VMs, LXCs to backup
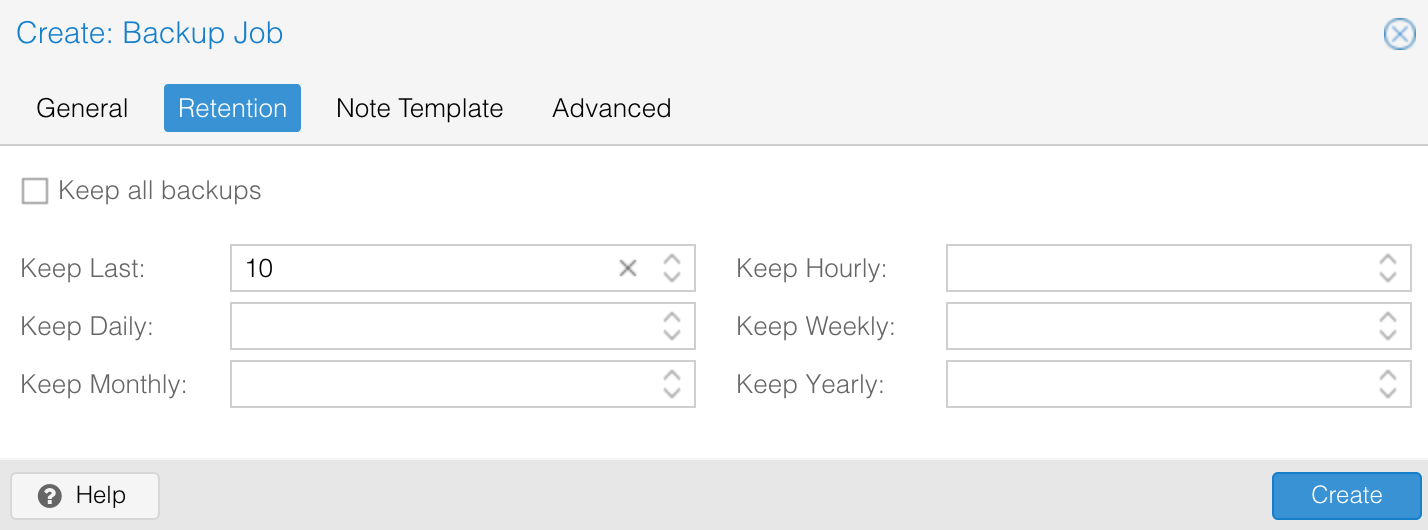
Click on the Retention tab to configure the number of backups to store. I choose Keep Last: 10, which means the 10 most recent backups will be stored, older ones will be automatically deleted.
Once created, you can click the Run now button to have it execute the task immediately.
Depending on the capacity of the VM / LXC and the quality of the connection, the backup time will vary. After the backup is successful, the Promox Backup Server will display information about the backups that have just been uploaded from Proxmox.
7. Restore VM/LXC from backup
Follow these steps to restore VM / LXC from backup
- Access the Storage section
- Select Backups
- Select the backup to restore
- Click the Reset button
- Customize the parameters then click the Restore button
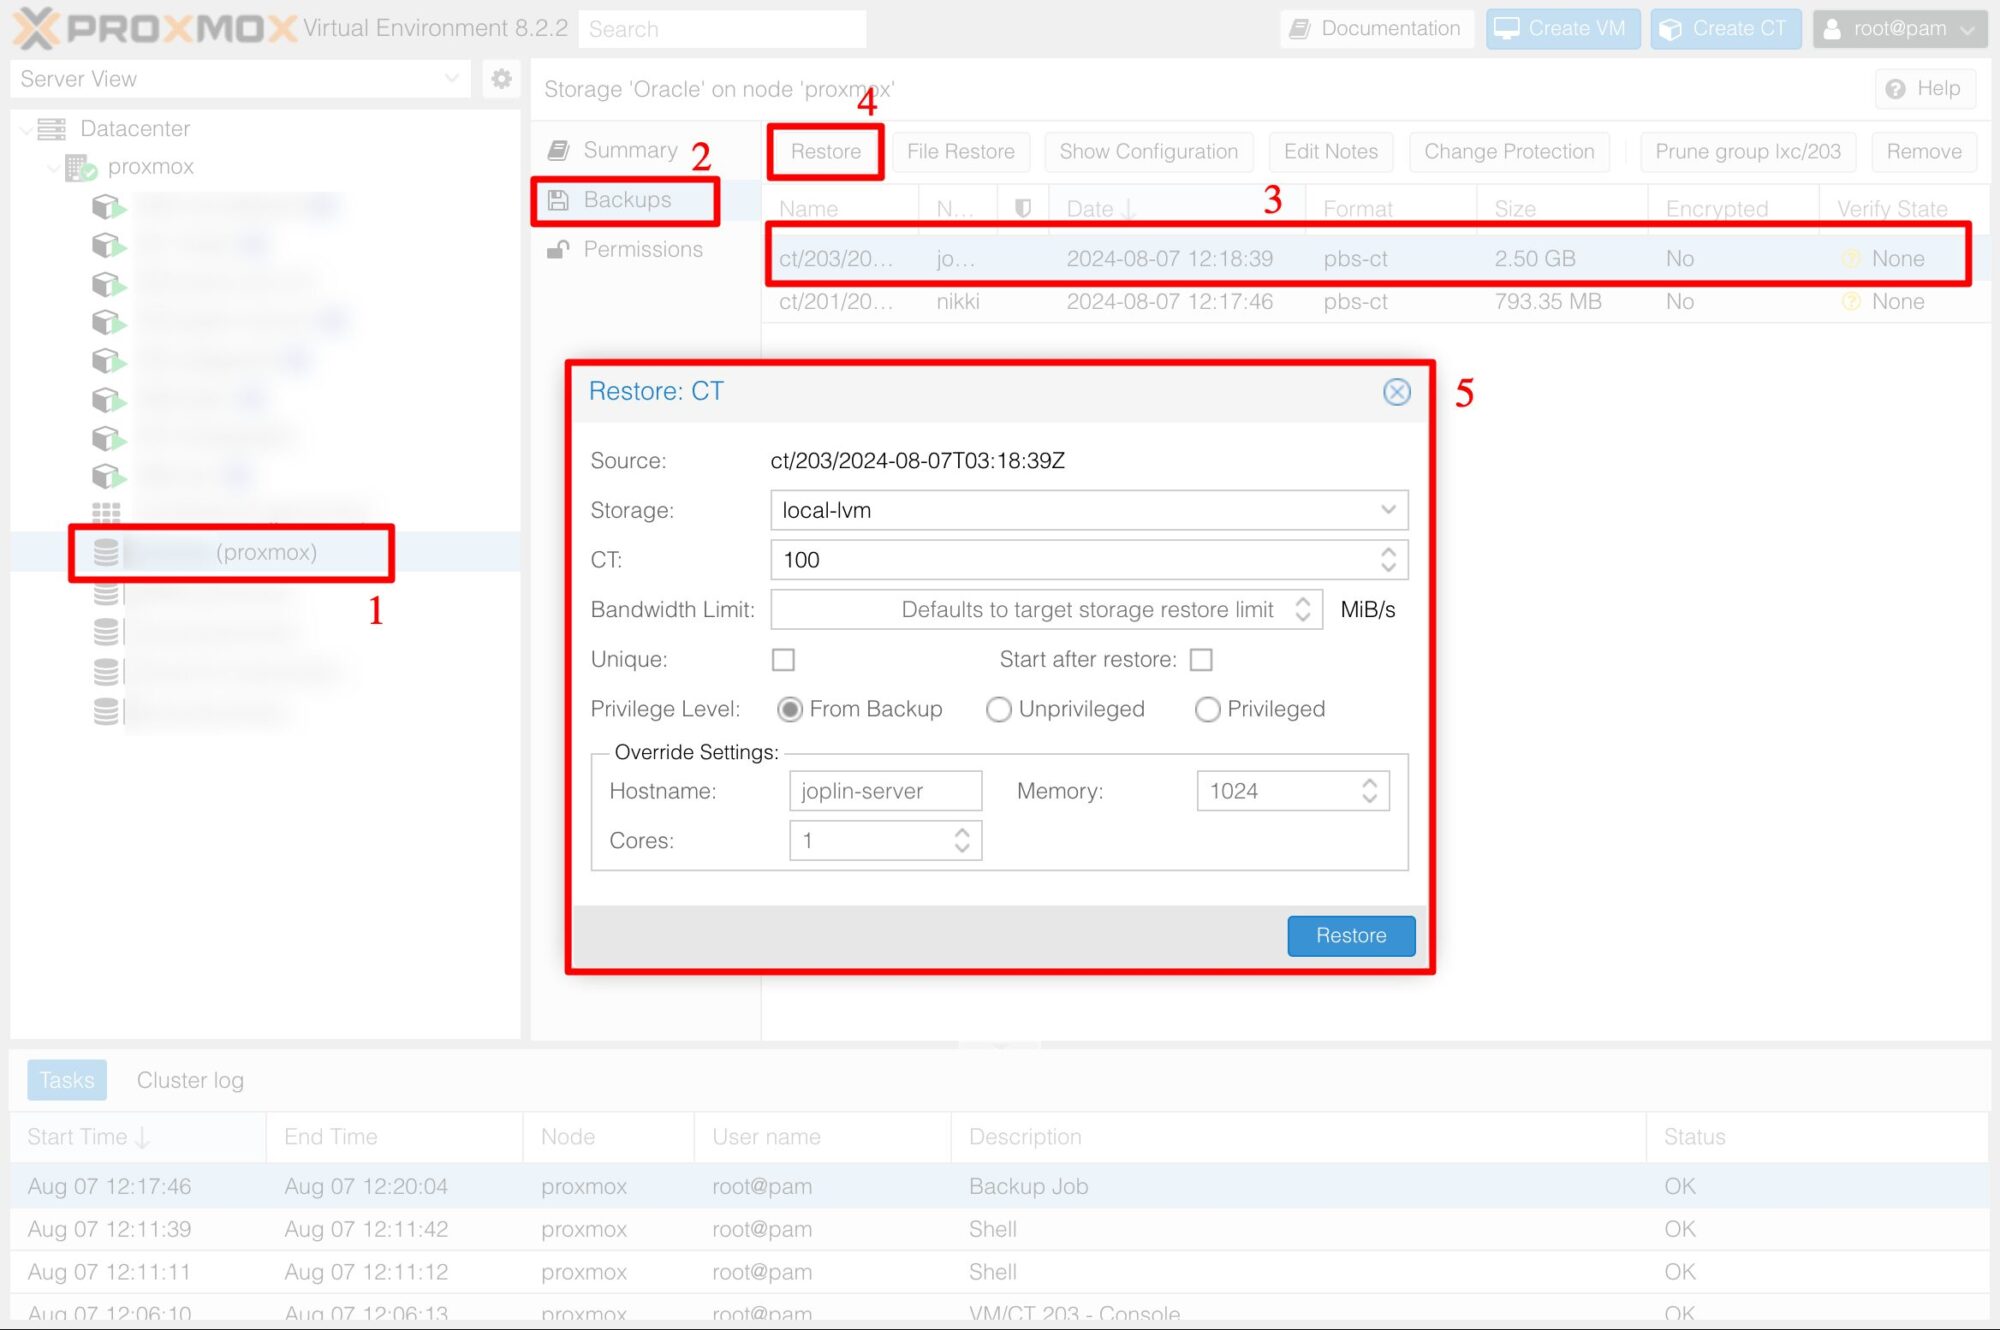
Wait a few minutes for Proxmox to download the backup from PBS and restore it to the system.
The Proxmox Backup Server user guide is over. Good luck!
Comment Policy: We truly value your comments and appreciate the time you take to share your thoughts and feedback with us.

Note: Comments that are identified as spam or purely promotional will be removed.

To enhance your commenting experience, consider creating a Gravatar account. By adding an avatar and using the same e-mail here, your comments will feature a unique and recognizable avatar, making it easier for other members to identify you.

Please use a valid e-mail address so you can receive notifications when your comments receive replies.