When setting up web services in homelab, one problem I had to solve was “How can we best access these services from the Internet?“
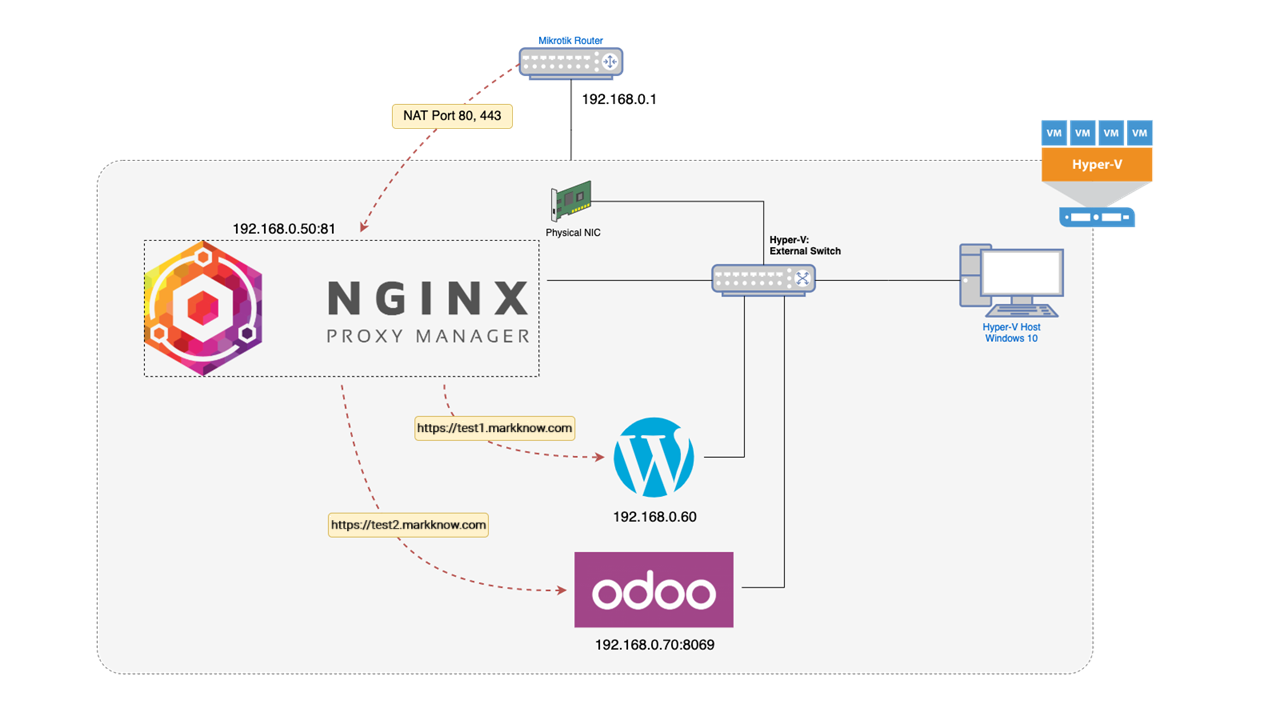
For example: My Homelab has a WordPress website on a virtual machine with an IP address 192.168.0.60 and 1 Odoo website on virtual machine with address 192.168.0.70.
I want to access these two services from outside through the following 2 domain names:
- WordPress: access via domain name
https://test1.markknow.com - Odoo: access via domain name
https://test2.markknow.com
Both domains require connection via HTTPS protocol, using port 443 on 2 different LAN IPs. Meanwhile, the network Router can only configure NAT port 443 from the WAN to an internal IP address in the LAN. What to do now?
The only way to solve this problem is to use Reverse Proxy to act as an intermediary to receive connections from the client and forward it to the corresponding Server.
What is Reverse Proxy?
In the information network system, a reverse proxy is a type of proxy server that mediates between a server and clients sending requests. It controls client requests, which, if valid, are routed to the appropriate servers. (Wikipedia)
I have tried many different Reverse Proxy solutions: Apache, Nginx, HAProxy, Treafik,… but most of them are complicated and difficult to use. Only until found Nginx Proxy Manager, managing Reverse Proxy in your Homelab has become much simpler and more convenient.
This article will show you how to install and configure Nginx Proxy Manager to manage network services in Homelab more conveniently.
Below is the LAN network connection diagram I used for this article.
I. Introducing Nginx Proxy Manager
Nginx Proxy Manager (NPM) is a Docker-based application that helps you easily configure Reverse Proxy for network services installed in homelab or VPS. It also comes with a free SSL certificate generator from Let’s Encrypt.
Features
- Security-based and user-friendly management interface Tabler
- Easily configure domain forwarding and redirection without knowing anything about how to configure Nginx.
- Generate a free SSL certificate from Let’s Encrypt
- Create an access list and set up secure HTTP authentication for the server
- Advanced Nginx configuration depending on usage needs
- Manage accounts, permissions and work history.
II. System Preparation
To use Nginx Proxy Manager, you need to prepare the following steps
- Access the main network router in your home and navigate to the NAT / Port Forwarding setup area
- Configure NAT Port Forwarding on the Router for two ports 80 (HTTP) and 443 (HTTPS) to redirect to the computer / virtual machine where Nginx Proxy Manager is installed.
- Set up Dynamic DNS for the domains you need to use to access your home intranet.
- Nginx Proxy Manager will mediate requests from clients to web services in the internal network.
III. Install Nginx Proxy Manager
1. Install Docker and Docker-Compose
Refer to the following article to learn how to install Docker & Docker-Compose on your computer
2. Create file compose.yml
Log in with SSH to your computer and create a file compose.yml for Nginx Proxy Manager
mkdir nginxproxymanager
cd nginxproxymanager
nano compose.ymlCode language: Bash (bash)
Enter the following content and save.
services:
  app:
    image: 'docker.io/jc21/nginx-proxy-manager:latest'
    restart: unless-stopped
    ports:
      - '80:80'
      - '81:81'
      - '443:443'
    volumes:
      - ./data:/data
      - ./letsencrypt:/etc/letsencryptCode language: YAML (yaml)
3. Enable Nginx Proxy Manager
docker compose up -dCode language: Nginx (nginx)If you are not familiar with working with the command interface, you can use Portainer’s Stack function to replace steps 2 and 3.
4. Access WebUI
Access the Nginx Proxy Manager Web UI interface by address
http://127.0.0.0:81Code language: JavaScript (javascript)If you install on a virtual machine, access the Web UI according to the machine’s IP address
http://<IP Address>:81Code language: JavaScript (javascript)Log in with the default Admin account below
Email:    admin@example.com
Password: changemeCode language: CSS (css)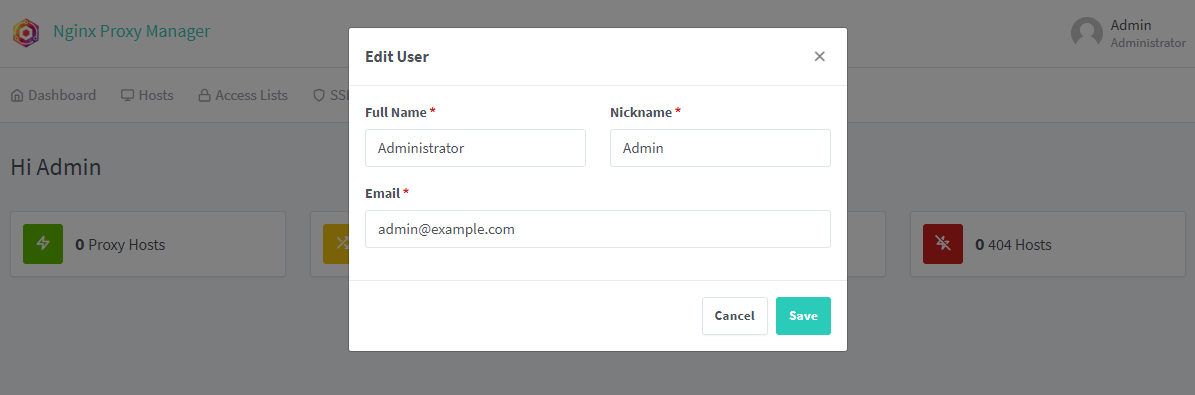
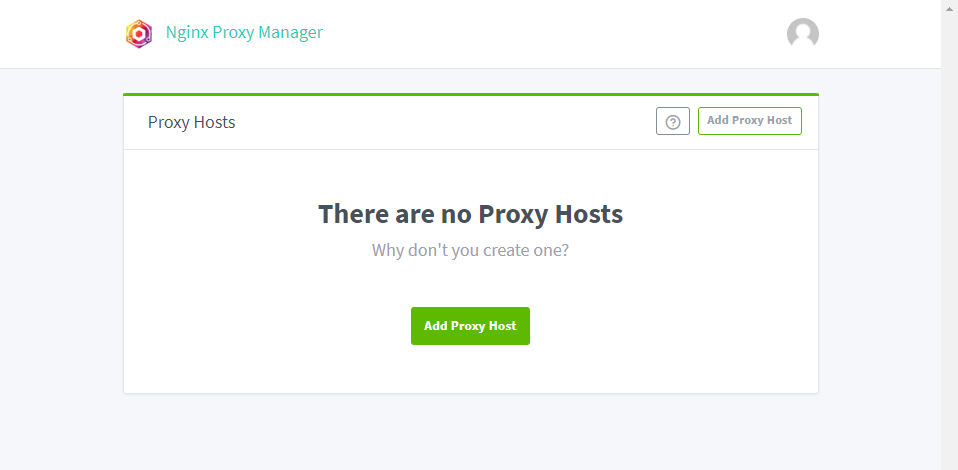
IV. Create Proxy Host
I will create 2 Proxy Hosts for 2 web services WordPress and Odoo as mentioned at the beginning of the article
- Domain name
https://test1.markknow.comforward to WordPress on LAN IP192.168.0.60 - Domain name
https://test2.markknow.comforwarded to Odoo on LAN IP192.168.0.70
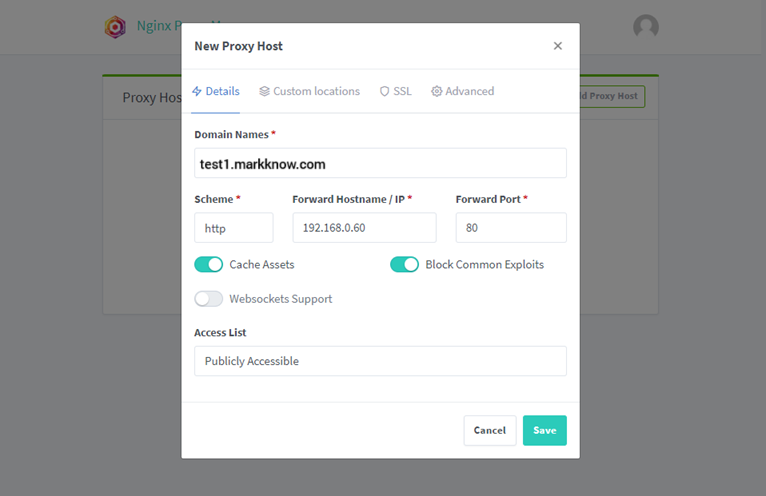
1. Create a Proxy Host for WordPress with an SSL certificate
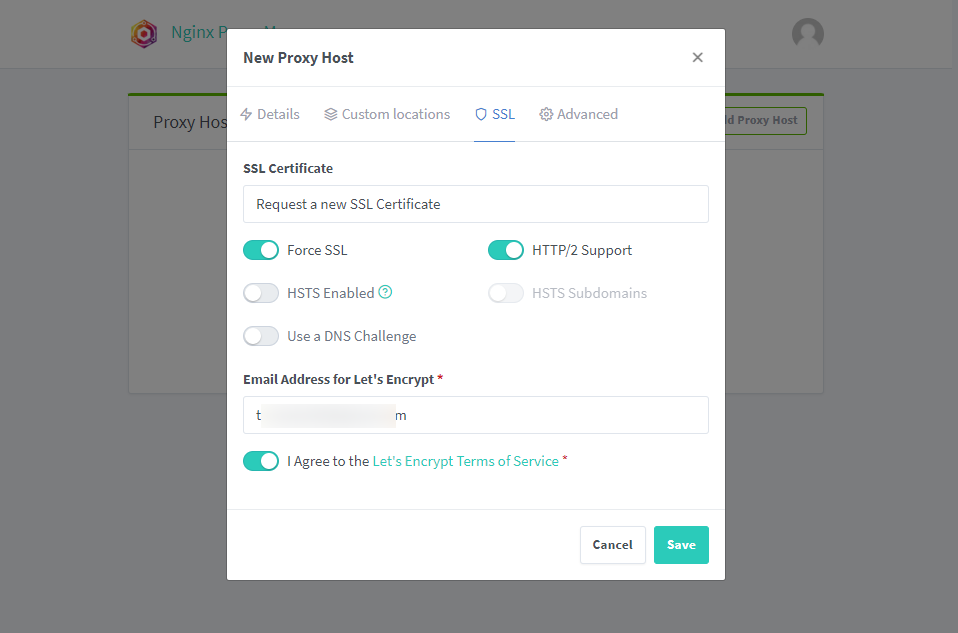
Wait a few minutes for the system to authenticate and create an SSL certificate for the domain name. If you receive an Internal Error, you need to check the following parameters:
- Is the domain name pointing to the correct Public IP of your home network?
- Have you adjusted NAT Port 80 and 443 to Nginx Proxy Manager’s LAN IP on the Router?

If SSL authentication is successful, you will see the SSL column with the words Let’s Encrypt written on it.
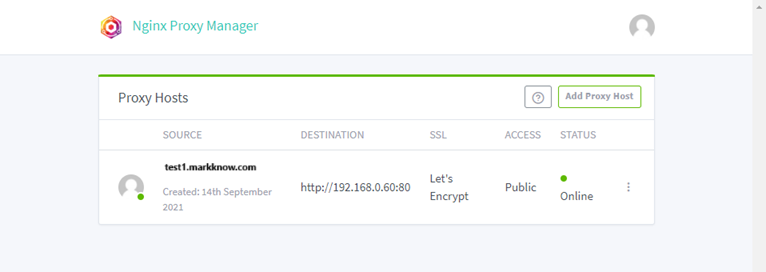
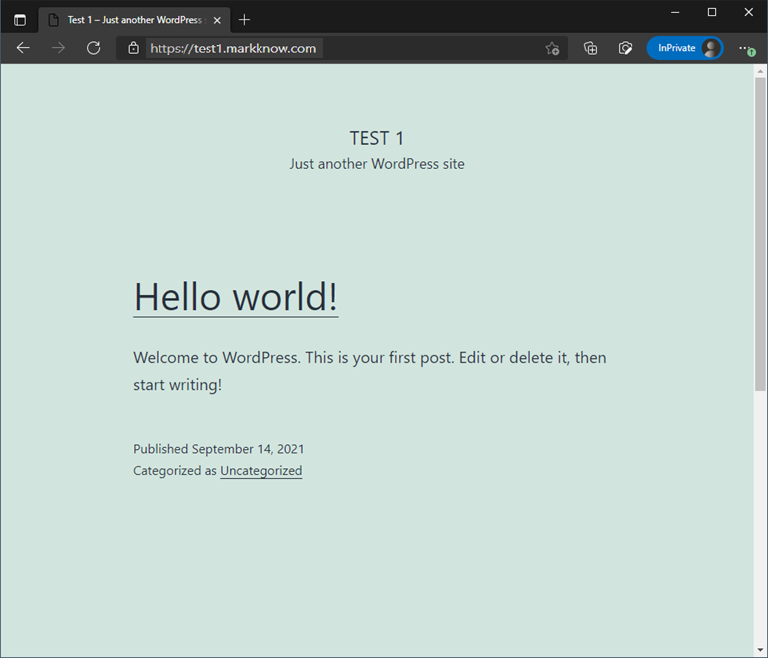
I was able to successfully access WordPress from the address https://test1.markknow.com
Note: Try accessing the domain name using 4G on your phone to check if the service is working properly. If you use your home network to access the service through the domain name used to set up the Proxy Host, you will likely receive an inaccessible error. Reason: Router has not configured Hairpin NAT.
2. Create Proxy Host for Odoo with SSL certificate (DNS Challenge)
I will create another Proxy Host for Odoo. But this time we will switch to SSL authentication using DNS Challenge, instead of having to point the domain name to the machine’s IP.
With SSL authentication using DNS Challenge, I do not need to point the domain name to the Public IP immediately. Instead, Let’s Encrypt will authenticate the domain name through the TXT Record set up on DNS.
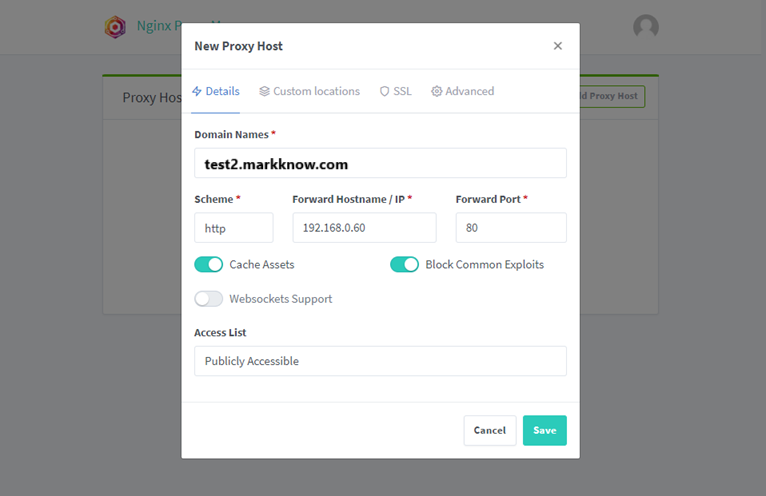
Because Odoo works on the portal 8069 so I will enter 8069 Go to the Forward Port box.
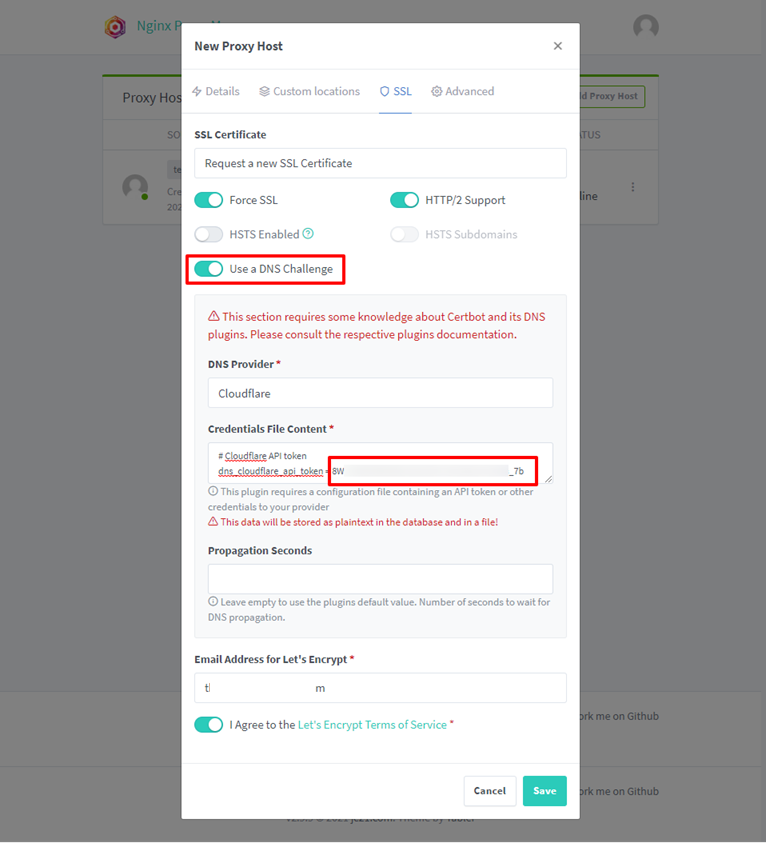
Click on the SSL tab to create an SSL certificate for the domain name test2.markknow.com.
- Click select Use a DNS Challenge to use domain name validation via DNS.
- DNS Provider: choose Cloudflare
- Credentials File Content: import into Cloudflare’s Token API.
You need to create a new API Token on Cloudflare to fill in the Credentials File Content box: see instructions here.
Click Save. Wait about 1-2 minutes for NPM to authenticate the domain name through Cloudflare and create a Proxy Host.
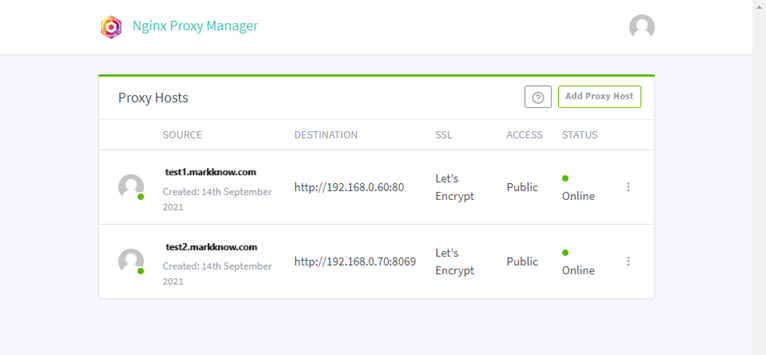
https://test2.markknow.comAfter successfully creating a Proxy Host, you need to adjust the domain name to point to the correct Public IP address at home. Odoo is now accessible through the new domain https://test2.markknow.comno need to type long lines https://192.168.0.70:8069 again.
https://test2.markknow.comV. Summary
I have just introduced Nginx Proxy Manager – an application that helps manage Reverse Proxy simply and effectively for web applications in Homelab. Besides the Proxy Host creation feature I shared above, NPM has many other functions such as creating Redirection Hosts, Stream, 404 Hosts,… for you to explore.
Wishing you success in installing and configuring Nginx Proxy Manager and managing Homelab more effectively!
Comment Policy: We truly value your comments and appreciate the time you take to share your thoughts and feedback with us.

Note: Comments that are identified as spam or purely promotional will be removed.

To enhance your commenting experience, consider creating a Gravatar account. By adding an avatar and using the same e-mail here, your comments will feature a unique and recognizable avatar, making it easier for other members to identify you.

Please use a valid e-mail address so you can receive notifications when your comments receive replies.