Continuing with the articles about homelab, today will be an article instructing how to install Docker and Docker Compose on Ubuntu 20.04 LTS.
I. What is Docker?
Docker is an open source virtualization platform that helps you build, test and deploy applications as containers on any server environment, virtual machine. It allows you to create an independent environment, separate from the operating system to launch or develop applications. This virtual environment is called a container.
Benefits of Docker over using VMs
- Turn container on/off in seconds.
- Easily set up your work environment and share it with others
- Containers operate independently, without affecting other containers or the Host OS.
- Optimize server resources if you need to run multiple independent applications compared to separating each application on each virtual machine.
I am currently using Docker on a Hyper-V virtual machine at home to run Adguard Home , Omada Controller, Nginx Proxy Manager.
II. Install Docker
Update 08/01/2024 : You can replace all the Docker and Docker Compose installation steps below with just the following 2 command lines
curl -fsSL https://get.docker.com -o get-docker.sh
sh get-docker.sh
Code language: Shell Session (shell)
1. Prepare the system
First, install the necessary packages to prepare for Docker installation.
sudo apt-get update
sudo apt-get install apt-transport-https ca-certificates curl gnupg lsb-release
Code language: Shell Session (shell)
Add Docker’s official GPG key to the system
curl -fsSL https://download.docker.com/linux/ubuntu/gpg | sudo gpg --dearmor -o /usr/share/keyrings/docker-archive-keyring.gpg
Code language: Nginx (nginx)
Set up Docker repository
echo \
  "deb [arch=$(dpkg --print-architecture) signed-by=/usr/share/keyrings/docker-archive-keyring.gpg] https://download.docker.com/linux/ubuntu \
  $(lsb_release -cs) stable" | sudo tee /etc/apt/sources.list.d/docker.list > /dev/null
Code language: Shell Session (shell)
If you are installing Ubuntu 20.04 running on a Raspberry Pi, use this command to set up the Docker repository
 echo \
  "deb [arch=arm64 signed-by=/usr/share/keyrings/docker-archive-keyring.gpg] https://download.docker.com/linux/ubuntu \
  $(lsb_release -cs) stable" | sudo tee /etc/apt/sources.list.d/docker.list > /dev/null
Code language: Shell Session (shell)
2. Install Docker Engine
Use apt-get (or apt) to install Docker on your machine
sudo apt-get update
sudo apt-get install docker-ce docker-ce-cli containerd.ioCode language: Shell Session (shell)
To confirm Docker is installed and working properly, check by doing the following
sudo docker run hello-worldCode language: Dockerfile (dockerfile)If you receive the Hello from Docker! message as shown below, Docker is ready to run.
Hello from Docker!
This message shows that your installation appears to be working correctly.

To generate this message, Docker took the following steps:
 1. The Docker client contacted the Docker daemon.
 2. The Docker daemon pulled the "hello-world" image from the Docker Hub.
    (amd64)
 3. The Docker daemon created a new container from that image which runs the
    executable that produces the output you are currently reading.
 4. The Docker daemon streamed that output to the Docker client, which sent it
    to your terminal.

To try something more ambitious, you can run an Ubuntu container with:
 $ docker run -it ubuntu bash

Share images, automate workflows, and more with a free Docker ID:
 <https://hub.docker.com/>

For more examples and ideas, visit:
 <https://docs.docker.com/get-started/>
Code language: Shell Session (shell)
3. Add user to Docker group
To manage Docker under a non-root account (no need to insert sudowhen typing commands), you need to assign the current account to the Docker user group as follows
sudo groupadd docker
sudo usermod -aG docker $USER
Code language: Nginx (nginx)
III. Install Docker Compose
Next, install Docker Compose so you can quickly initialize applications that use multiple containers later.
Docker Compose is a tool used to define and run Docker programs using multiple containers (multi-containers). With Docker Compose, we use a YAML file to set up the services needed for the program. Finally, with a single command, you will set up a complete system without having to run each command line, which is time-consuming.
1. Installation on Intel / AMD computers
Download the latest version of Docker Compose to your computer
sudo curl -L "https://github.com/docker/compose/releases/download/1.29.2/docker-compose-$(uname -s)-$(uname -m)" -o /usr/local/bin/docker-compose
Code language: Bash (bash)
Set executable permissions for docker-compose and create symlink
sudo chmod +x /usr/local/bin/docker-compose
sudo ln -s /usr/local/bin/docker-compose /usr/bin/docker-compose
Code language: Bash (bash)
Check if docker-compose has been installed successfully with the command
docker-compose --version2. Install on ARM (Rapsberry Pi)
For computers using ARM-based CPUs like Raspberry Pi or Oracle Cloud Ampere, you need to install Docker-Compose via Python as below.
# Install required packages
sudo apt update
sudo apt install -y python3-pip libffi-dev

# Install Docker Compose from pip (using Python3)
# This might take a while
sudo pip install docker-compose
Code language: Shell Session (shell)
Check if docker-compose has been installed successfully with the command
docker-compose --version
IV. Setting up WordPress with Docker Compose
I will run a WordPress site on my machine with Docker Compose to test Docker Compose.
First, create a separate folder for the project.
mkdir wordpress
cd wordpressCode language: Bash (bash)
Next create a file docker-compose.ymlto configure the containers needed to run WordPress.
sudo nano docker-compose.ymlCode language: CSS (css)Fill in this information and save.
version: "3.9"

services:
  db:
    image: mysql:5.7
    volumes:
      - db_data:/var/lib/mysql
    restart: always
    environment:
      MYSQL_ROOT_PASSWORD: somewordpress
      MYSQL_DATABASE: wordpress
      MYSQL_USER: wordpress
      MYSQL_PASSWORD: wordpress

  wordpress:
    depends_on:
      - db
    image: wordpress:latest
    volumes:
      - wordpress_data:/var/www/html
    ports:
      - "8000:80"
    restart: always
    environment:
      WORDPRESS_DB_HOST: db:3306
      WORDPRESS_DB_USER: wordpress
      WORDPRESS_DB_PASSWORD: wordpress
      WORDPRESS_DB_NAME: wordpress
volumes:
  db_data: {}
  wordpress_data: {}
Code language: YAML (yaml)
Project Initiation
sudo docker-compose up -d
Code language: Nginx (nginx)
Wait a few minutes for Docker to process the operations: download the wordpress and mysql containers to your computer and initialize the project.
Status: Downloaded newer image for wordpress:latest
Creating wordpress_db_1 ... done
Creating wordpress_wordpress_1 ... done
Code language: Bash (bash)
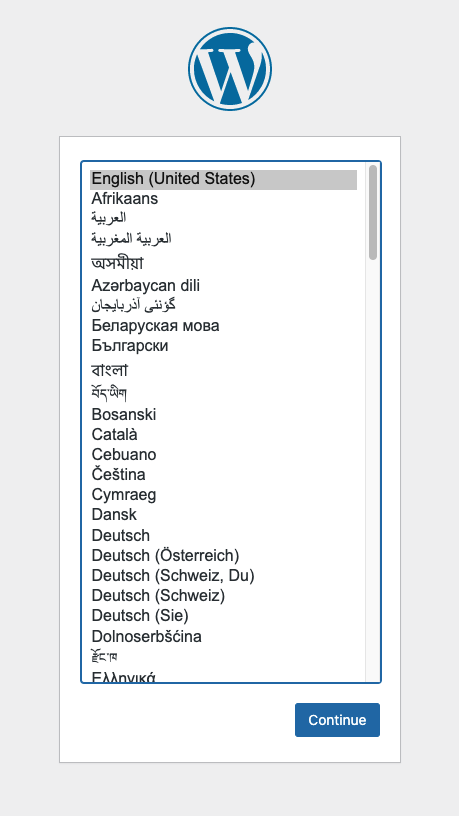
When you see this message, WordPress is ready. Access it at the following address
http://<IP-Adress>:8000
Code language: JavaScript (javascript)
Port 8000 is the port you declared in the docker-compose.yml file. If the server does not use port 80, you can change the ports line to
ports:
      - "80:80"
Code language: JavaScript (javascript)
Rerun docker-compose and access WordPress directly by IP address
http://<IP-Adress>/
Code language: JavaScript (javascript)
Now WordPress installation is done.
If you no longer need WordPress, you can disable the application using the command
sudo docker-compose down
Code language: Nginx (nginx)
If you find using CLI commands difficult to remember, you can install Portainer to manage Docker.
Comment Policy: We truly value your comments and appreciate the time you take to share your thoughts and feedback with us.

Note: Comments that are identified as spam or purely promotional will be removed.

To enhance your commenting experience, consider creating a Gravatar account. By adding an avatar and using the same e-mail here, your comments will feature a unique and recognizable avatar, making it easier for other members to identify you.

Please use a valid e-mail address so you can receive notifications when your comments receive replies.
