In the first articles about Docker and Docker Compose on the blog, I introduced Portainer – an intuitive, efficient Docker management application, suitable for beginners.
However, in practice, I never use Portainer to manage Docker. There are 3 main reasons:
- I like using command line to work with Docker, it feels faster than using GUI.
- Sometimes you want to use Portainer’s interface to conveniently monitor parameters and update containers. But Portainer does not support managing applications installed via Docker Compose using the command line. It only supports applications installed via the available Stack Management feature.
- Portainer has too many unnecessary features for personal needs, making the interface confusing and difficult to navigate.
I recently discovered Dockge – Docker Manager Application is similar to Portainer but has been optimized and simplified, suitable for Self-Hosting enthusiasts, and feels very suitable for the needs of use. Dockge is the perfect replacement for Portainer for Docker management.
I. Dockge Introduction
Dockge is an application that manages Docker through an intuitive, easy-to-use, easy-to-install web interface. It is developed by the author Louis who created Uptime Kuma – a popular free application for monitoring website uptime.
Dockge Features
- Management Support
compose.yaml- Create / Edit / Activate / Pause / Restart / Delete
- Update Docker image
- Editor for files
compose.yaml - Integrate Web Terminal to type command line commands
- Dockge Agents Support – Install Dockge on multiple servers and manage them all from a single interface.
- Convert command
docker run ...wallcompose.yaml - File
compose.ymlcreated by Dockge is saved in the specified directory. You can use the commanddocker composeto manage by command line - Intuitive interface, easy to use, direct feedback
II. Preparation requirements
To follow the steps in the article, you need to prepare the system as follows:
- VPS installed Linux operating system: CentOS / Debian 11 or higher / Ubuntu
- VPS has Docker and Docker Compose installed. See instructions here.
III. Install Dockge
Install Dockge using the following command
# Create directories that store your stacks and stores Dockge's stack
mkdir -p /opt/stacks /opt/dockge
cd /opt/dockge
# Download the compose.yaml
curl https://raw.githubusercontent.com/louislam/dockge/master/compose.yaml --output compose.yamlCode language: Nginx (nginx)
With this setup, all Docker Compose applications you create with Dockge will be saved in the directory /opt/stacks
If you already have Docker Compose applications running on your system, you should update the file. compose.yml of Dockge, edit the parameter of DOCKGE_STACK_DIR. For example, I usually save Docker Compose folders in /home So need to fix lines 15 and 18 as below.
version: "3.8"services:dockge:image: louislam/dockge:1restart: unless-stoppedports:- 5001:5001volumes:- /var/run/docker.sock:/var/run/docker.sock- ./data:/app/data# Stacks Directory
      # READ IT CAREFULLY. If you did it wrong, your data could end up writing into a WRONG PATH.
      # 1. FULL path only. No relative path (MUST)
      # 2. Left Stacks Path === Right Stacks Path (MUST)
- /home:/homeenvironment:# Tell Dockge where to find the stacks
- DOCKGE_STACKS_DIR=/homeCode language: YAML (yaml)
Enable Dockge
docker compose up -dCode language: Nginx (nginx)Access Dockge via address http://IP:5001
IV. Setting up and managing applications on Dockge
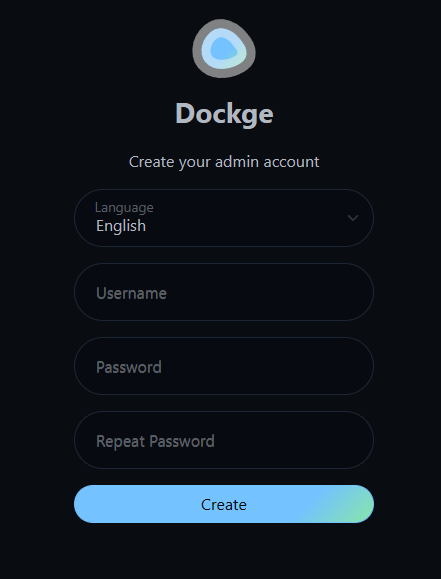
On first visit, you need to create an admin account
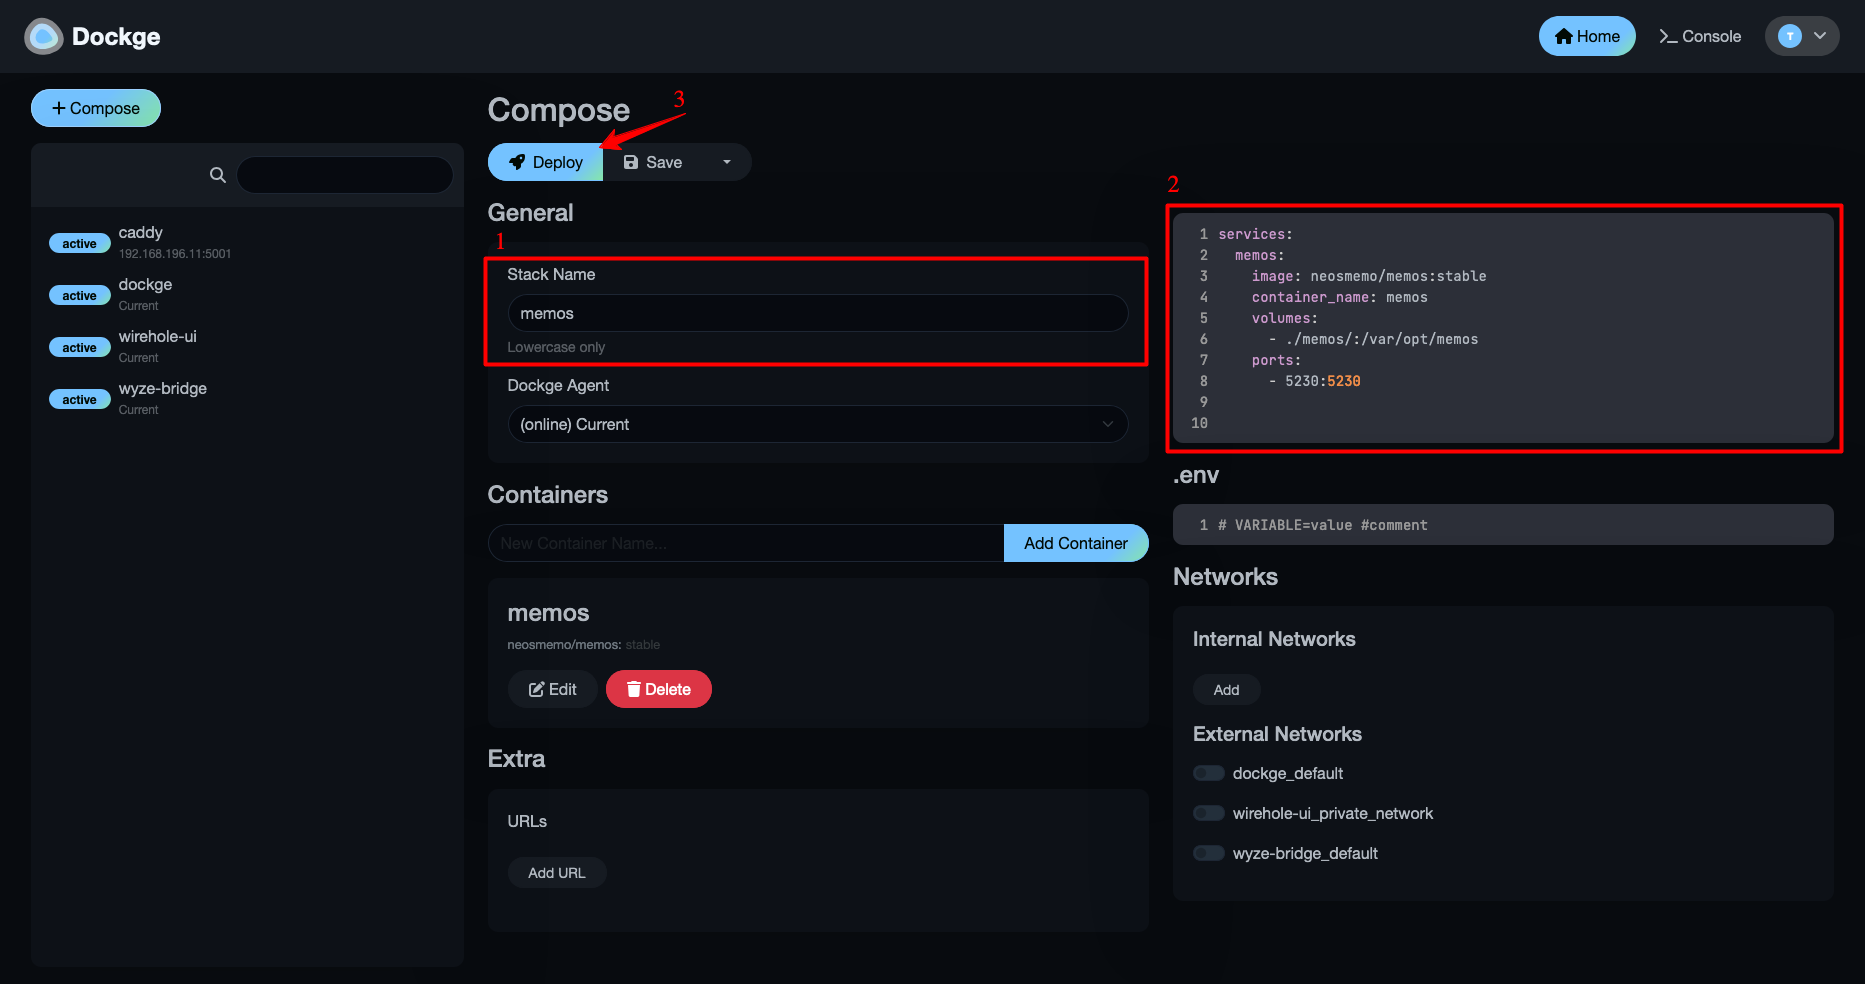
Click the button + Compose to create a new application. Then enter the information:
- Stack Name: the name of the application, it will also be the name of the folder containing the file
compose.yml - Enter the Docker Compose file content into box number 2
- Click Deploy to activate
For example, here I create a Memos application to write notes.
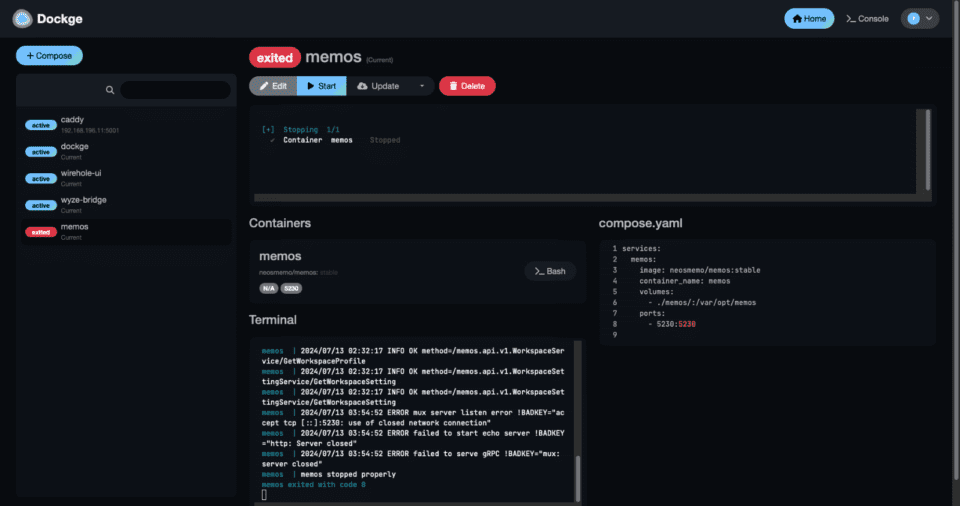
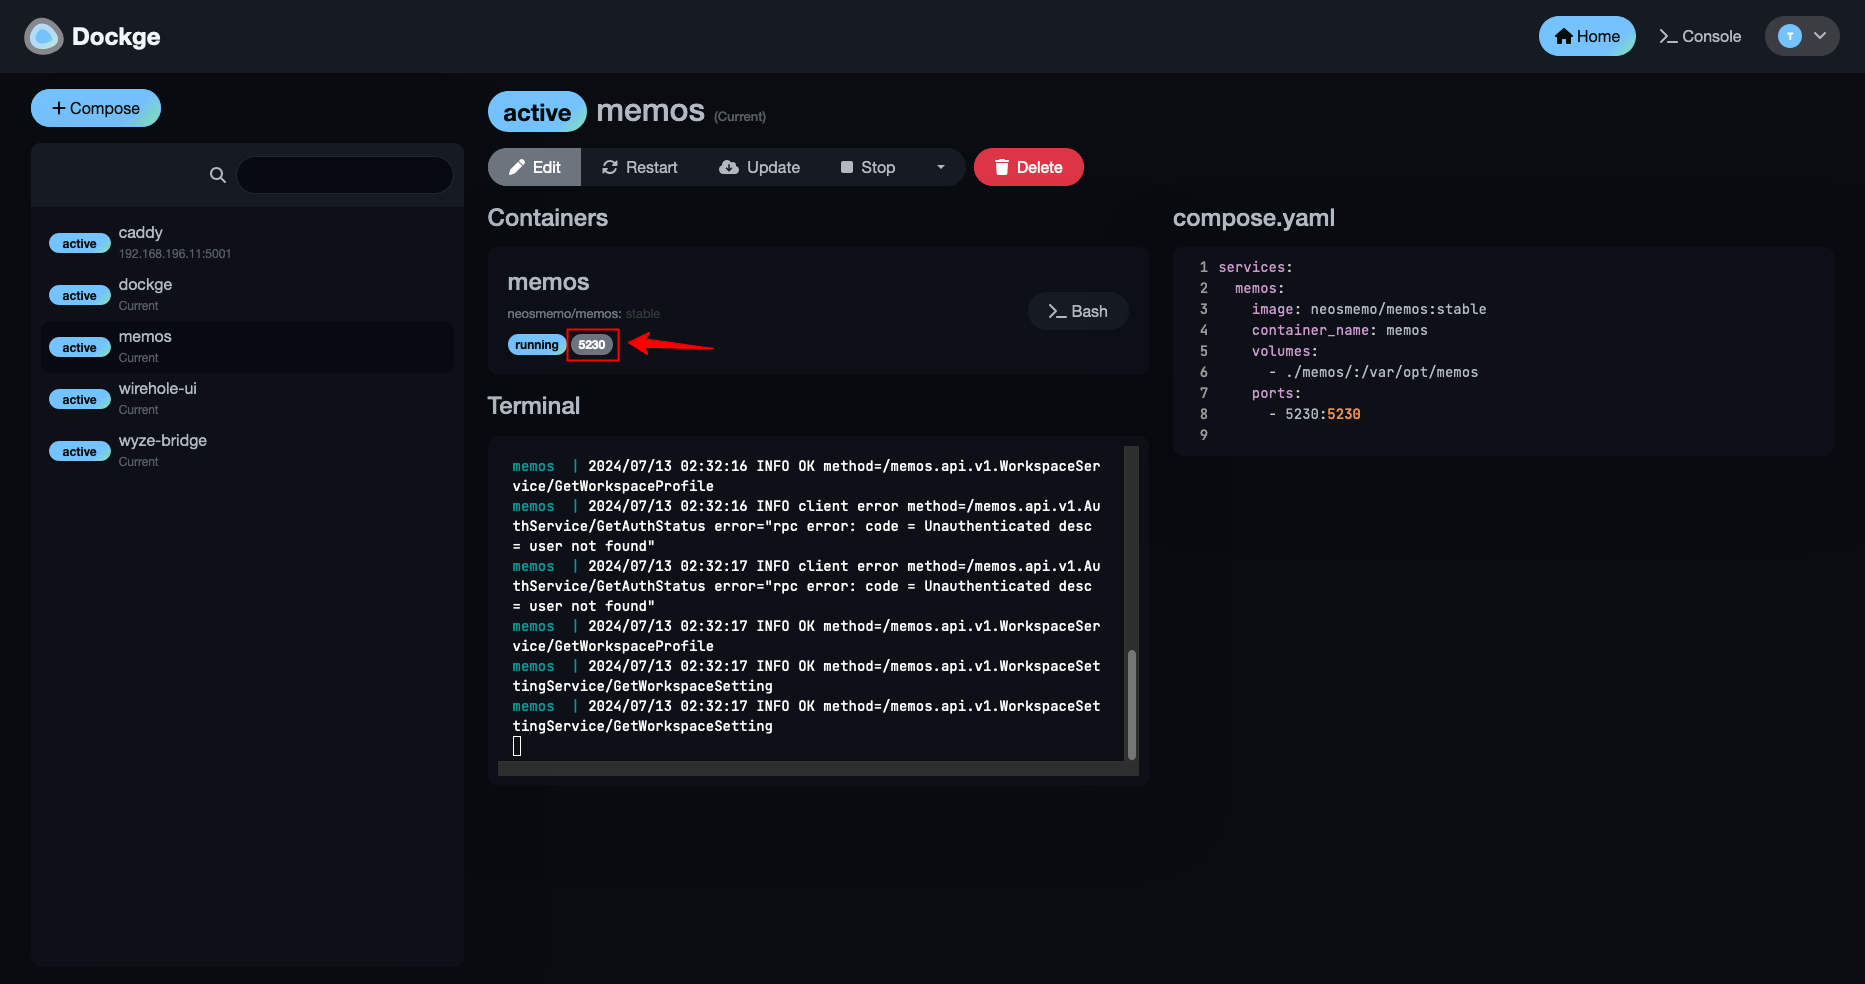
Once Dockge finishes activating the new application, you can click on the port number to access the application.
The toolbar above has buttons for you to manage the application you just created:
- Edit: edit file
compose.yml - Restart: restart
- Update: update to the latest version
- Stop: pause (corresponding to the command)
docker compose stop) - Stop & Reactive: off (corresponding to the command)
docker compose down) - Delete: delete application
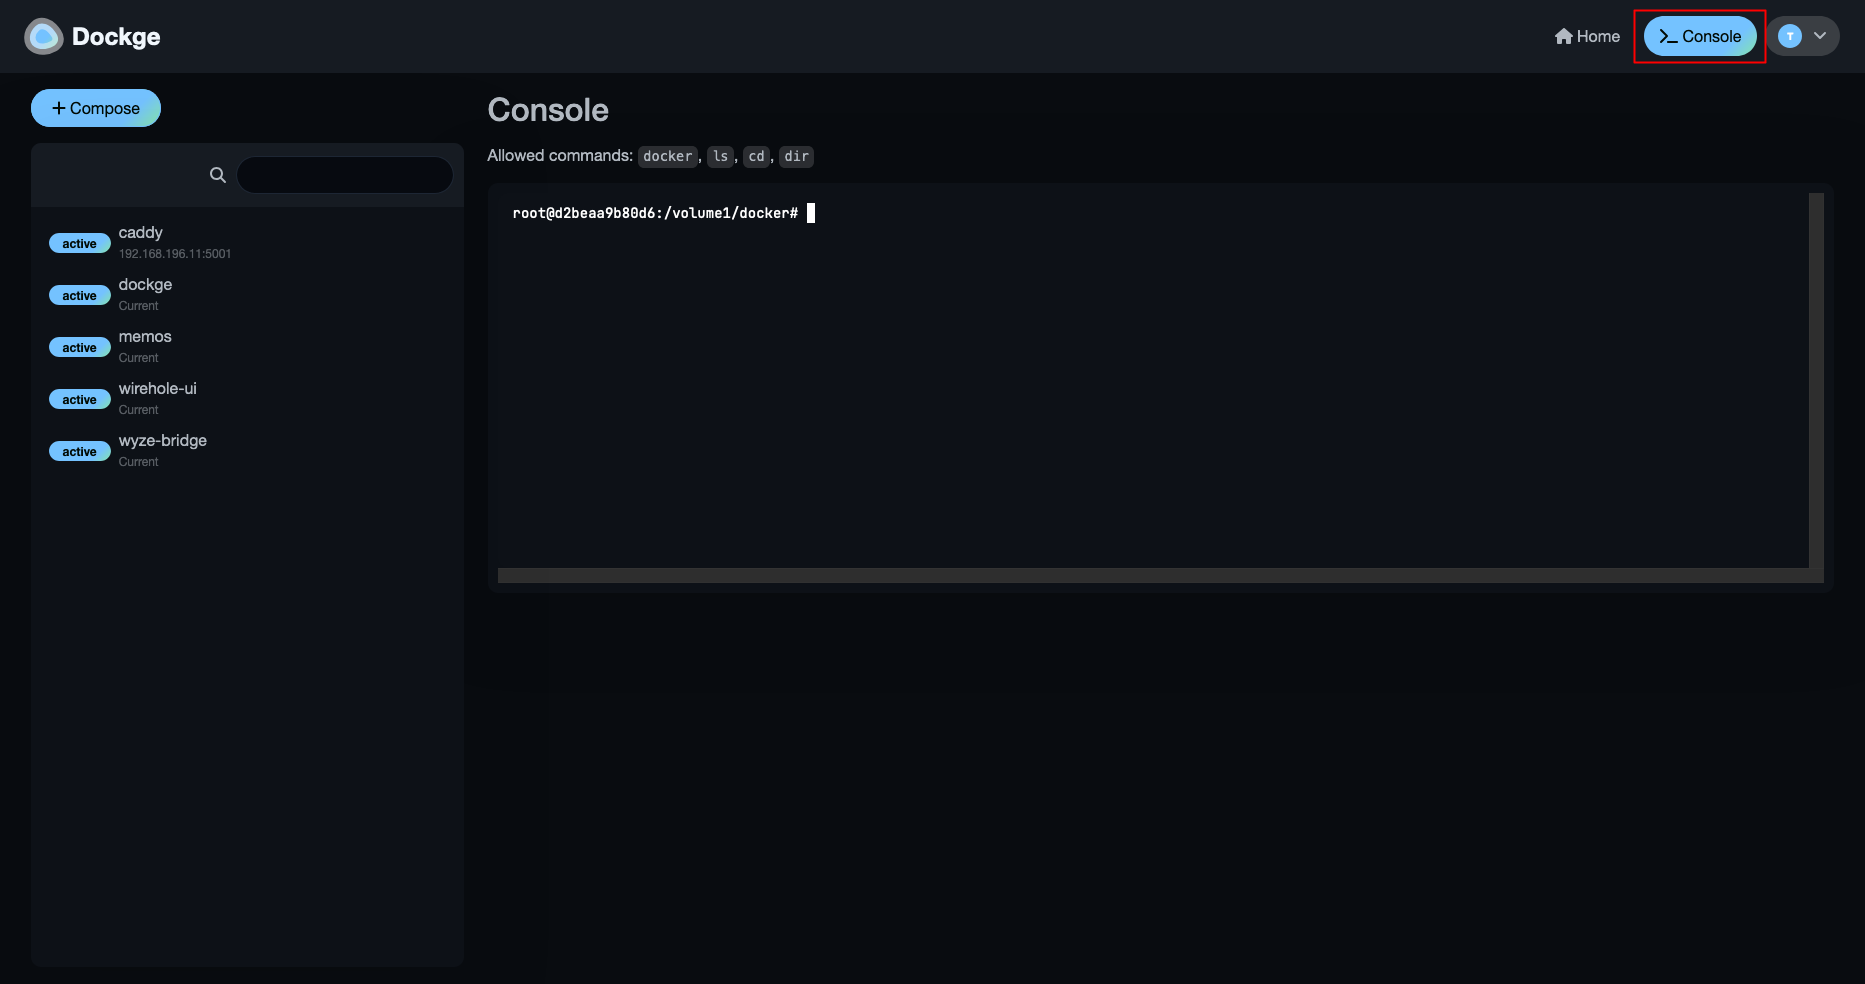
V. Using Console
Docker has a built-in Web Terminal for managing Docker using the command line. Click the Console button in the upper right corner to access the Console. You can type commands into the Console area that appears below.
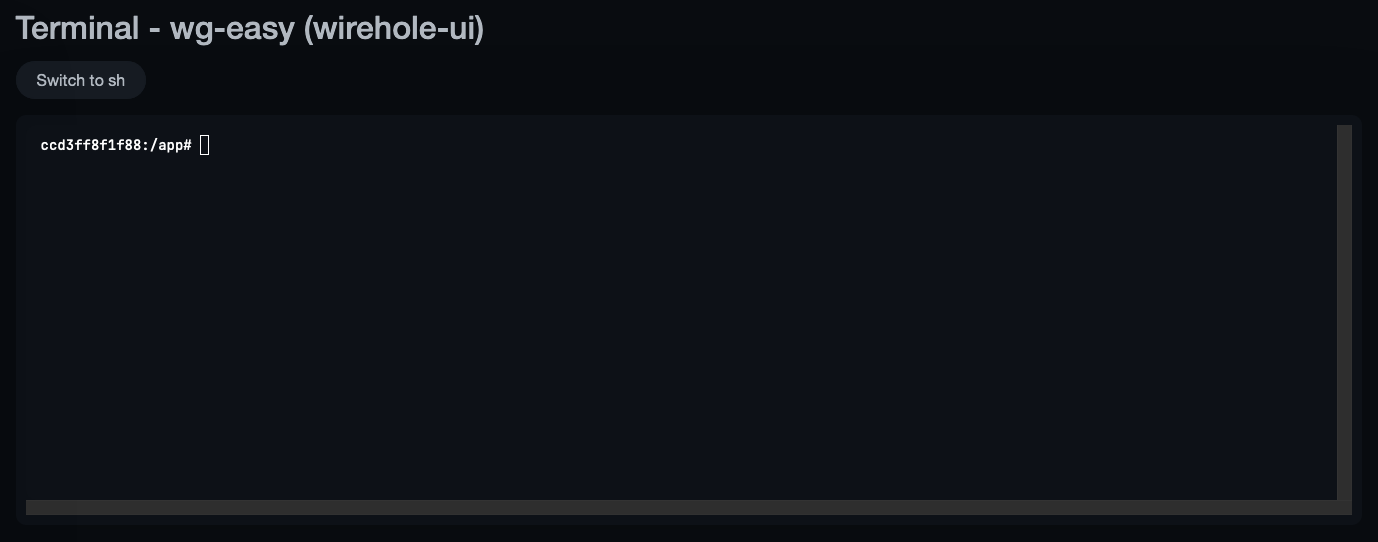
You can also access the Terminal of each container by clicking the >_Bash button
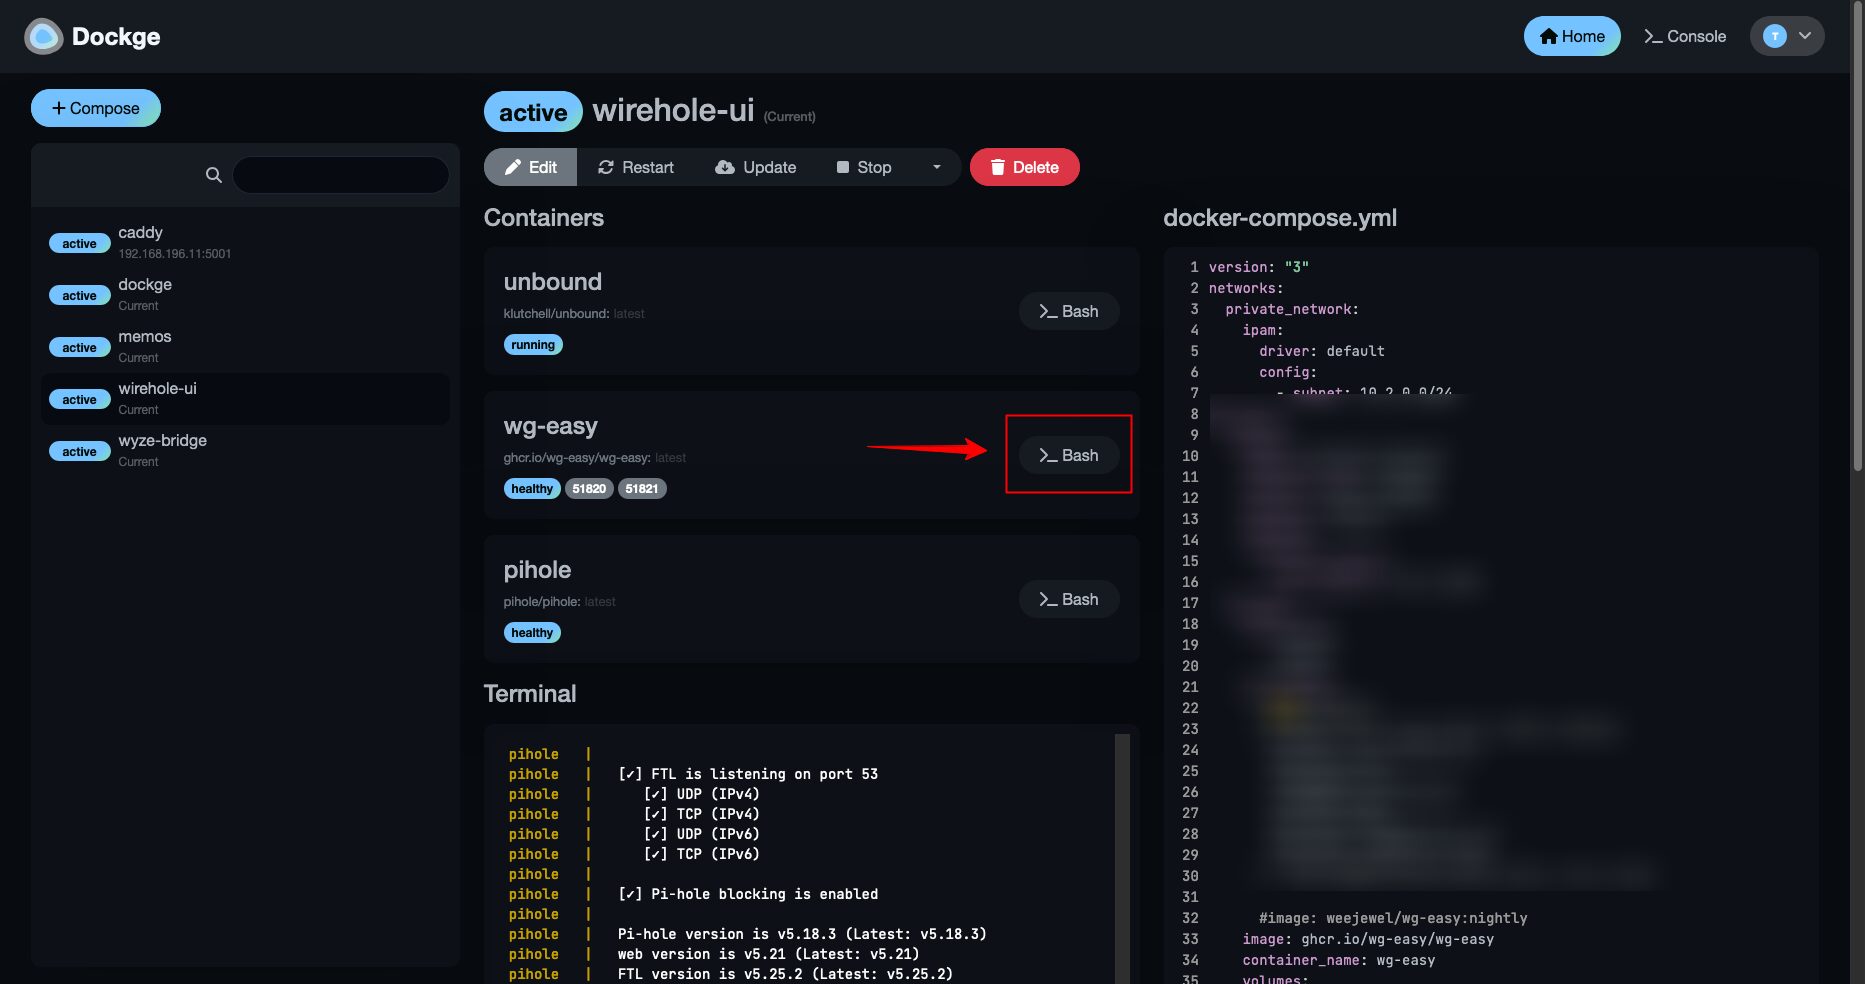
Then you can type commands normally as when operating directly using SSH.
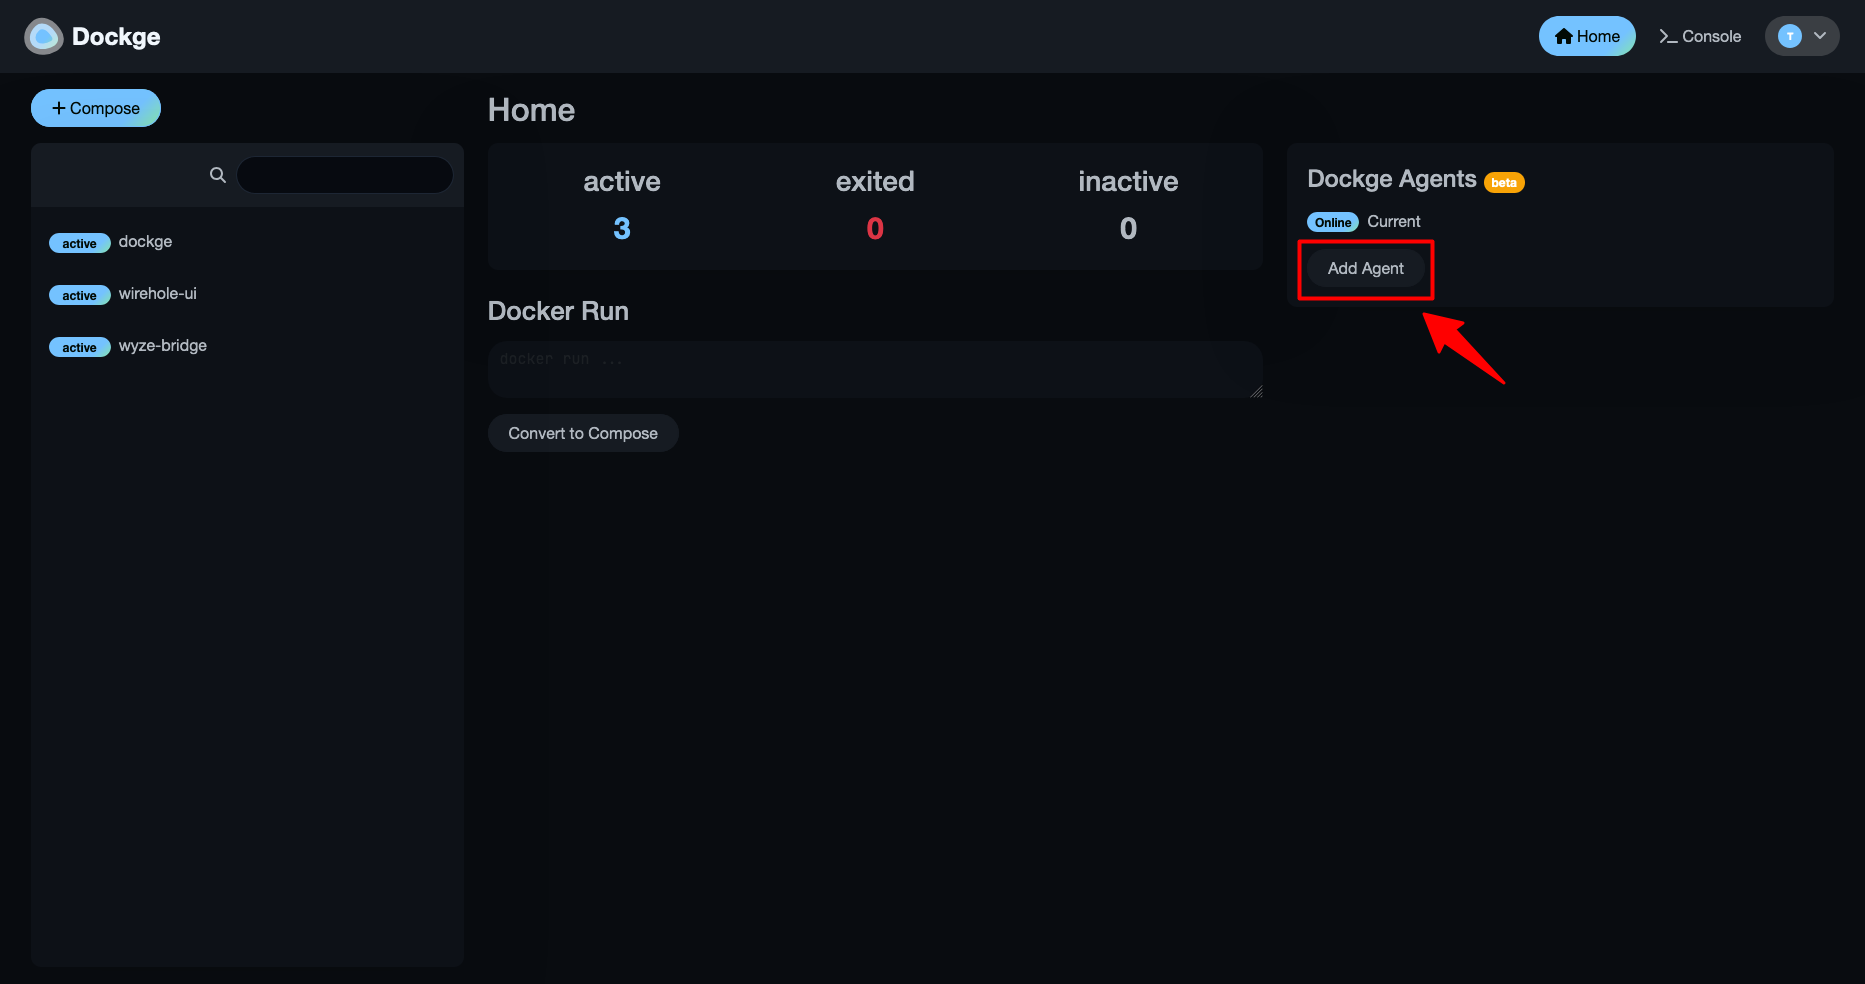
VI. Connecting Agents
We can install Docker on multiple servers. Then use the Docker Agents feature to connect and manage Docker of multiple servers on a single interface.
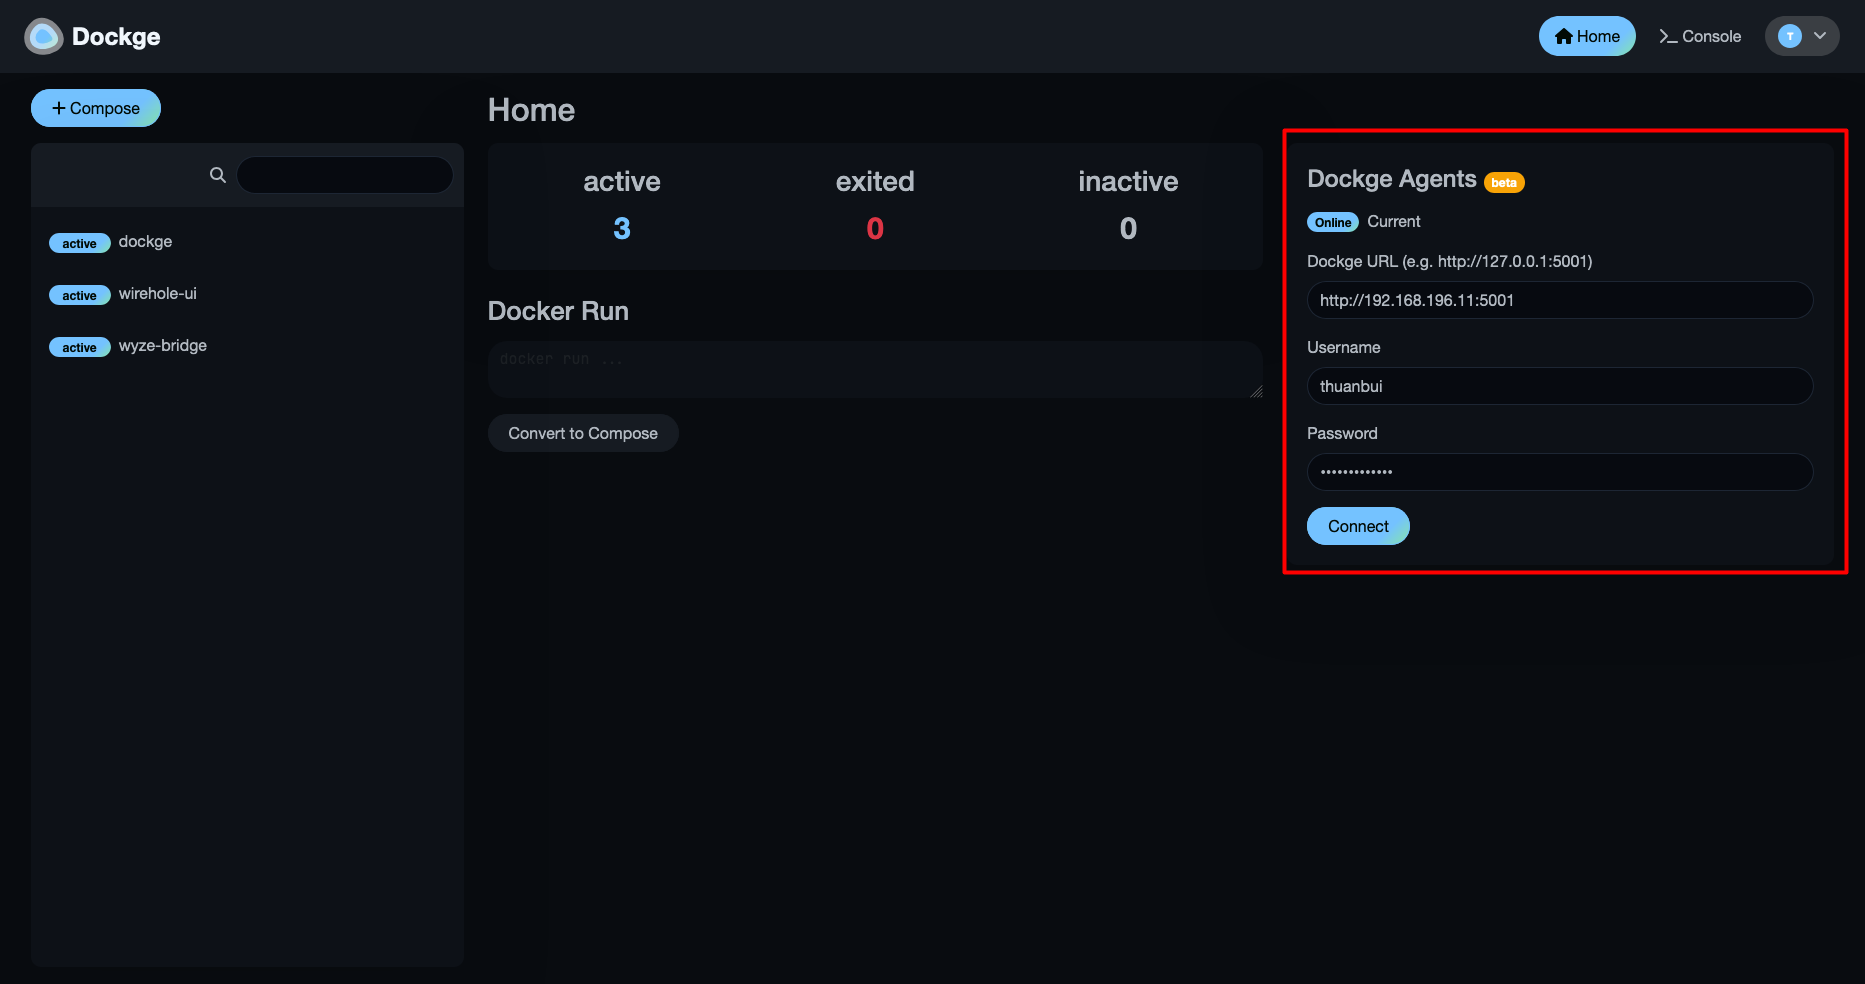
Click the Add Agent button to connect to another Server that has Dockge installed.
Enter the server URL, username and password accordingly. Click Connect to connect.
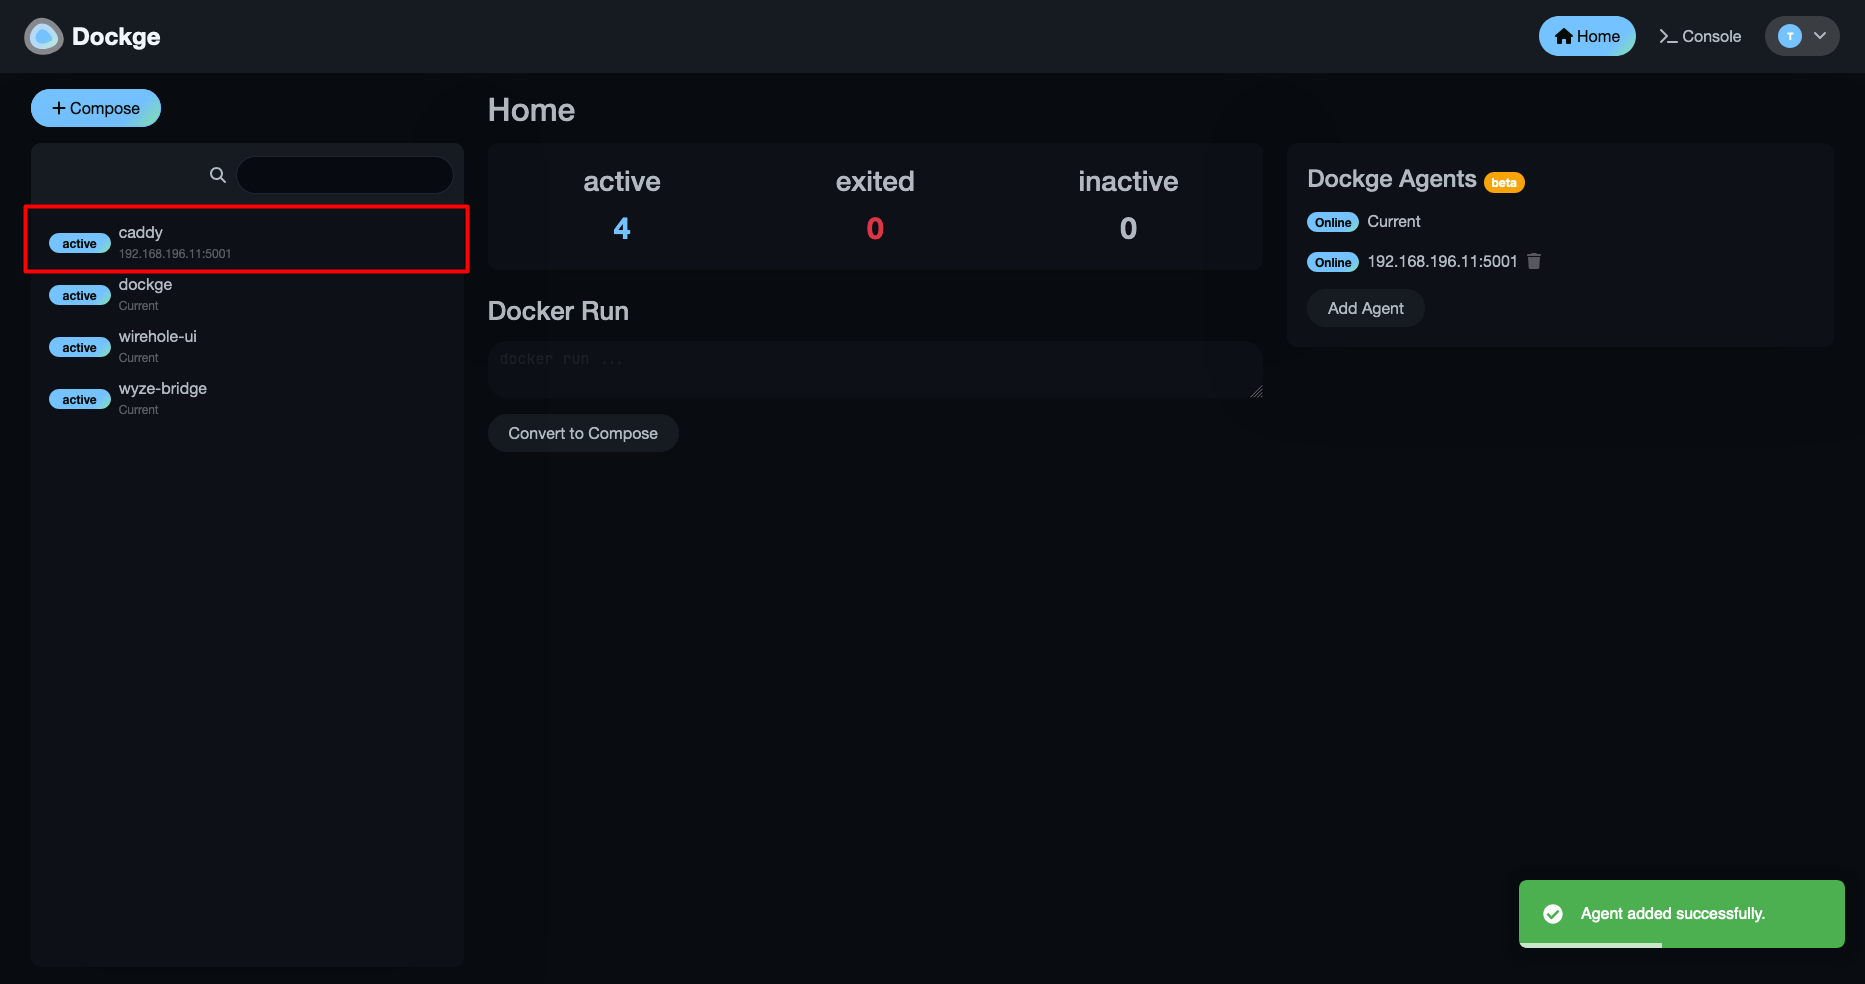
After successfully connecting, the left menu will display additional applications running on the server just connected to the main Dockge interface.
When creating a new application, you can optionally store the application on the server running Dockge or a server connected via Agent.
Dockge quickly became my favorite Docker management tool. It supports both intuitive GUI and command-line operations, which is convenient for both sides. In particular, the Dockge Agents feature is really useful for managing multiple servers at the same time, saving a lot of time compared to having to access each server as before.
Good luck with your installation!
If my article provides useful information and knowledge to you, don’t hesitate to invite me for a beer to have more motivation to share more. Thank you!
Comment Policy: We truly value your comments and appreciate the time you take to share your thoughts and feedback with us.

Note: Comments that are identified as spam or purely promotional will be removed.

To enhance your commenting experience, consider creating a Gravatar account. By adding an avatar and using the same e-mail here, your comments will feature a unique and recognizable avatar, making it easier for other members to identify you.

Please use a valid e-mail address so you can receive notifications when your comments receive replies.