DDNS or Dynamic DNS is a method of dynamically updating IP for domain names, often used to access servers located at home (most home Internet connections use dynamic IP). DDNS will monitor the server’s IP address and when it detects a change, it will contact the DNS system to update the new IP.
Most network routers support Dynamic DNS to update with free domain names. If you use a paid domain name, you can refer to the way to update DDNS with CloudFlare.
If you are using Mikrotik Router for your home network, use the IP/Cloud feature built into RouterOS to set up Dynamic DNS. No need to go through the complicated script setup like the old tutorials.
Update RouterOS
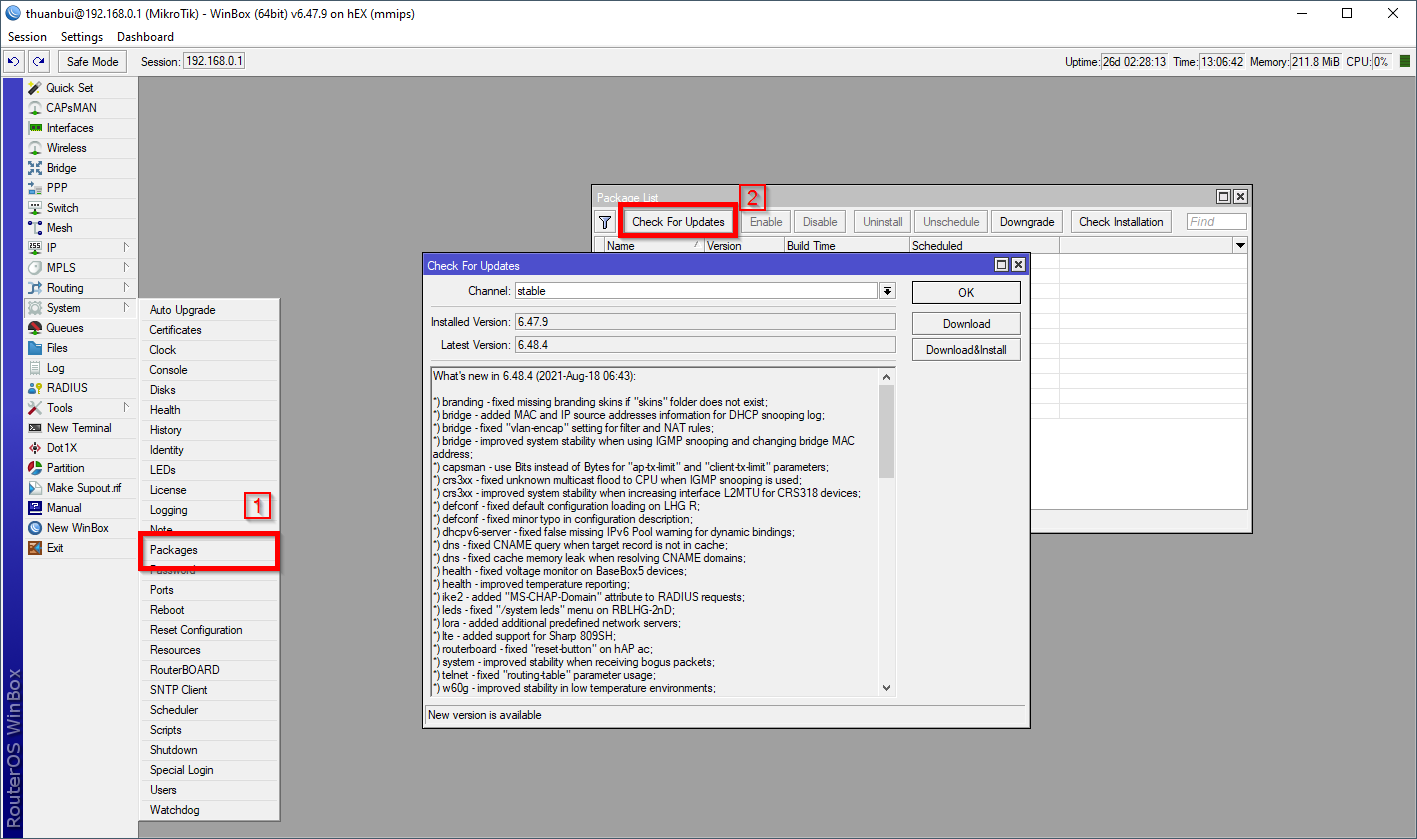
IP/Cloud feature is only available on RouterOS 6.14 and later. You can check using Winbox, Go to System -> Packages.

If you see that the current version is newer than 6.14, you can proceed to the next step. If the Router is working properly, it is best not to update to the new version to avoid errors.
Configure DDNS on Mikrotik router
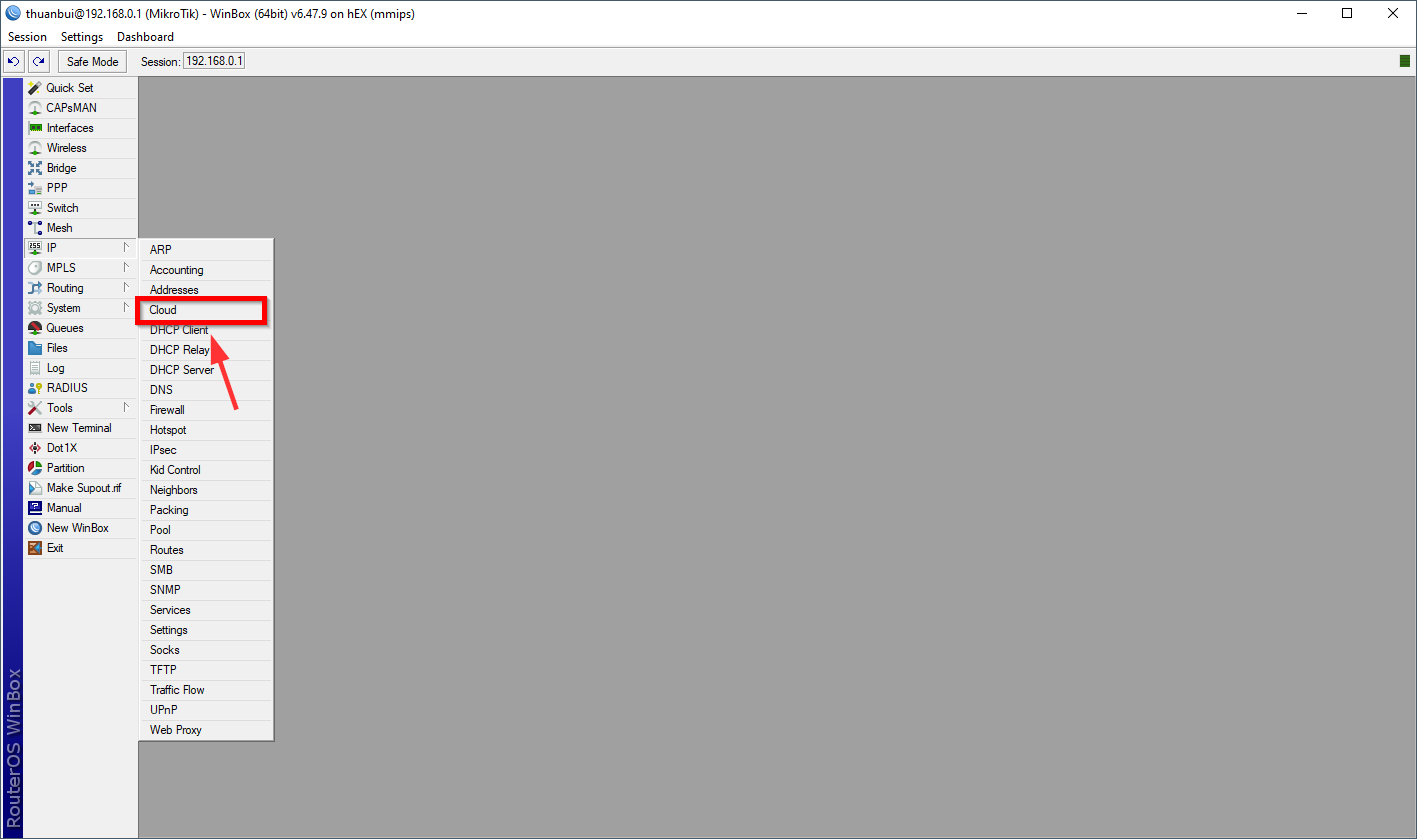
To configure Dynamic DDNS, you connect to Mikrotik Router via Winbox or WebUI.

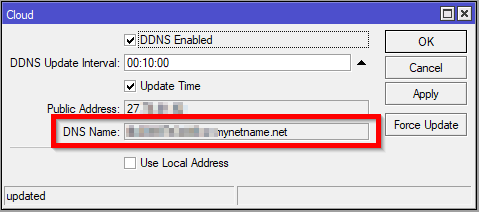
The Cloud window will appear, you just need to click on DDNS Enabled, select Update Time and click Apply. Wait a few seconds and you will see the domain name appear in the DNS Name section. Click OK to complete.

The DDNS Update Interval item is the time the Router automatically updates the IP for the domain name. The default of 10 minutes as shown is fine.
DNS Name xxxx.mynetname.netis automatically provided by Mikrotik to the Router. You can use this domain name to access web services located at home.
Set up CNAME for your own domain name
If you want to use your own domain name to access your home server, you can create a CNAME and point it to the default DNS Name above. This way, the domain name will always point to the correct dynamic IP at home.
Here is how I create a CNAME record on Cloudflare for the domain name aliababa.markknow.compointing to Mikrotik’s DNS Name
Click Add Record to create a new record for the domain markknow.com
- Type: Select CNAME
- Name: alibaba. If you want to point directly to the main domain, type @
- Target: Fill in DNS Name in the configuration section above
- Click Save

With this CNAME setup, alibaba.markknow.comyour domain name will always point to the domain name’s IP xxxx.mynetname.net– which is always automatically updated by the Mikrotik router.
You can repeat this many more times if you want to use multiple domain names pointing to your home server at the same time.
Good luck!
