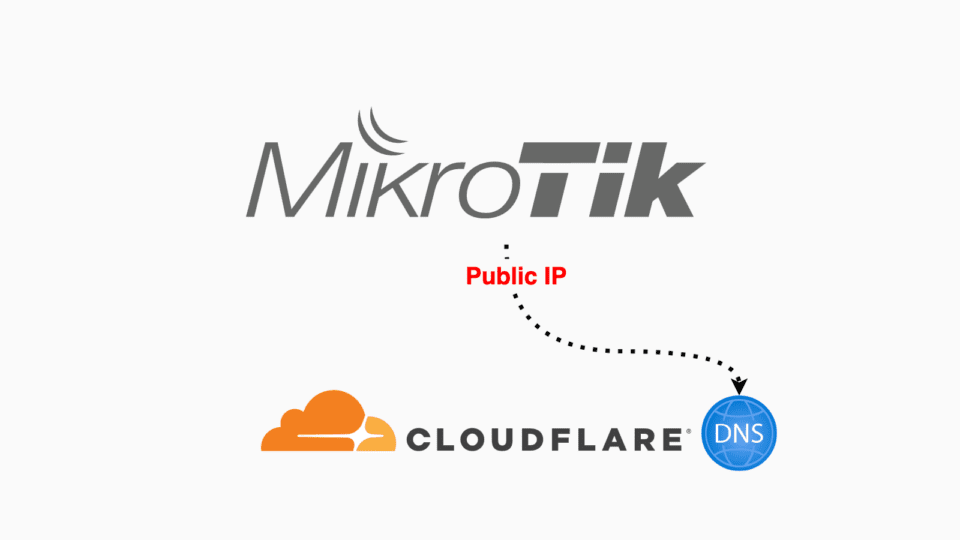
Previously, I had a tutorial on how to configure Dynamic DNS for Mikrotik routers using the built-in Cloud feature of RouterOS. However, this method will not be applicable on Mikrotik clone routers (Chinese routers flashed with Router OS Level 1 firmware).
This article will guide you how to configure Dynamic DNS on RouterOS using Cloudflare API, which can be applied on genuine Mikrotik routers and Mikrotik clones.
1. Requirements
- Already have a domain name and a Cloudflare account.
- The domain has been transferred to CloudFlare management.
- Router running RouterOS v7.
Note: The domain name used must be of the type pay fee (.com, .net, .org, .me, …), cannot use free domain names (.tk, .ga, .ml, .cf, .gq, …) because Cloudflare does not support them.
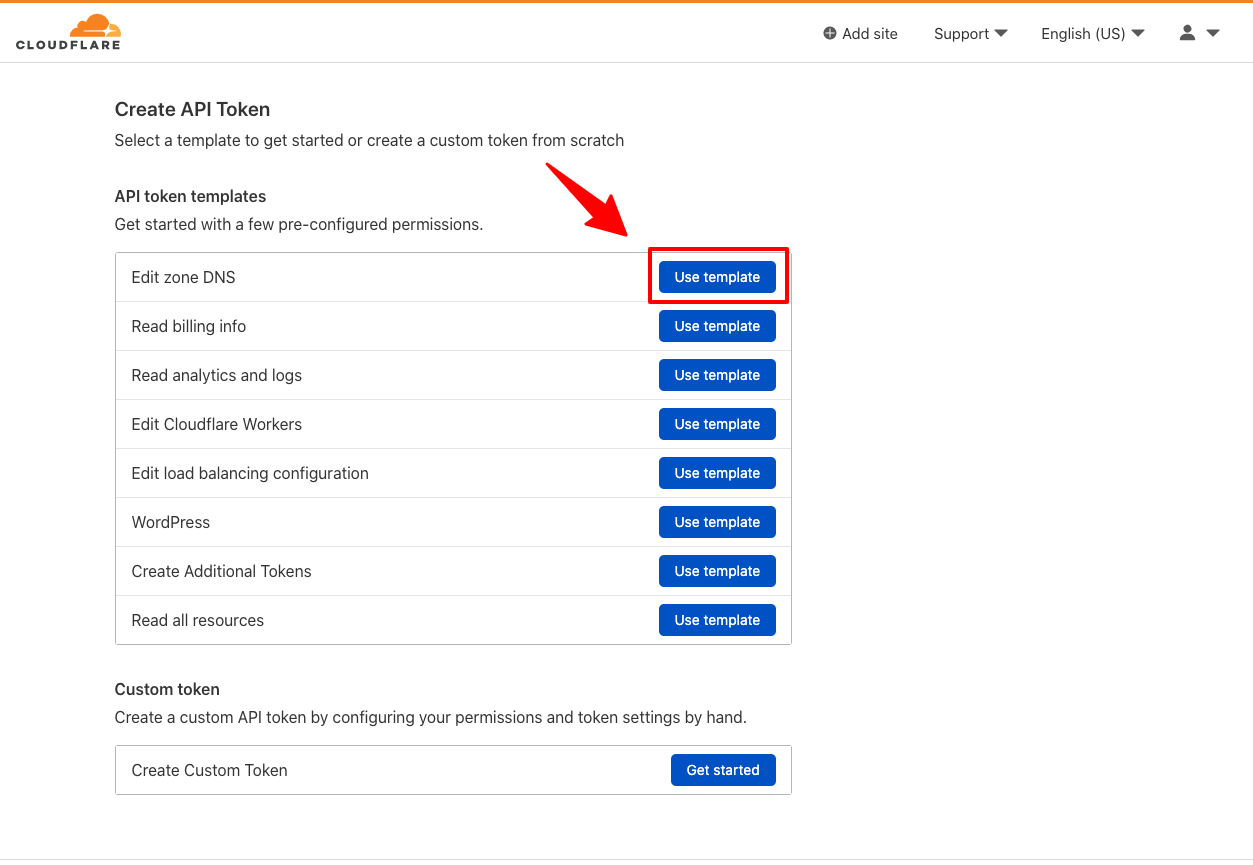
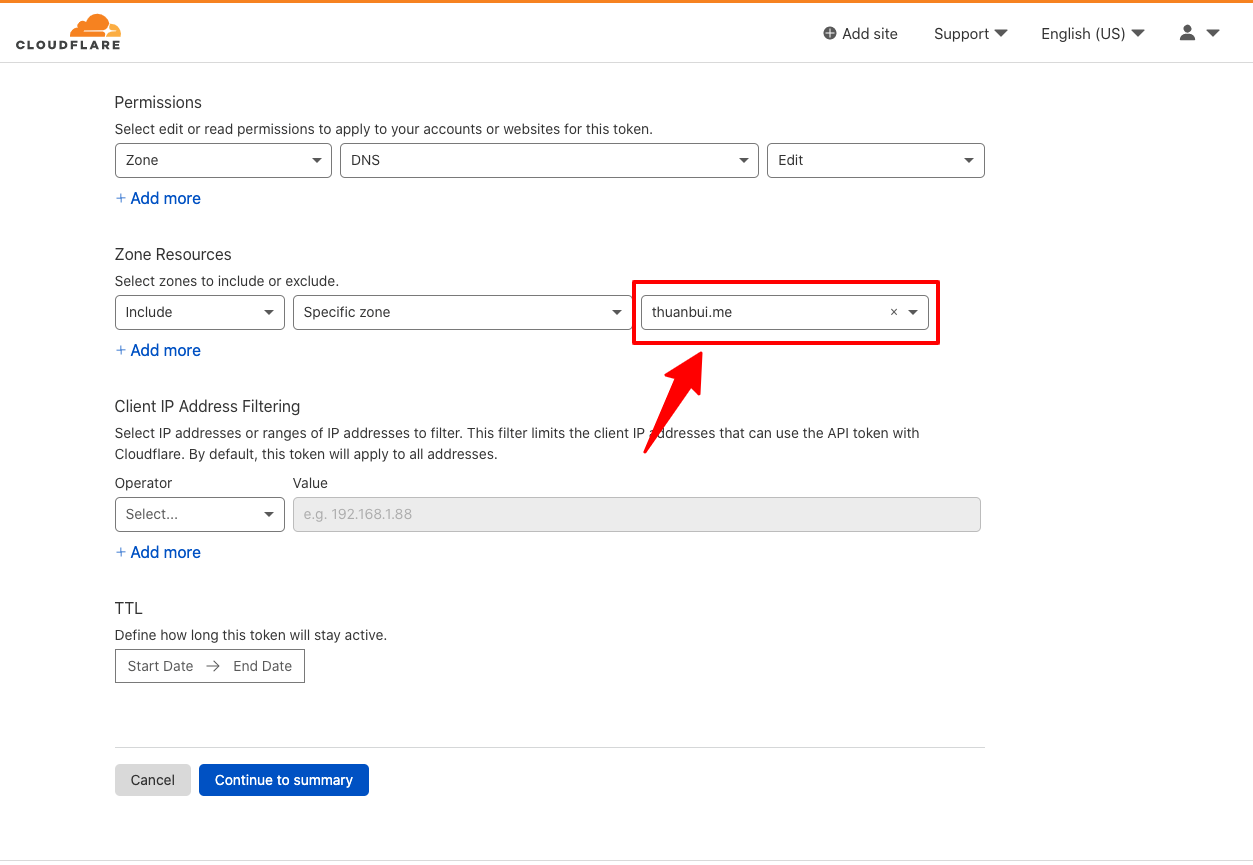
2. Create API Token
Visit the page Cloudflare API Token to create new Token
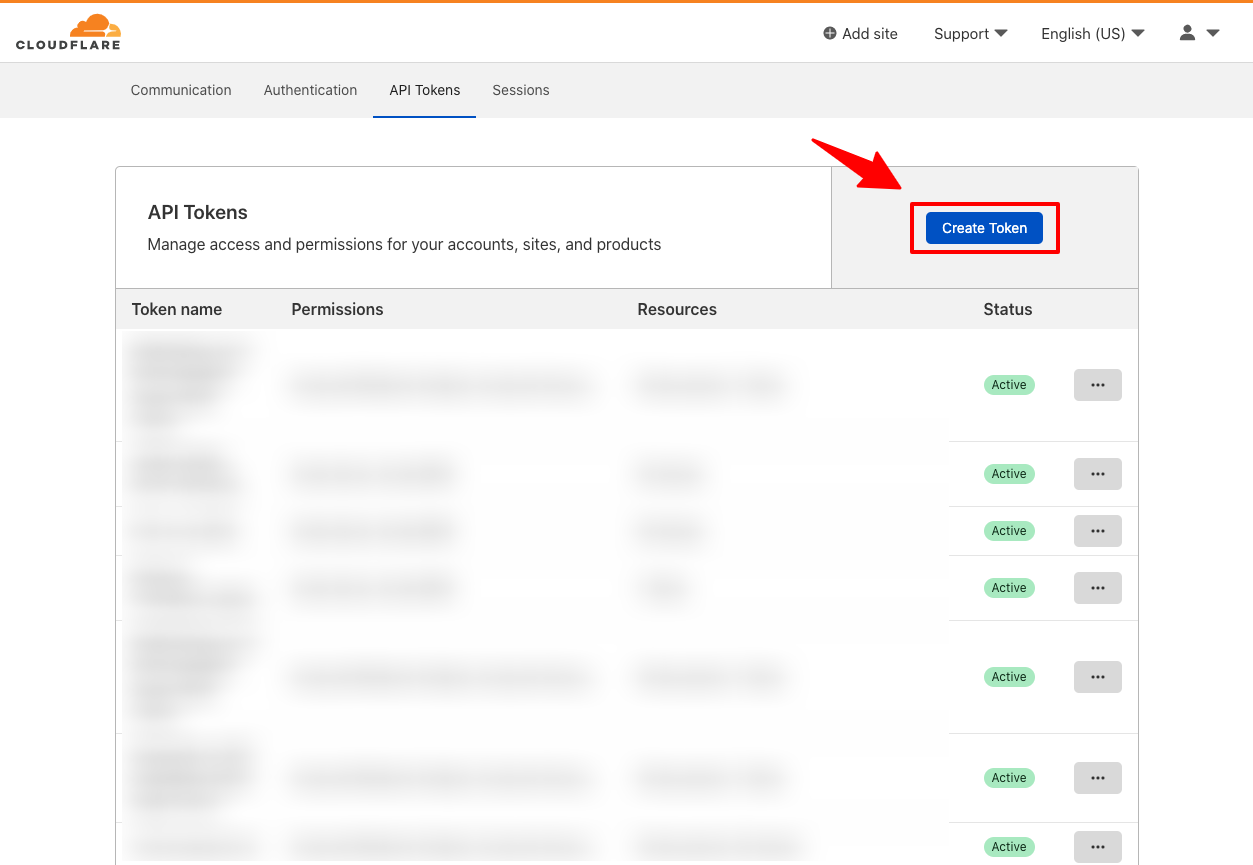

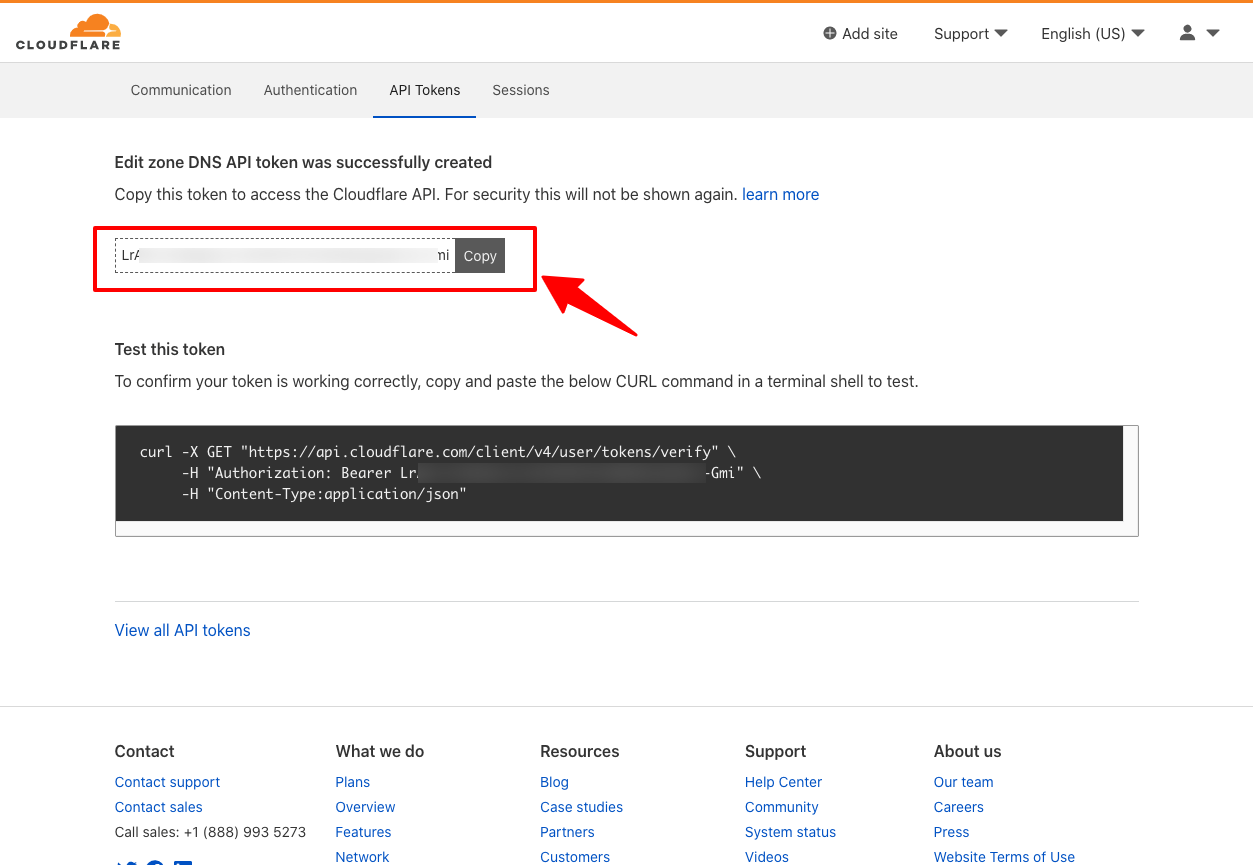
You need to save the newly created Token to save it to the script you created. This Token will not appear again on Cloudflare for security reasons. If you forget to save it, you need to delete the Token and create a new one.
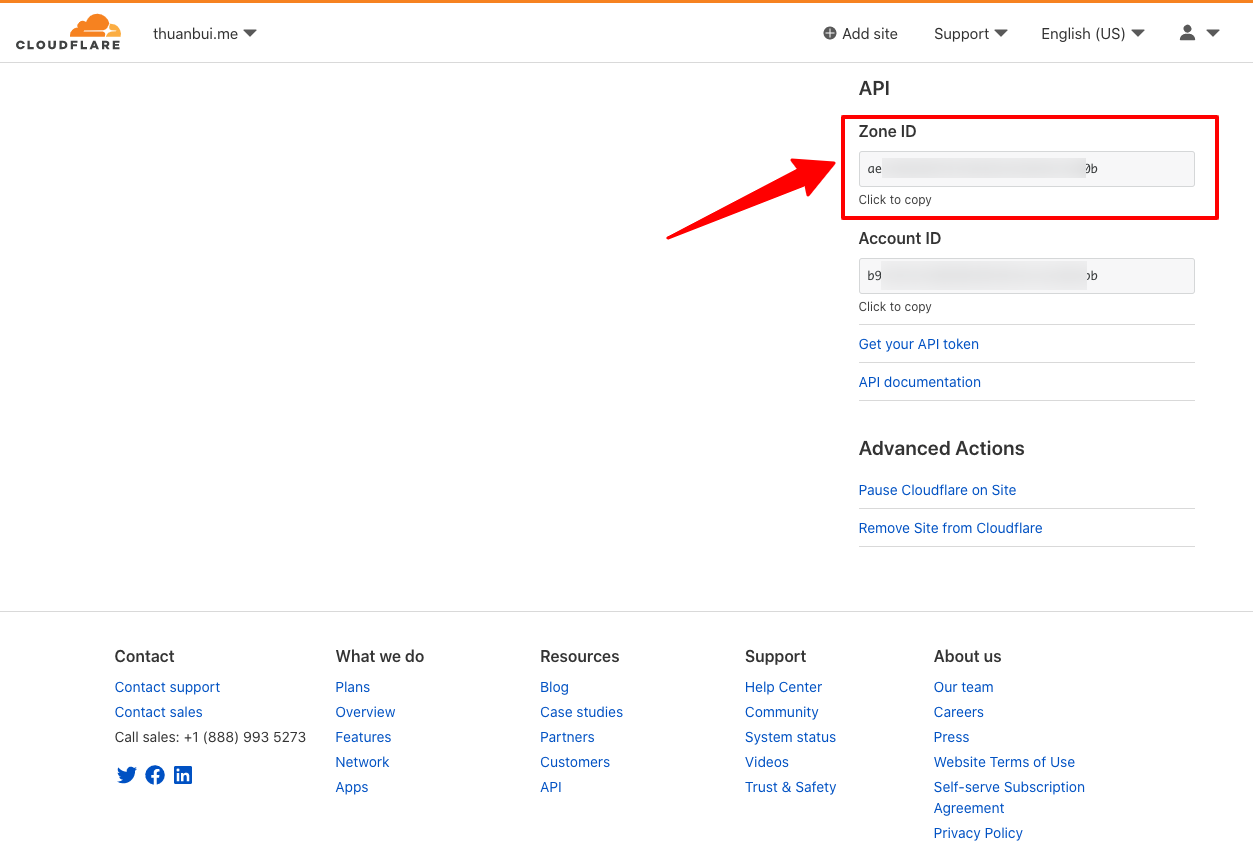
3. Find Zone ID
From the Cloudflare homepage, click on the domain name you want to use to update the IP. Then scroll down to see the Zone ID section. Save this parameter to fill in the script.
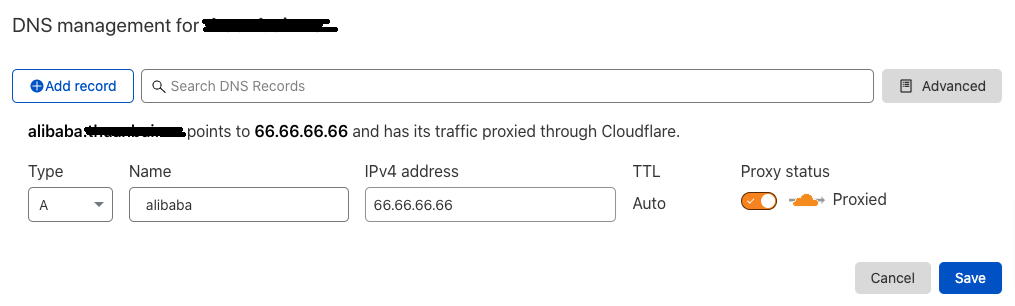
4. Create an A Record for the domain name
For example, I want to use a domain name alibaba.markknow.com to access the homelab at home. Click Add record and create a new A record.
- Name: fill in
alibaba - IPv4: temporary
66.66.66.66this parameter will be automatically updated to the modem’s IP after running the script.
5. Find DNS Identifier
To find the DNS Identifier, you need to use Terminal on Linux or macOS (I haven’t tried it on Windows so I don’t know) to access the Cloudflare API. The DNS Identifier information will be included in the returned results.
You need to use the command as below, and need to edit the necessary information
curl -X GET "https://api.cloudflare.com/client/v4/zones/$ZONE_IDENTIFIER/dns_records?type=A&name=$DNS_NAME"
-H "Authorization: Bearer $API_TOKEN"Code language: Nginx (nginx)- $ZONE_IDENTIFIER: Zone ID parameter found in step 3
- $DNS_NAME: domain name created in step 4
- $API_TOKEN: API token created in step 2
The returned result will be similar to the one below:
{"result":({"id":"2b4evvvvcd17de26b8389f89e70a5d","zone_id":"ae23242305787b4683e2616b8af51a0b","zone_name":"markknow.com","name":"alibaba.markknow.com","type":"A","content":"171.123.247.32","proxiable":true,"proxied":false,"ttl":1,"locked":false,"meta":{"auto_added":false,"managed_by_apps":false,"managed_by_argo_tunnel":false},"comment":null,"tags":(),"created_on":"2021-09-09T04:35:30.960774Z","modified_on":"2024-06-26T18:51:00.274137Z"}),"success":true,"errors":(),"messages":(),"result_info":{"page":1,"per_page":100,"count":1,"total_count":1,"total_pages":1}}%Code language: JavaScript (javascript)Parameter 2b4evvvvcd17de26b8389f89e70a5d of the item id is DNS Identifier we need
6. Create script on RouterOS
I refer to this Dynamic DNS update script on the website. MikroTik DDNS with Cloudflare API v4 (bayukurnia.com)tested and found it works well
Access RouterOS via Winbox or web browser. Go to System –> Scripts. Click the + sign or Add New button to create a new script
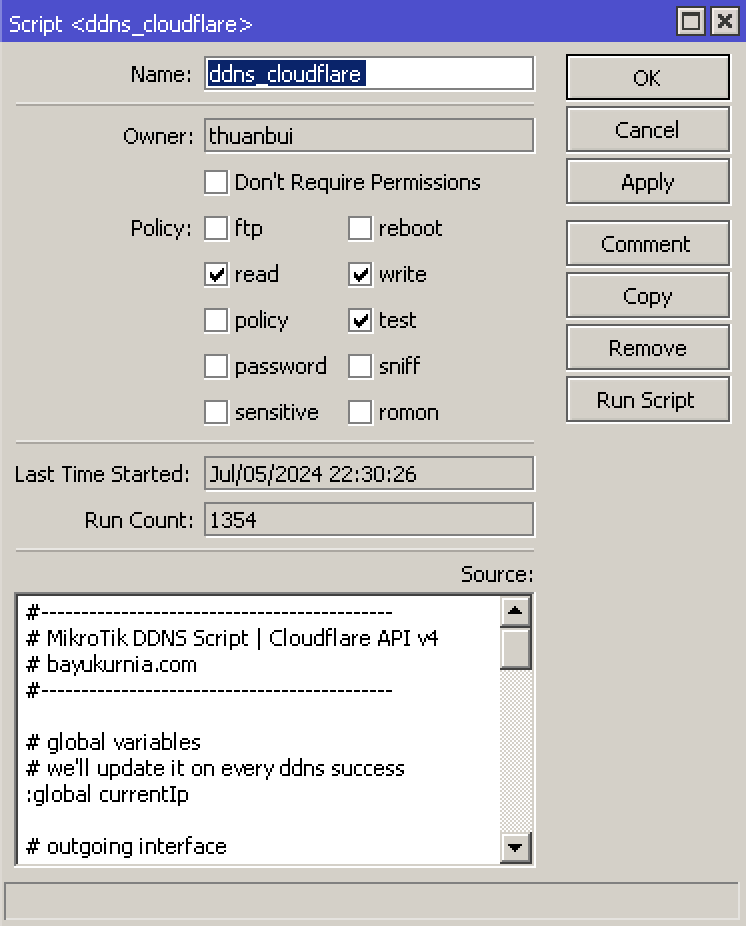
Name field: name ddns_cloudflare
Policy section: select read, write, test.
Source section: enter the code below after editing the necessary information:
- Line 11 – wanInterface: replace with the name of the WAN Interface that receives the Public IP from the network operator, see in the Interfaces section of RouterOS (usually it will be pppoe-out)
- Line 19 – cfToken: replace with API Token in step 2
- Line 20- cfZoneid: replace with Zone ID in step 3
- Line 21 – cfDnsId: replace with DNS Identifier in step 5
- Line 23 – dnsName: replace with domain name in step 4
- Line 25 – dnsProxied: true (enable proxy mode on Cloudflare to hide router IP) or false (do not want to hide router IP).
#--------------------------------------------
# MikroTik DDNS Script | Cloudflare API v4
# bayukurnia.com
#--------------------------------------------

# global variables
# we'll update it on every ddns success
:global currentIp

# outgoing interface
:local wanInterface "pppoe-out1"

# get current $wanInterface IP
:local newIpCidr (/ip address get (find interface="$wanInterface") address )
:local newIp (:pick $newIpCidr 0 (:find $newIpCidr "/"))

:if ($newIp != $currentIp) do={
  # cloudflare variables, adjust with yours
  :local cfToken "aJV8sCQqxxxxxxxxxxxxxxxxxxxxxxxxxxxxxxxx"
  :local cfZoneId "fb36edd6xxxxxxxxxxxxxxxxxxxxxxxx"
  :local cfDnsId "afc8b34dxxxxxxxxxxxxxxxxxxxxxxxx"
  :local dnsType "A"
  :local dnsName "alibaa.markknow.com"
  :local dnsTTL "1"
  :local dnsProxied "true"

 # compose endpoint
 # docs: https://api.cloudflare.com/#dns-records-for-a-zone-update-dns-record
  :local apiUrl "https://api.cloudflare.com/client/v4/zones/$cfZoneId/dns_records/$cfDnsId"

  # compose headers & payload
  :local headers "Authorization: Bearer $cfToken"
  :local payload "{"type":"$dnsType","name":"$dnsName","content":"$newIp","ttl":$dnsTTL,"proxied":$dnsProxied}"

  # make API request
  :do {
    :local response (/tool fetch http-method="put" url=$apiUrl http-header-field=$headers http-data=$payload as-value output=user)

    :if ($response->"status" = "finished") do={
        :log info "DDNS: changed $currentIp to $newIp"

        # update $currentIp with the new one
        :set currentIp $newIp
    }
  } on-error {
    :log error "DDNS: failed to change IP $currentIp to $newIp"
  }
}
Code language: Bash (bash)
Click Run Script to test the script. If Dynamic DNS is updated correctly, click OK to save. If there is an error, you need to check the steps above again.
7. Schedule automatic updates
To make RouterOS automatically run the Dynamic DNS update script, we need to use the Scheduler feature. Go to System -> Scheduler. Click the + sign or the Add New button to create a new one.
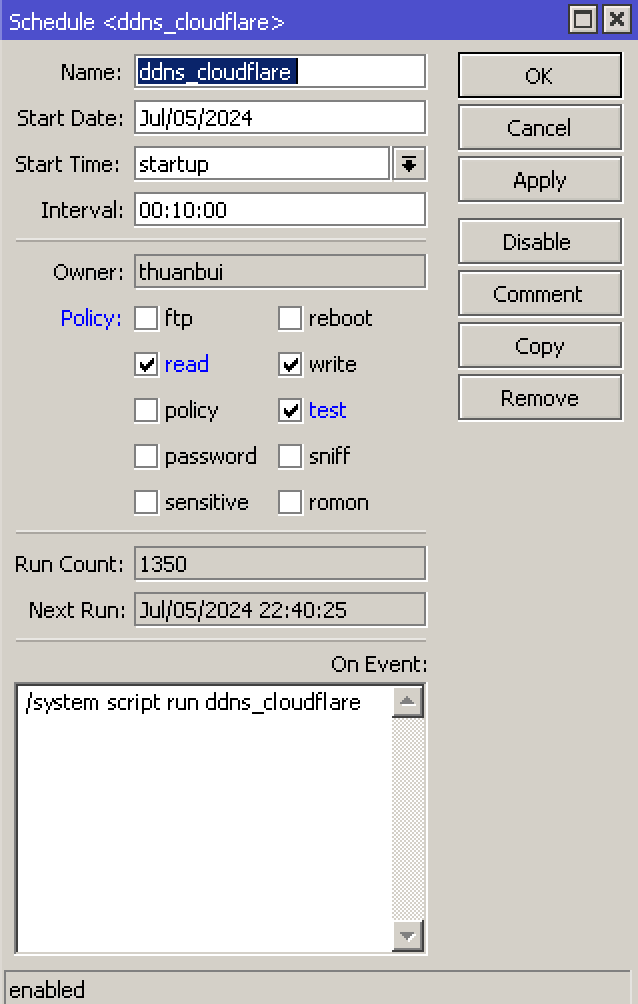
- Name: name ddns_cloudflare
- Start_time: select Startup
- Interval: 00:10:00 (10 minutes run 1 time)
- Policy: select read, write, test.
- On Event section: enter
/system script run ddns_cloudflare
Click OK to save.
Or if you like Terminal, use the following command:
/system scheduler
add interval=10m name=ddns_cloudflare on-event="/system script run ddns_cloudflare" policy=read,write,test start-time=startupCode language: Dockerfile (dockerfile)
That’s it. Good luck!
Reference: MikroTik DDNS with Cloudflare API v4 (bayukurnia.com), Configure Mikrotik with Cloudflare DDNS (vectops.com)
If my article provides useful information and knowledge to you, don’t hesitate to invite me for a beer to have more motivation to share more. Thank you!
Comment Policy: We truly value your comments and appreciate the time you take to share your thoughts and feedback with us.

Note: Comments that are identified as spam or purely promotional will be removed.

To enhance your commenting experience, consider creating a Gravatar account. By adding an avatar and using the same e-mail here, your comments will feature a unique and recognizable avatar, making it easier for other members to identify you.

Please use a valid e-mail address so you can receive notifications when your comments receive replies.