In the tutorial below, I will install the full Arr suite (Sonarr, Radarr, Prowlarr, Bazarr) on XPEnology. All applications are set up via Docker so you can apply it on any other operating system that supports Docker.
I. System preparation
1. Install Docker
Update later:
- Guide to install Docker on Synology / XPEnology
- for use Ubuntu / Debian.
2. Enable SSH feature
You need to open the SSH Service feature on Synology to be able to access it via SSH to operate using the command line.
Log in to the DSM web interface, go to the Control Panel > Terminal & SNMP > Enable SSH service. Check Enable SSH service and click Apply.
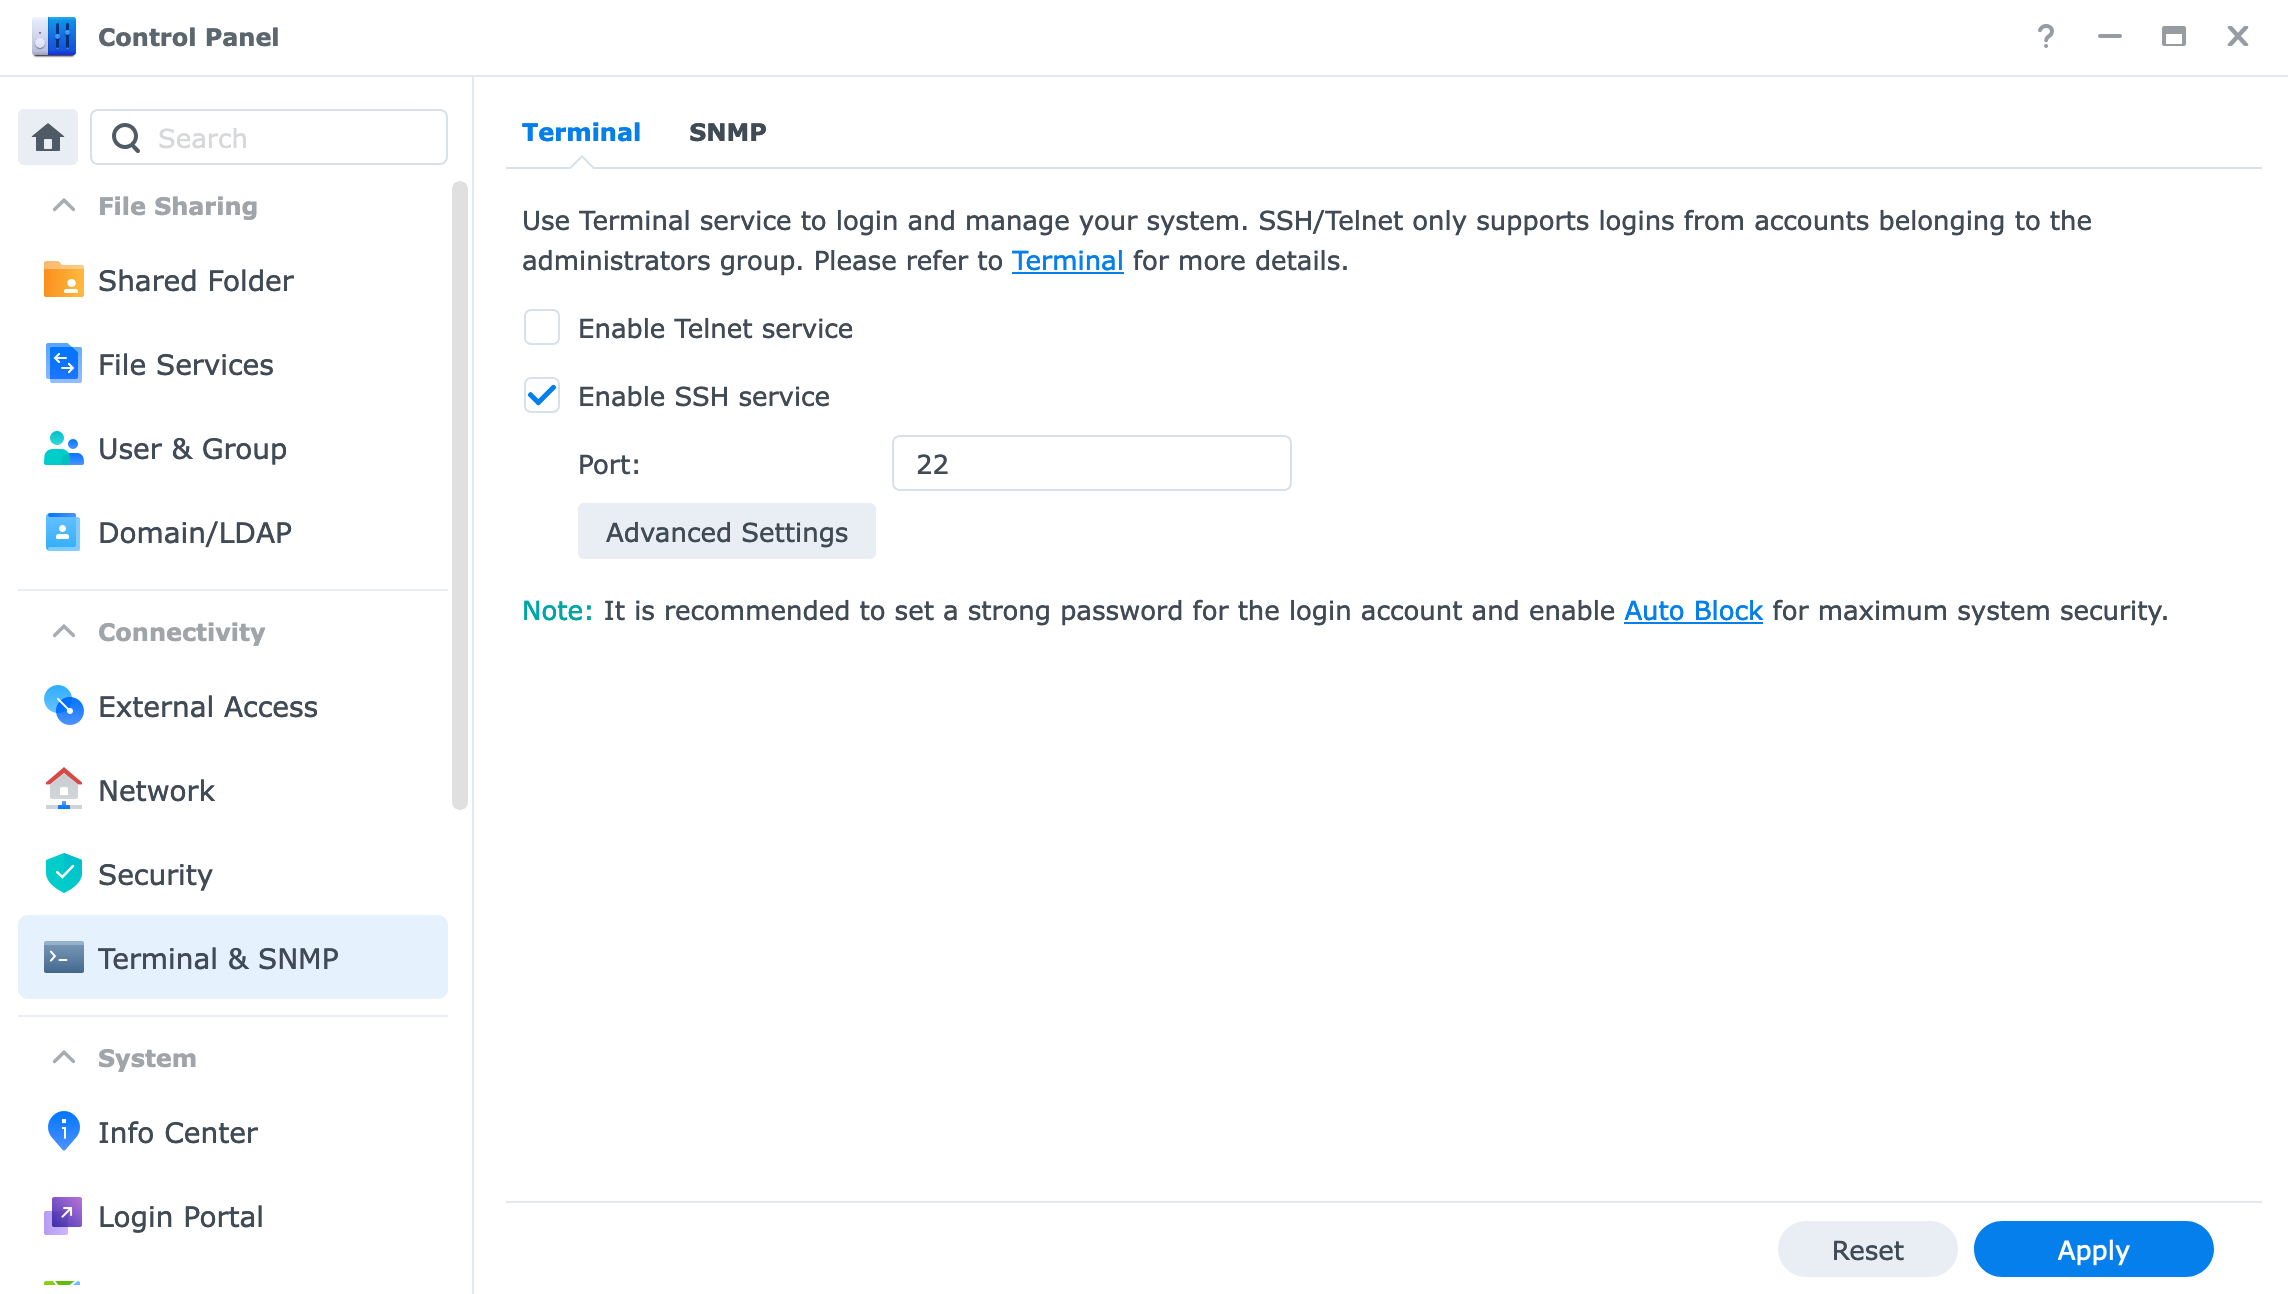
Then use Terminal / Putty to SSH into Synology / XPEnology.
3. Find uid, gid
Determine uid, gid of the account in use by command id
The result will be returned below:
uid=1026(markknow) gid=100(users) groups=100(users),101(administrators),65536(docker)uid=1026 and gid=100. I will use these parameters to install the applications in the following steps.
4. Create a Directory System
For the entire Arr suite to work smoothly, we need to create a standard folder system as shown below. In which the media folder will be the place to store movies / tv shows / music and the torrents folder will be the place to download files.
├── media
│   ├── movies
│   ├── music
│   └── tv
└── torrents
    ├── movies
    ├── music
    └── tv
Access the storage folder on Synology and create additional necessary folders. For example, I will save everything on the external hard drive volumeUSB3, create the folder with the following command
mkdir -p /volumeUSB3/usbshare/{torrents/{tv,movies,music},media/{tv,movies,music}}5. Create Docker network
I created a Docker network with the name arr to connect all related docker containers to this same network.
docker network create arrCode language: Nginx (nginx)II. Install Torrent client
Update later:
- installed qBittorrent + Flood following the instructions.
1. Update Parameters
After successful installation, need to edit the file compose.yml A little bit about environment declaration, volumes and networks to be able to connect to the arr suites application.
PUID=1026replace 1026 with the uid number found in step I.3PGID=1000Replace 1000 with the gid number found in step I.3- replace
/volumeUSB3/usbshareto the directory path you used in step I.4
File compose.yml after update will be as below
services:
  qbittorrent:
    container_name: qbittorrent
    image: ghcr.io/hotio/qbittorrent
    ports:
      - 8090:8090
    environment:
      - PUID=1026
      - PGID=1000
      - UMASK=002
      - WEBUI_PORTS=8090/tcp,8090/udp
    volumes:
      - ./config:/config
      - /volumeUSB3/usbshare:/data
  flood:
    image: jesec/flood:latest
    container_name: flood
    restart: always
    depends_on:
      - qbittorrent
    volumes:
      - ./flood_config:/config
      - /volumeUSB3/usbshare:/data
      - /etc/localtime:/etc/localtime:ro
    ports:
      - 3000:3000
    command:
      - --auth=none
      - --qburl=http://qbittorrent:8090
      - --qbuser=admin
      - --qbpass=123456
networks:
  default:
    name: arr
    external: trueCode language: YAML (yaml)
then reactivate the application
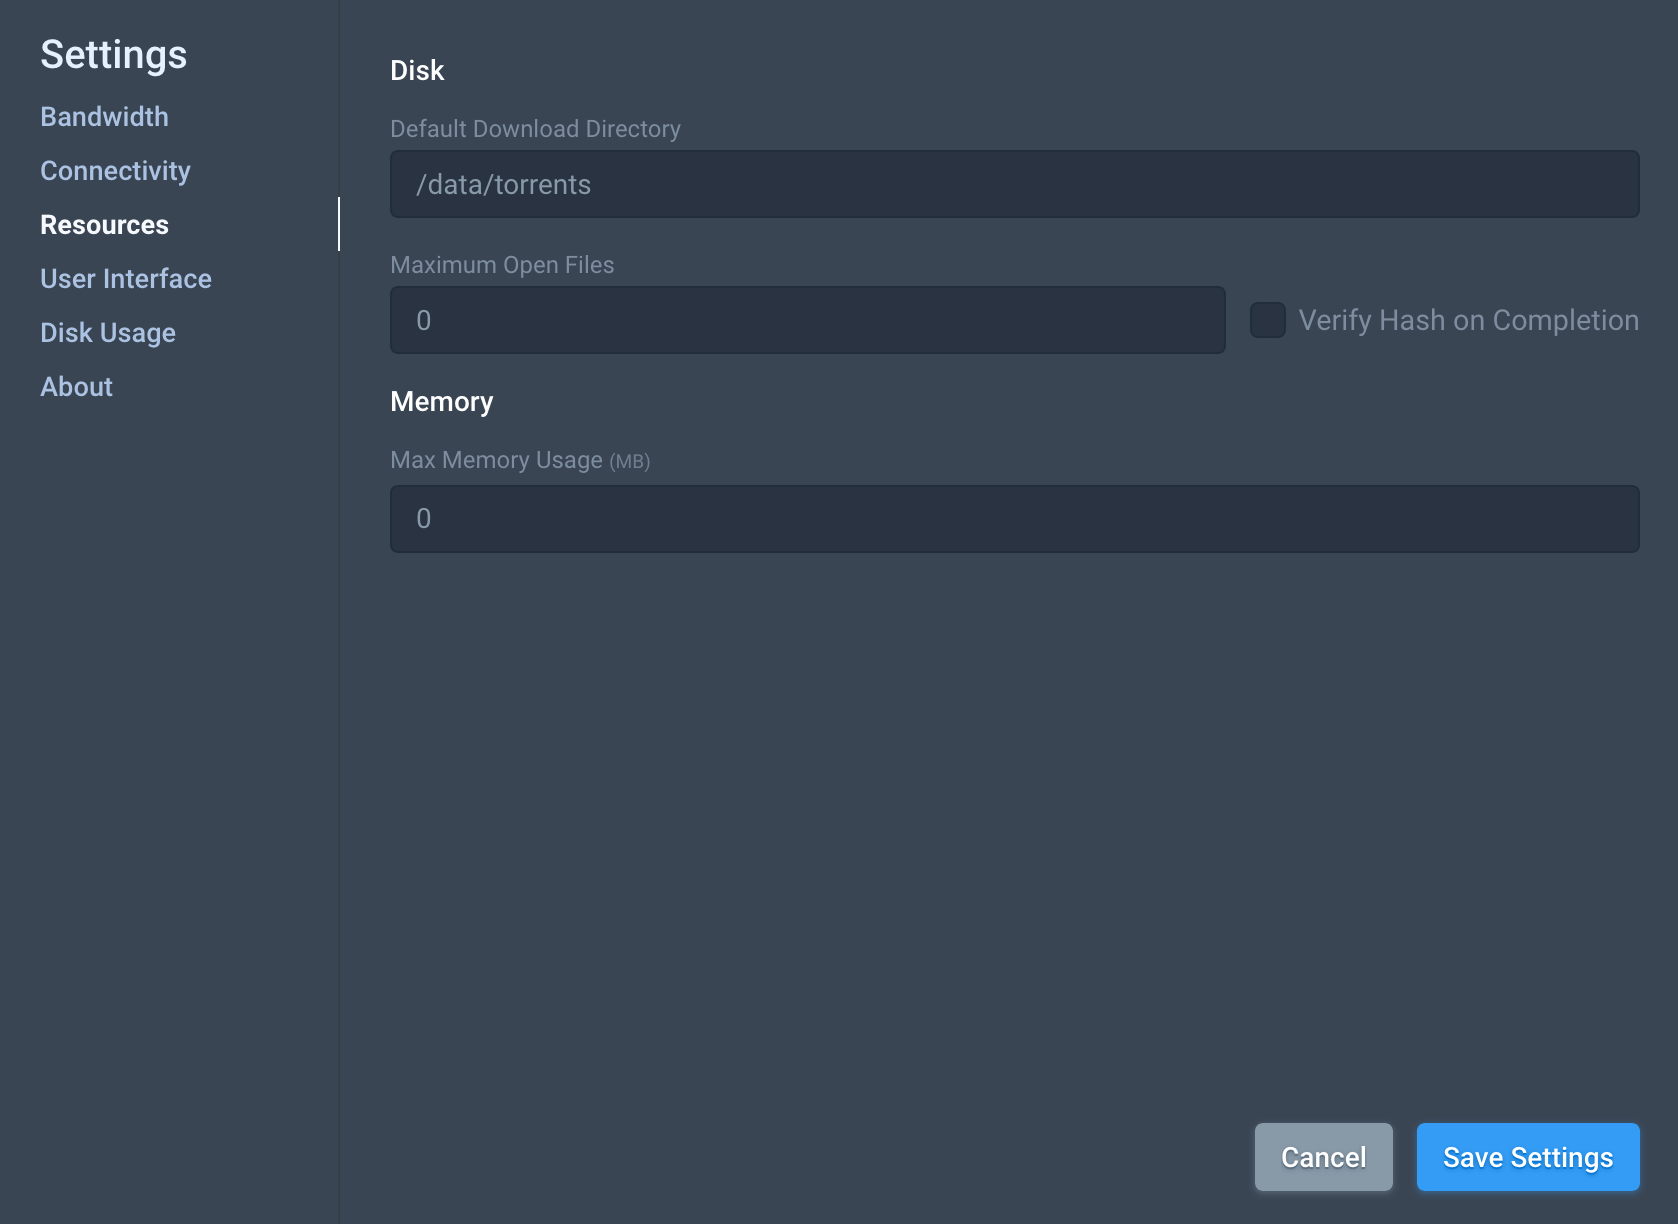
3. Update the Archive Folder
Access Floor at http://<IP>:3000 go to Settings> Resources and update the Default Download Directory to /data/torrents
III. Arr Suite Installation
1. Create a Folder
Because Docker on Synology does not automatically create folders when activating Docker, I need to create the necessary folders for the Arr suite.
mkdir -p /volume1/docker/servarr/{radarr,sonarr,bazarr,plex,prowlarr}2. Create compose.yml and .env files
Access the servarr directory
cd /volume1/docker/servarr/Code language: Bash (bash)and create file compose.yml with the following content
version: "3.2"
services:


  radarr:
    container_name: radarr
    image: ghcr.io/hotio/radarr:latest
    restart: unless-stopped
    logging:
      driver: json-file
      options:
        max-file: ${DOCKERLOGGING_MAXFILE}
        max-size: ${DOCKERLOGGING_MAXSIZE}
    ports:
      - 7878:7878
    environment:
      - PUID=${PUID}
      - PGID=${PGID}
      - TZ=${TZ}
      - UMASK=002
    volumes:
      - /etc/localtime:/etc/localtime:ro
      - ${DOCKERCONFDIR}/radarr:/config
      - ${DOCKERSTORAGEDIR}:/data


  sonarr:
    container_name: sonarr
    image: ghcr.io/hotio/sonarr:release
    restart: unless-stopped
    logging:
      driver: json-file
      options:
        max-file: ${DOCKERLOGGING_MAXFILE}
        max-size: ${DOCKERLOGGING_MAXSIZE}
    ports:
      - 8989:8989
    environment:
      - PUID=${PUID}
      - PGID=${PGID}
      - TZ=${TZ}
      - UMASK=002
    volumes:
      - /etc/localtime:/etc/localtime:ro
      - ${DOCKERCONFDIR}/sonarr:/config
      - ${DOCKERSTORAGEDIR}:/data


  bazarr:
    container_name: bazarr
    image: ghcr.io/hotio/bazarr
    restart: unless-stopped
    logging:
      driver: json-file
      options:
        max-file: ${DOCKERLOGGING_MAXFILE}
        max-size: ${DOCKERLOGGING_MAXSIZE}
    ports:
      - 6767:6767
    environment:
      - PUID=${PUID}
      - PGID=${PGID}
      - TZ=${TZ}
      - UMASK=002
    volumes:
      - /etc/localtime:/etc/localtime:ro
      - ${DOCKERCONFDIR}/bazarr:/config
      - ${DOCKERSTORAGEDIR}/media:/data/media


  prowlarr:
    container_name: prowlarr
    image: hotio/prowlarr
    restart: unless-stopped
    logging:
      driver: json-file
      options:
        max-file: ${DOCKERLOGGING_MAXFILE}
        max-size: ${DOCKERLOGGING_MAXSIZE}
    ports:
      - 9696:9696
    environment:
      - PUID=${PUID}
      - PGID=${PGID}
      - TZ=${TZ}
      - UMASK=002
      - ARGS=
    volumes:
      - ${DOCKERCONFDIR}/prowlarr:/config:rw

networks:
  default:
    name: arr
    external: trueCode language: YAML (yaml)
Create additional .env file
COMPOSE_PROJECT_NAME=servarr
DOCKERCONFDIR=/volume1/docker/servarr
DOCKERSTORAGEDIR=/volumeUSB3/usbshare
PUID=1026
PGID=100
TZ=Asia/Ho_Chi_Minh
DOCKERLOGGING_MAXFILE=10
DOCKERLOGGING_MAXSIZE=200kCode language: JavaScript (javascript)
You need to change the DOCKERSTORAGEDIR, PUID, PGID, TZ parameters to match your system.
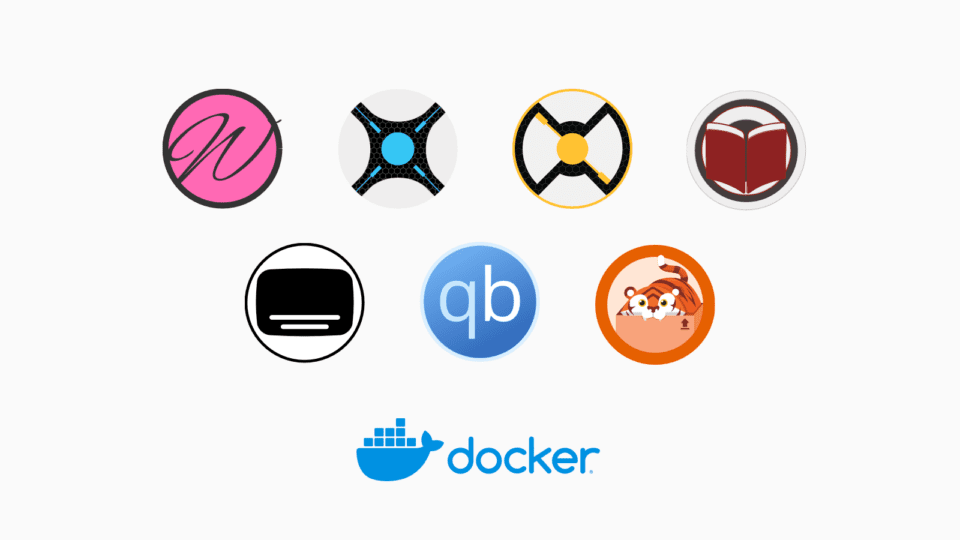
This Arr suite includes 4 applications.
- Radarr (Quản lý phim lẻ)
- Sonarr (Quản lý phim bộ)
- Bazarr (Quản lý phụ đề)
- Prowlarr (Quản lý indexer/tracker)Code language: Markdown (markdown)
In addition to these applications, there are also Whisparr, Tidarr, Readarr serving other snacks. Those who are interested can research more.
3. Configure Access Rights
Before activating, I need to set access permissions for the created folders to avoid permission-denied errors. Remember to replace /volumeUSB3/usbshare with your folder path and markknow:users to the corresponding user:group name.
sudo chown -R markknow:users /volumeUSB3/usbshare /volume1/dockerCode language: Nginx (nginx)sudo chmod -R a=,a+rX,u+w,g+w /volumeUSB3/usbshare /volume1/dockerCode language: Nginx (nginx)4. Activate Arr Suite
Activate Arr Suite
docker-compose up -dIV. Radarr Configuration
Radarr is a movie management application in the Arr suite. I only guide you on how to configure Radarr, the Sonarr side operates almost exactly the same.
Access Radarr at http://:7878
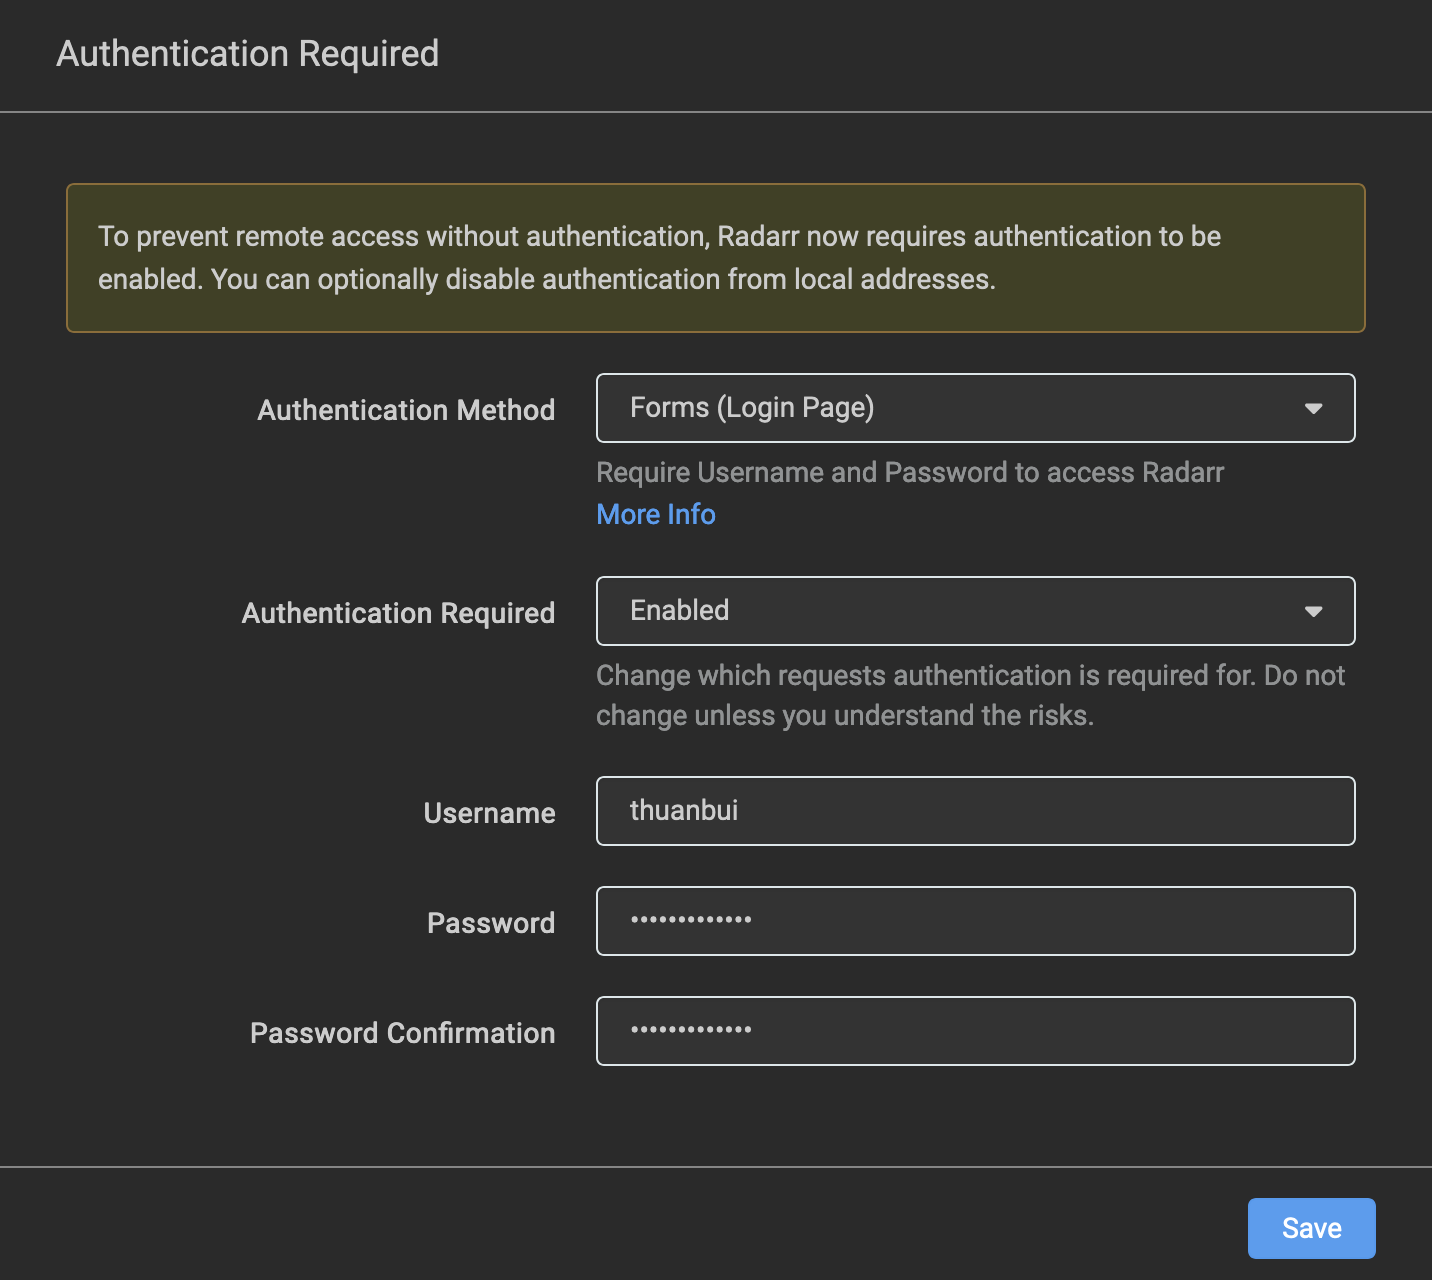
1. Login configuration
On the first access, Radarr will ask for security configuration. I choose to log in using Login Page then click Save.
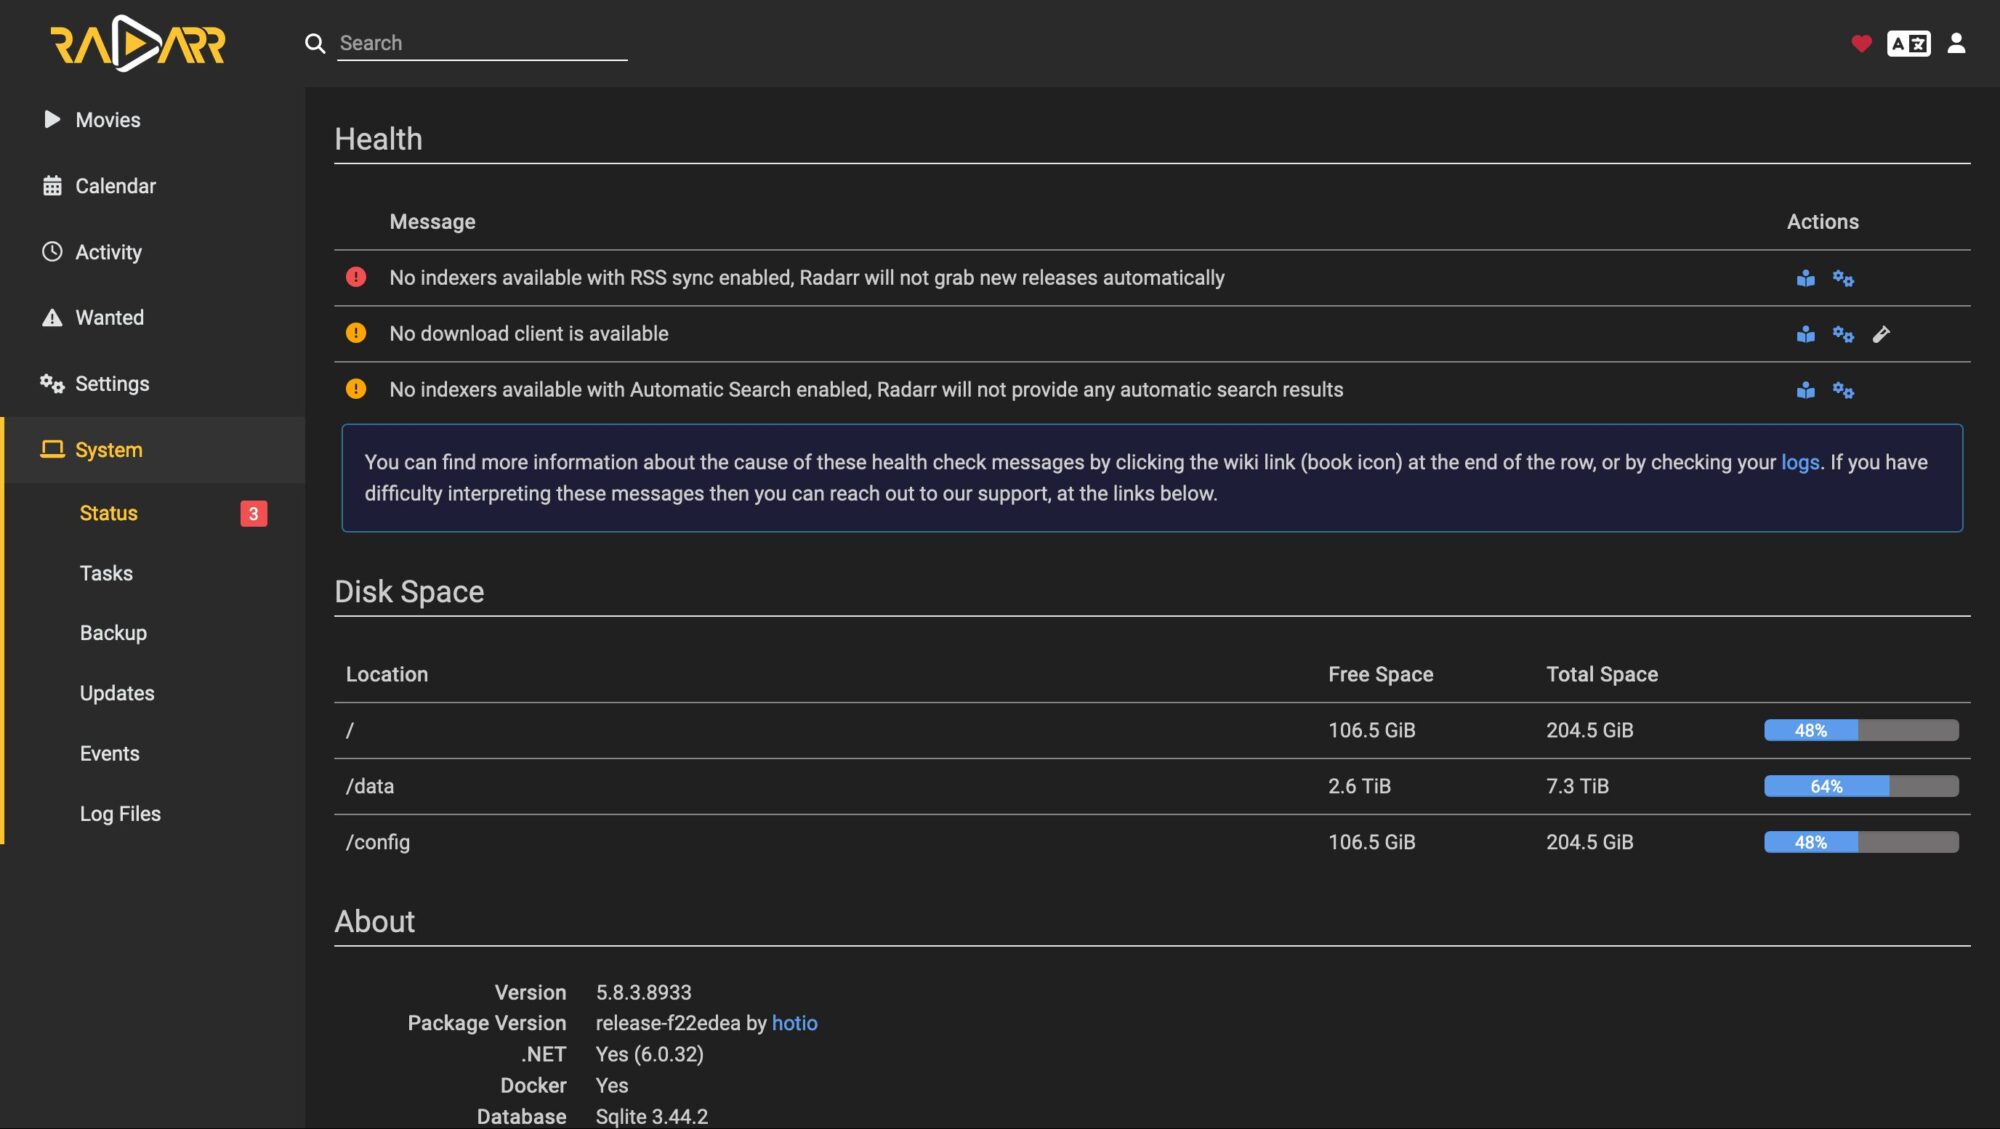
After logging in, the system will report an error that there is no Indexer or file download client as shown below.
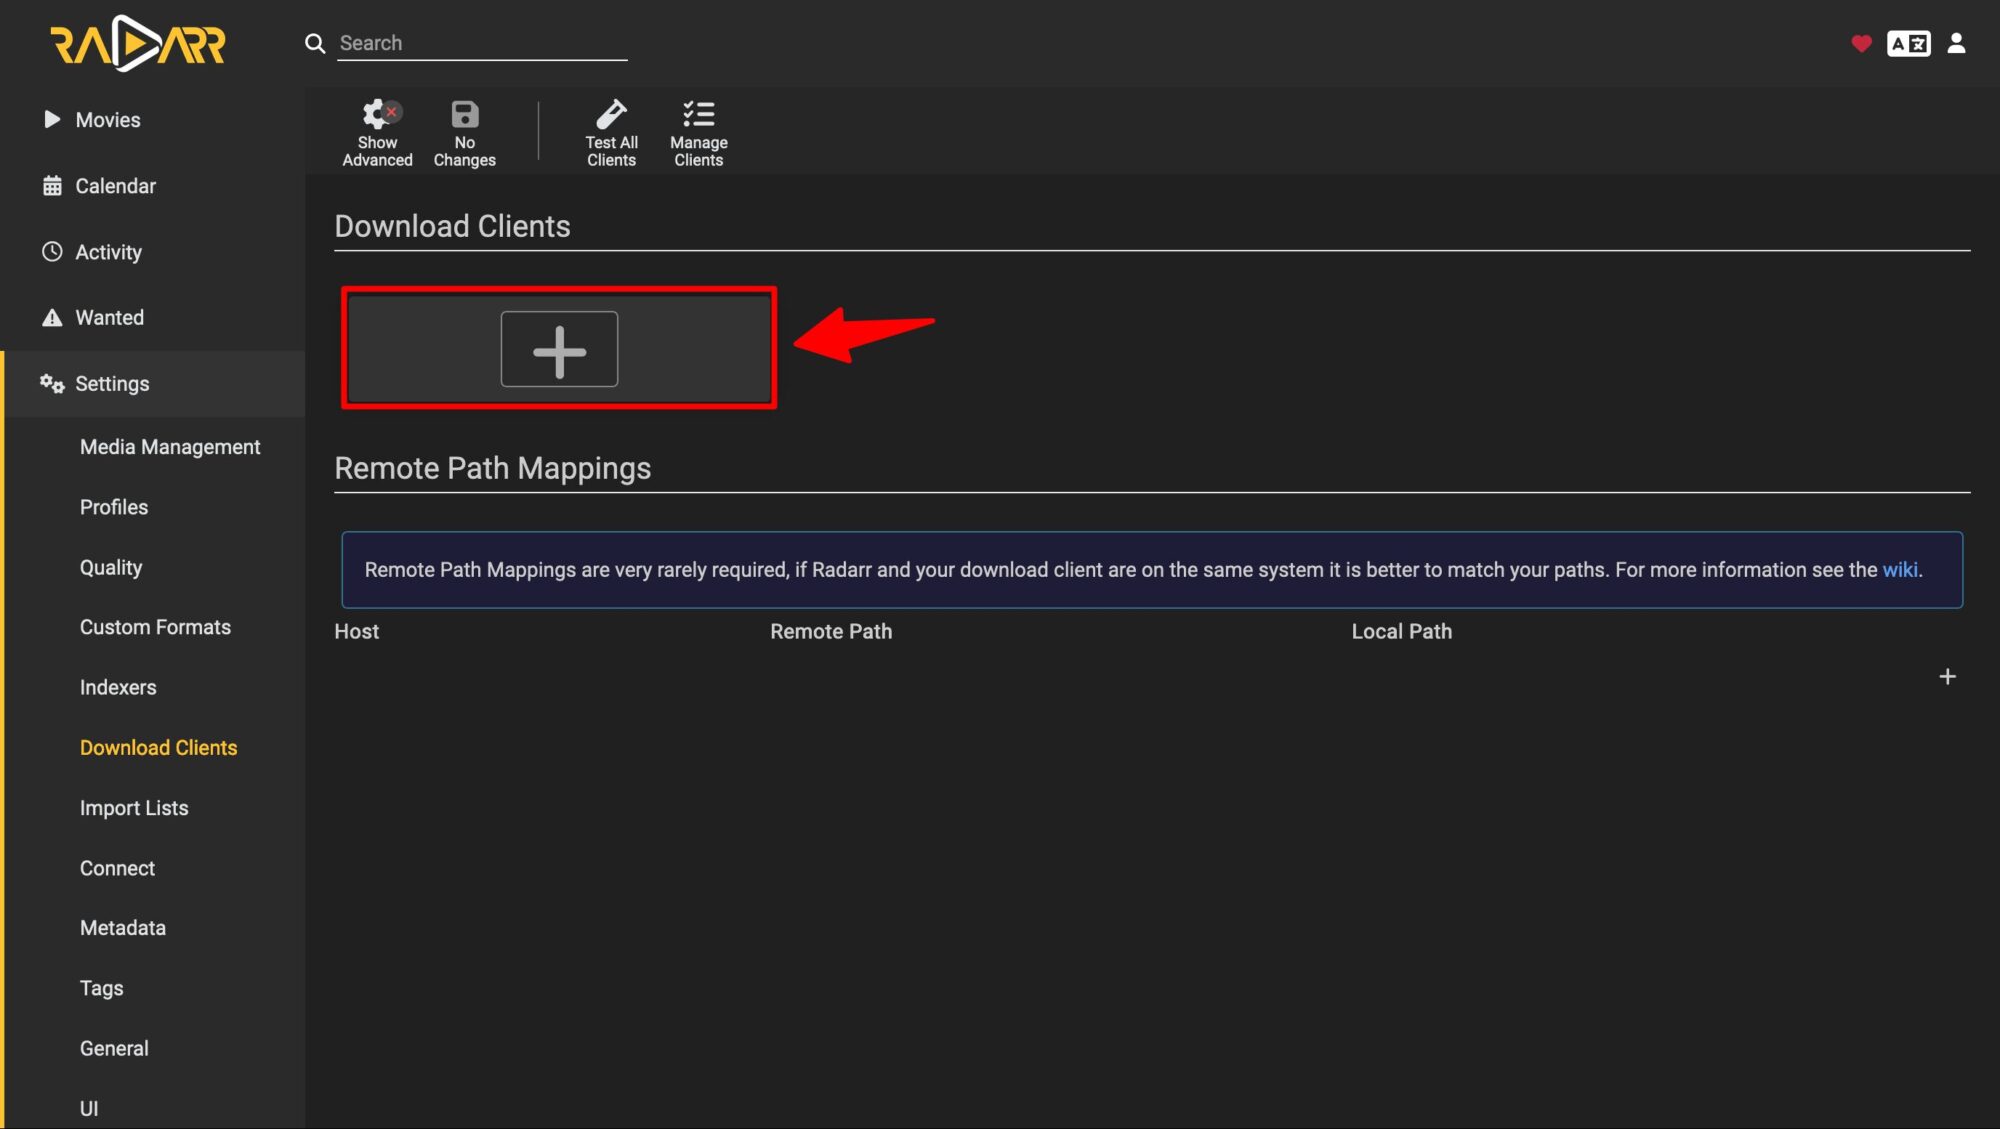
2. Configure Download Clients
Go to Settings > Download Clients, click on the + sign to add new
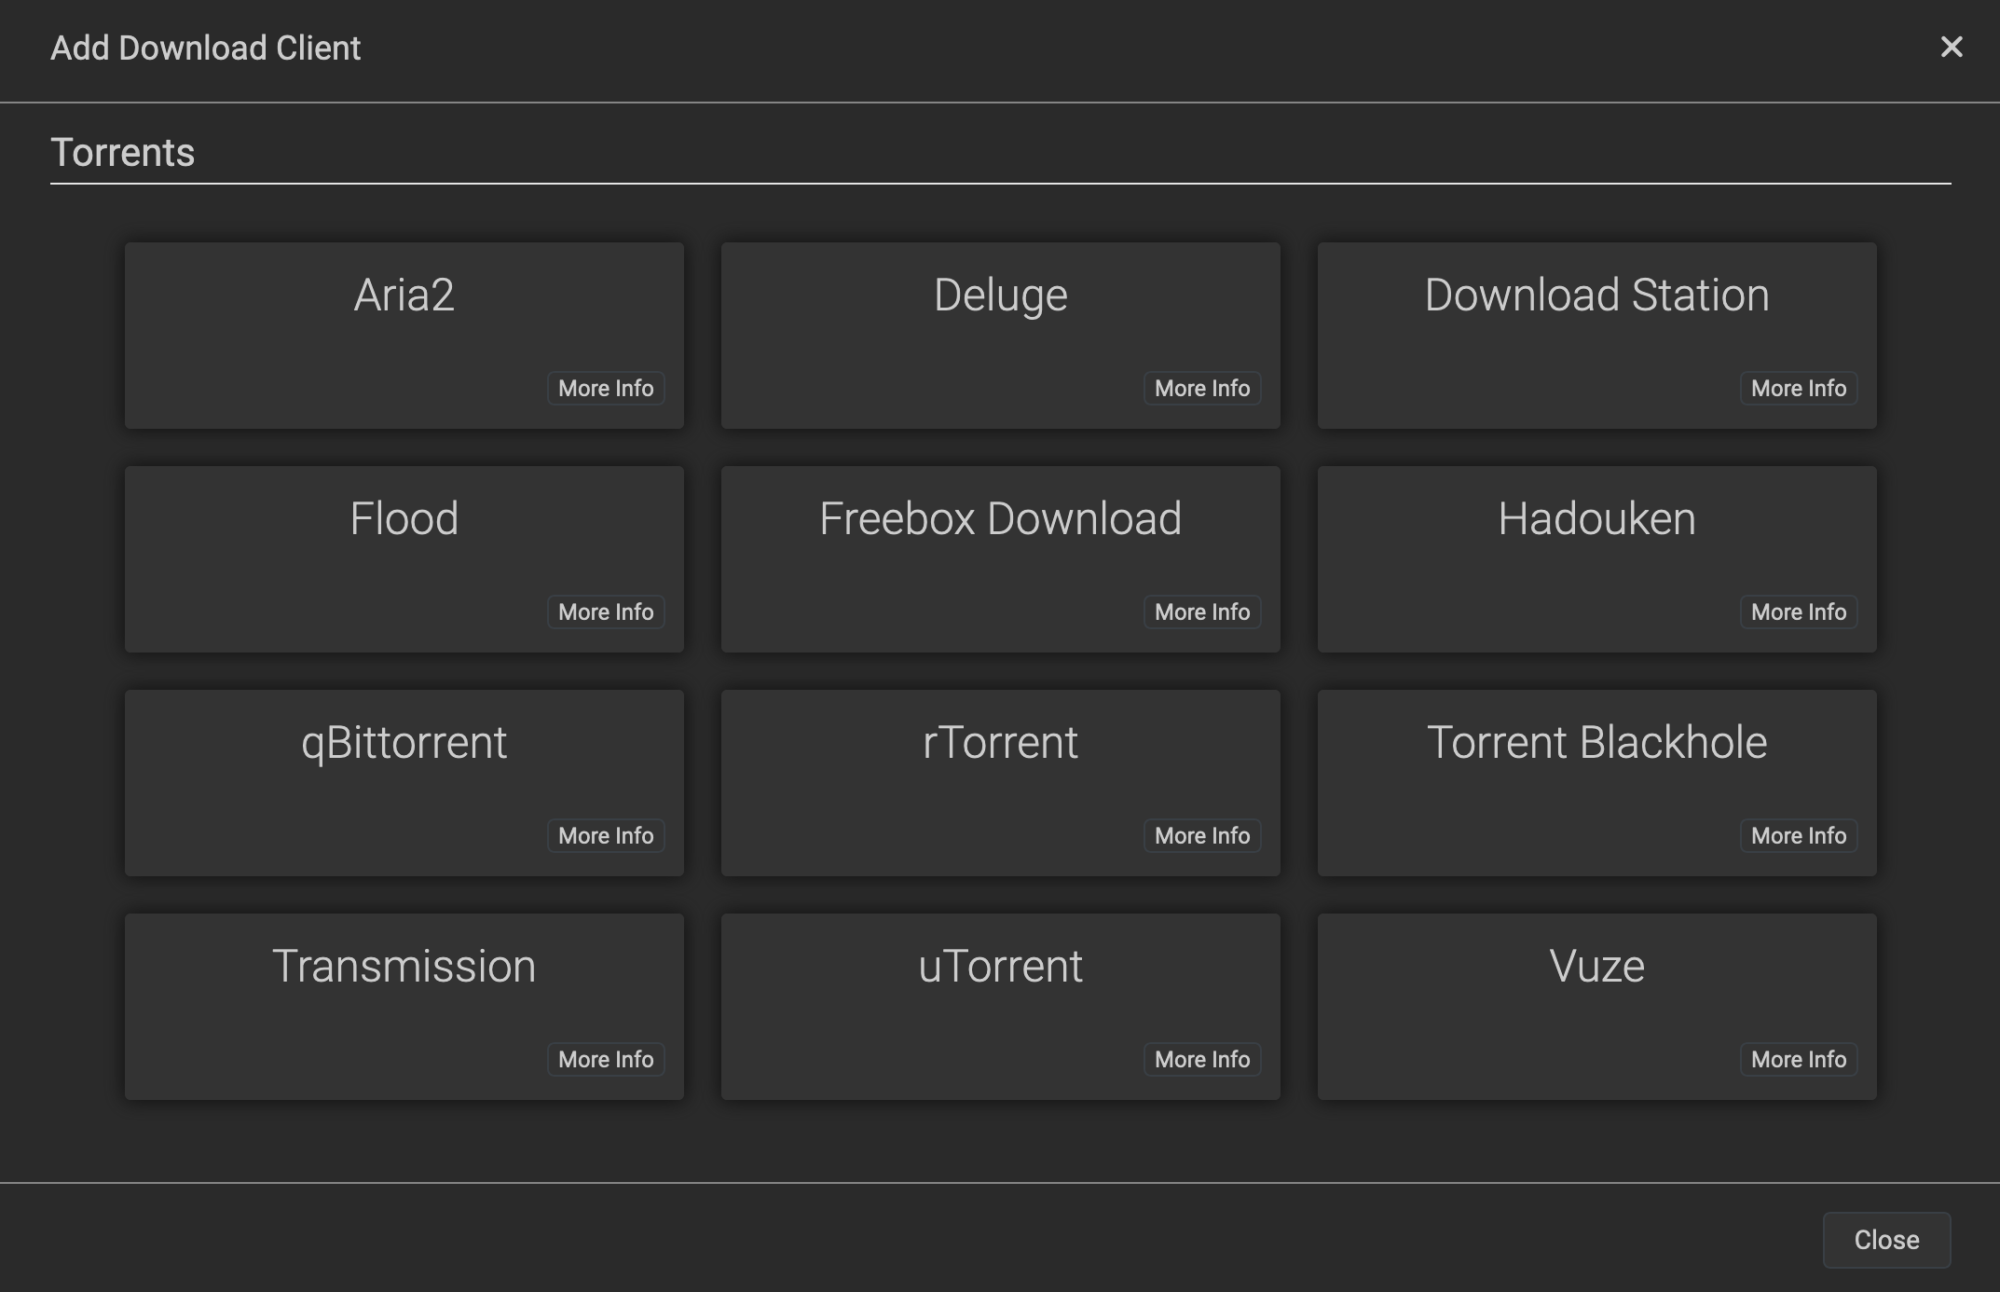
I chose Flood because I like managing torrents with it.
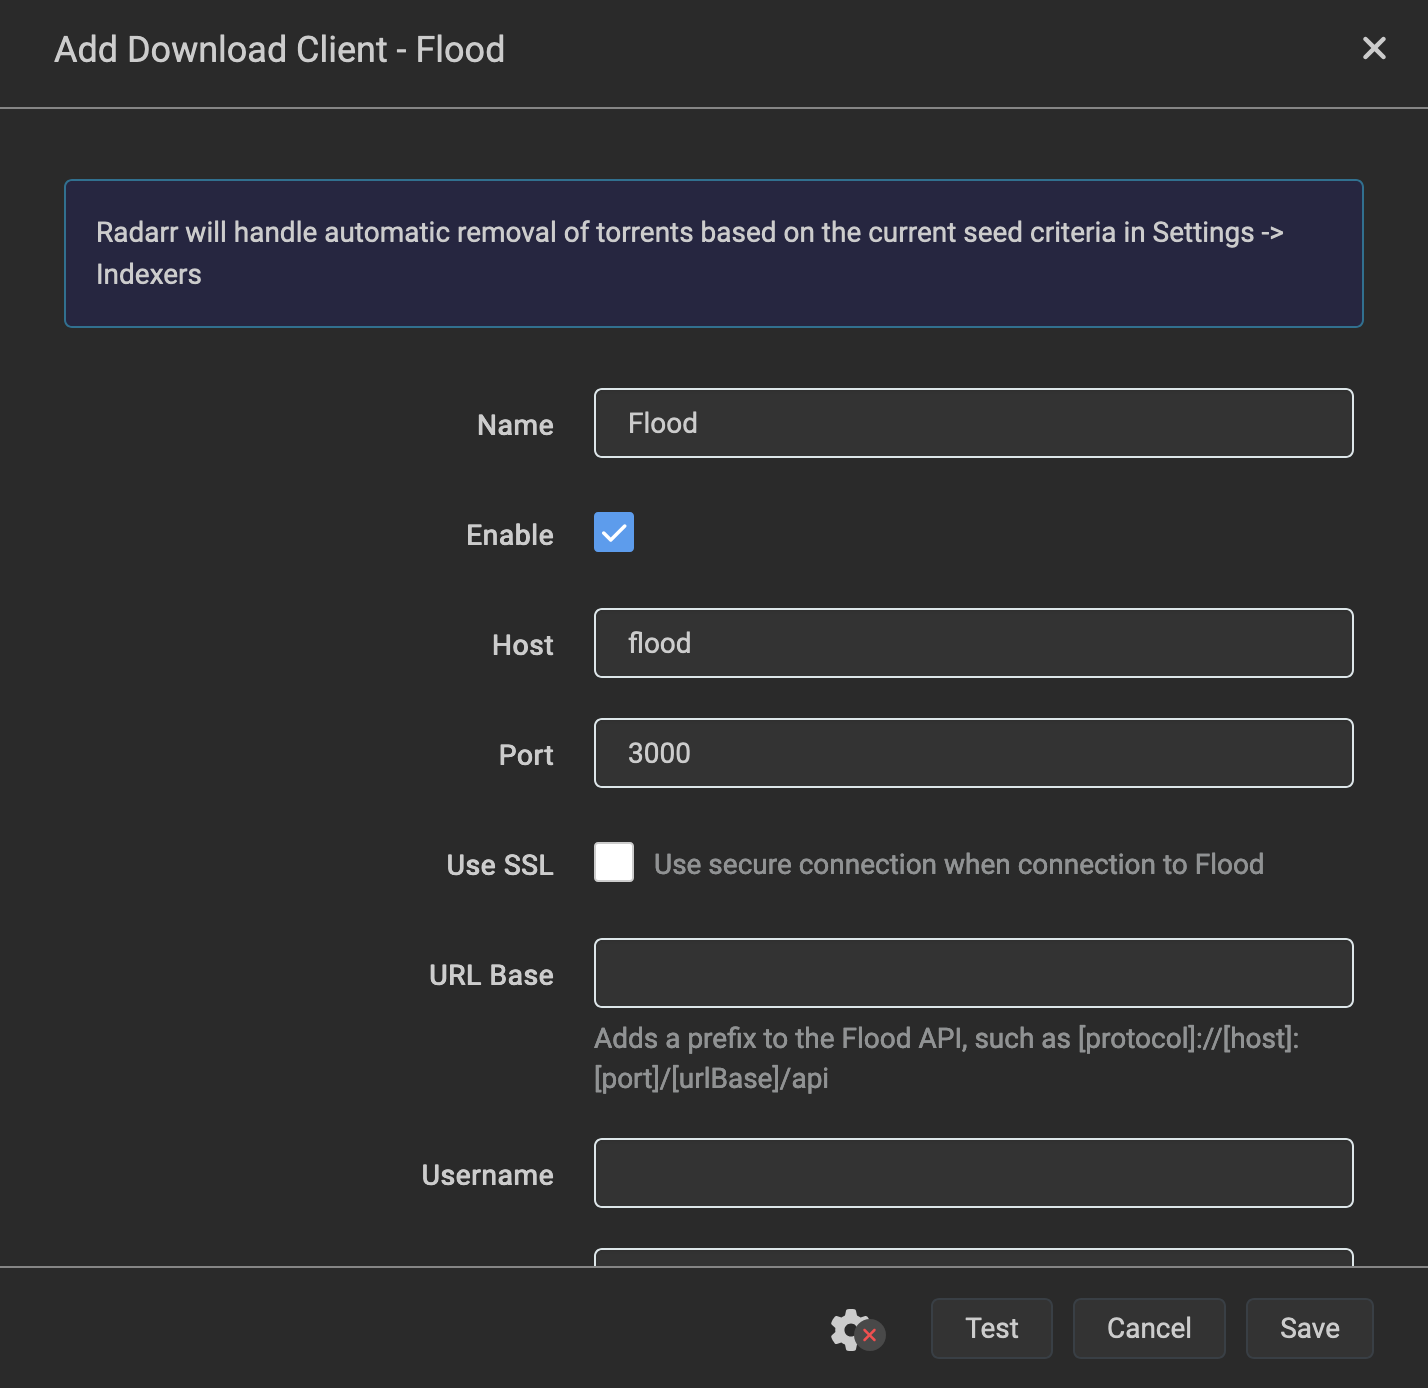
Because containers are all connected to the same Docker network arr so you can access directly by the service name. In the Host section, enter flood, Port: 3000. Then click Test to test the connection. If it’s OK, click Save.
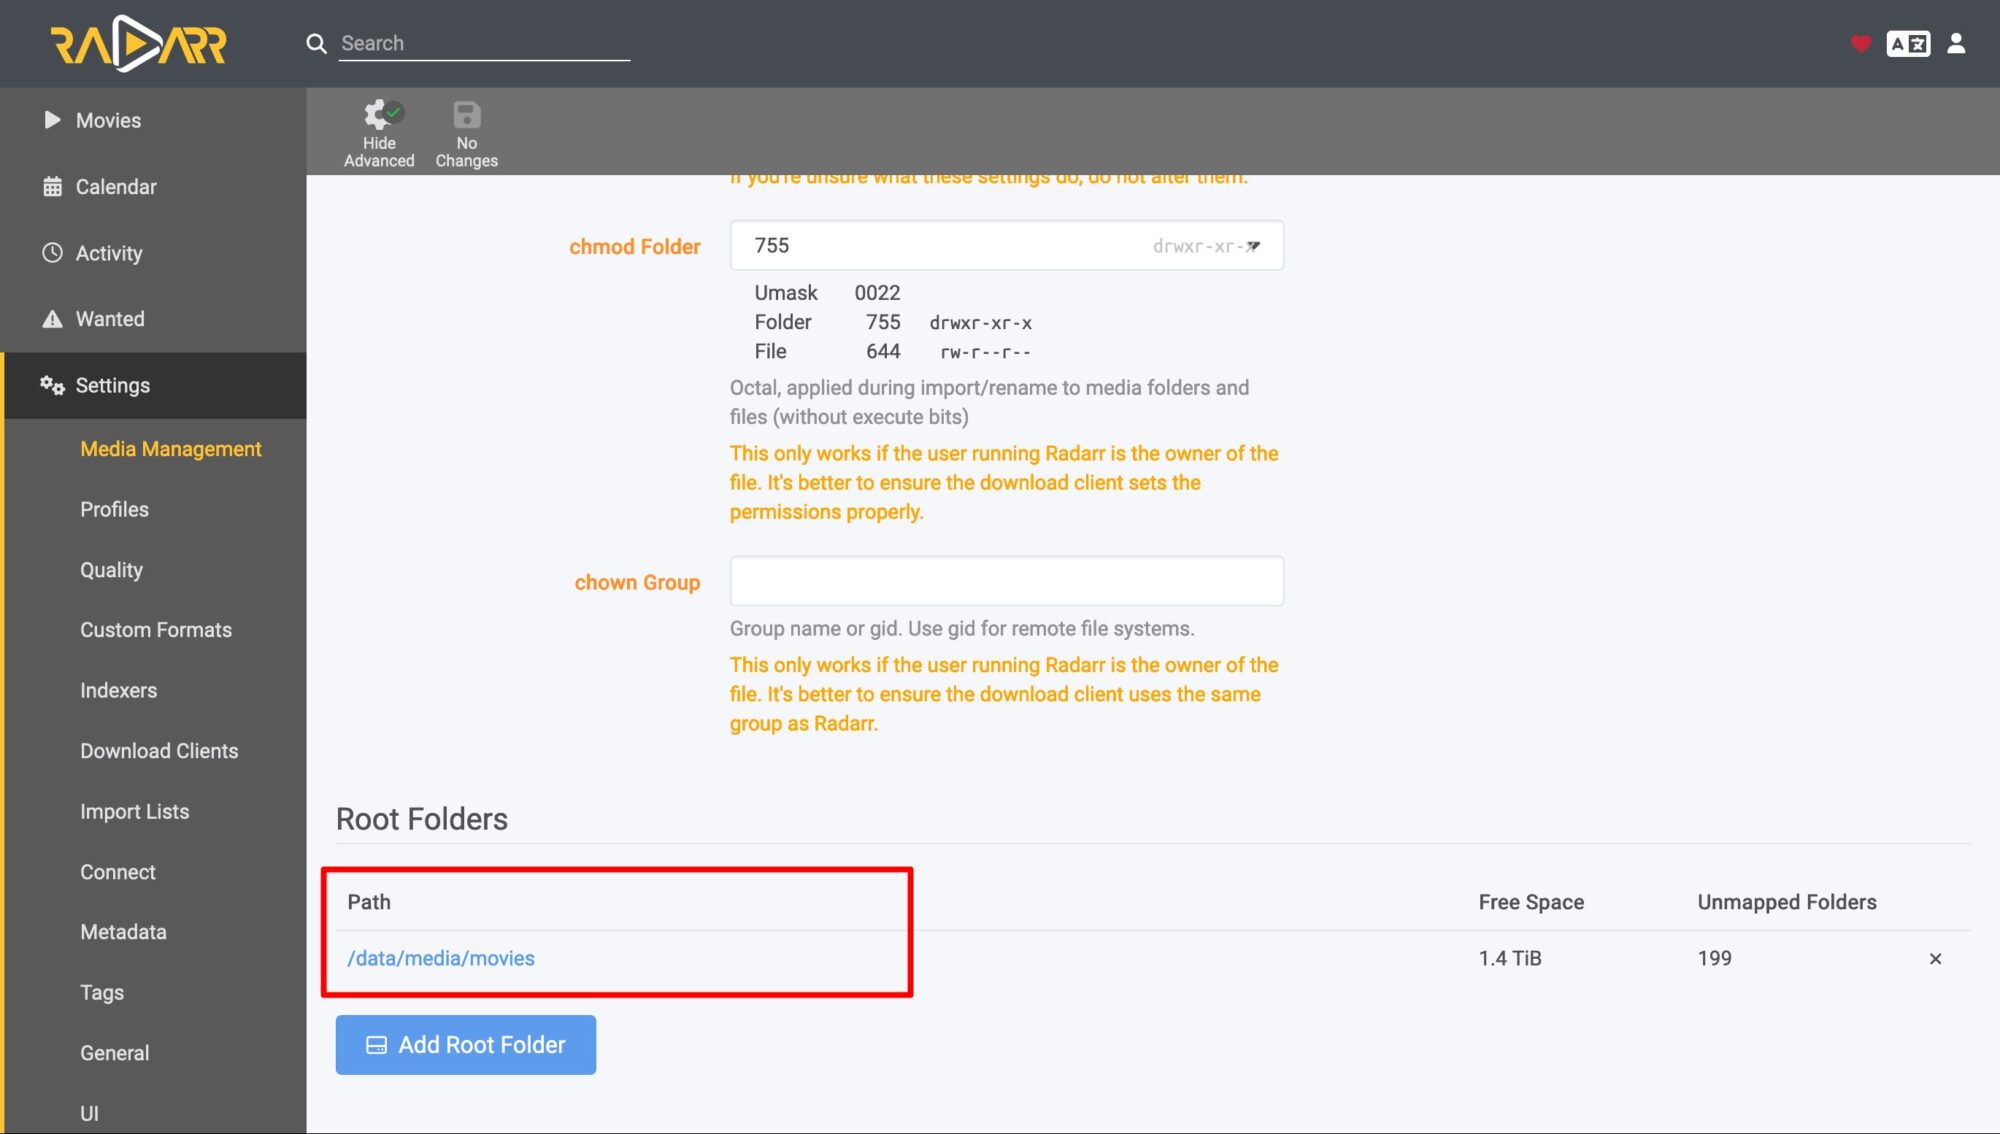
3. Configure Root Folders
Go to Settings > Media Management, scroll down to the bottom, click Add Root Folder and add the folder /data/meda/movies
V. Prowlarr Configuration
Prowlarr acts as a middleman, passing search requests from Radarr/Sonarr to Trackers to search for information, then returning the results back to these applications.
Log in to Prowlarr using the link http:\:9696then configure the login exactly as you did for Radarr
1. Add Inderxers
Indexers can be understood as search pages like Google / Bing, it will return results as links / torrent files to download data.
Go to Indexers, click Add Indexers to add Indexer. This part is a bit sensitive, please find out for yourself.
2. Connect to Radarr / Sonarr
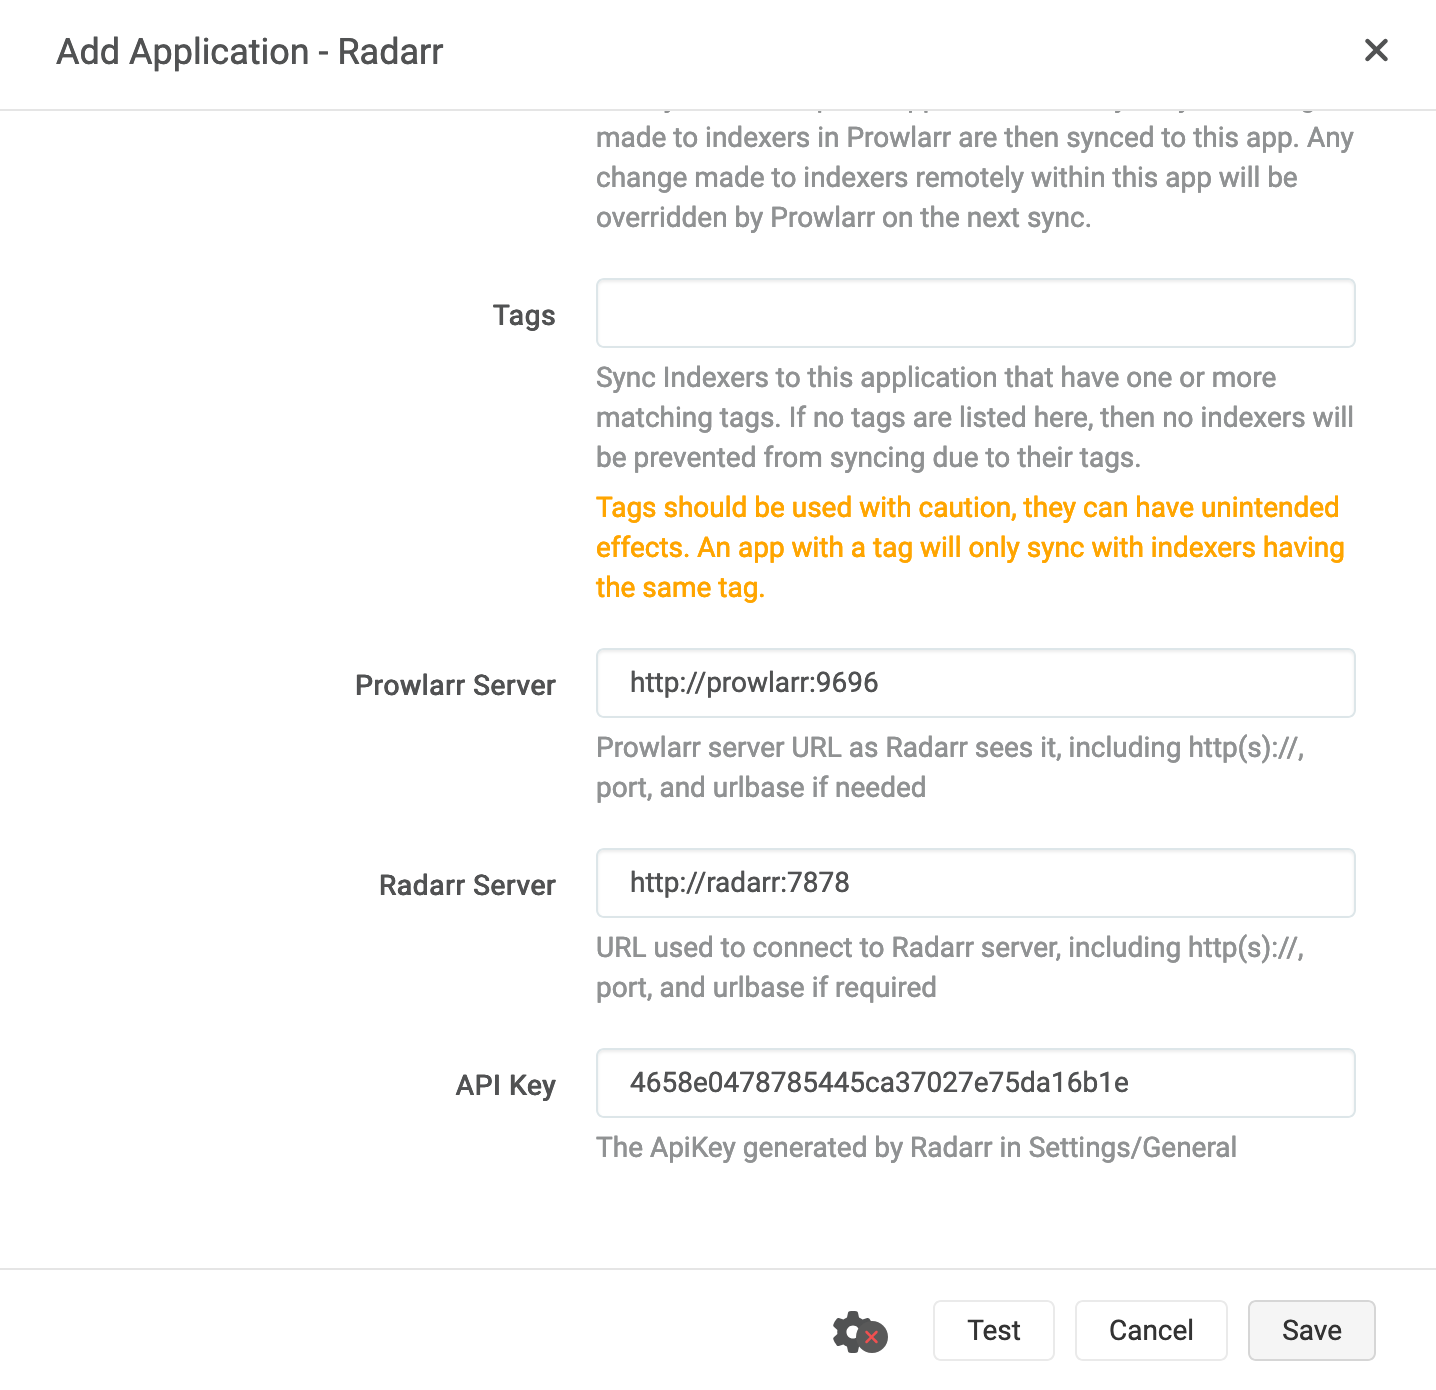
Go to Settings > Apps, click the + sign to add a connection
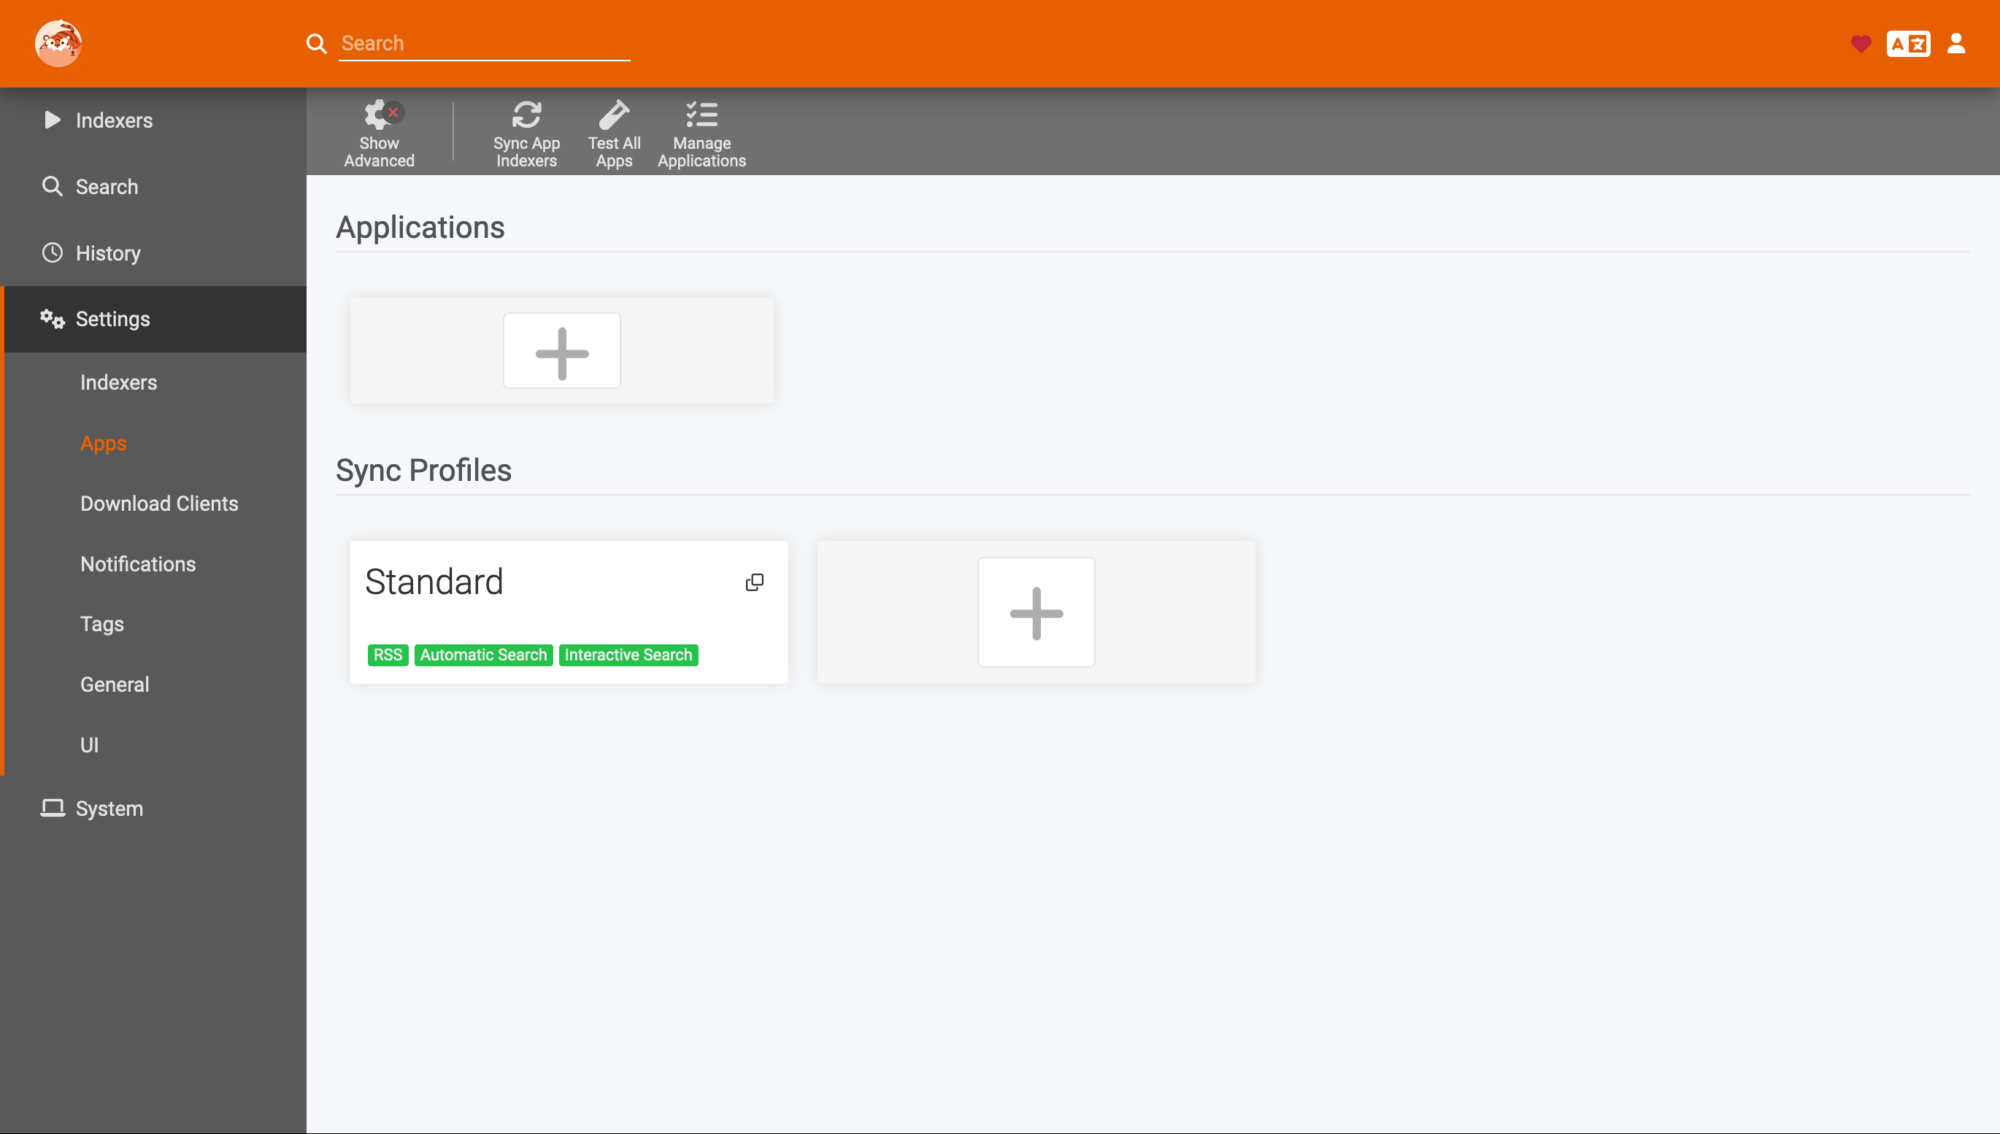
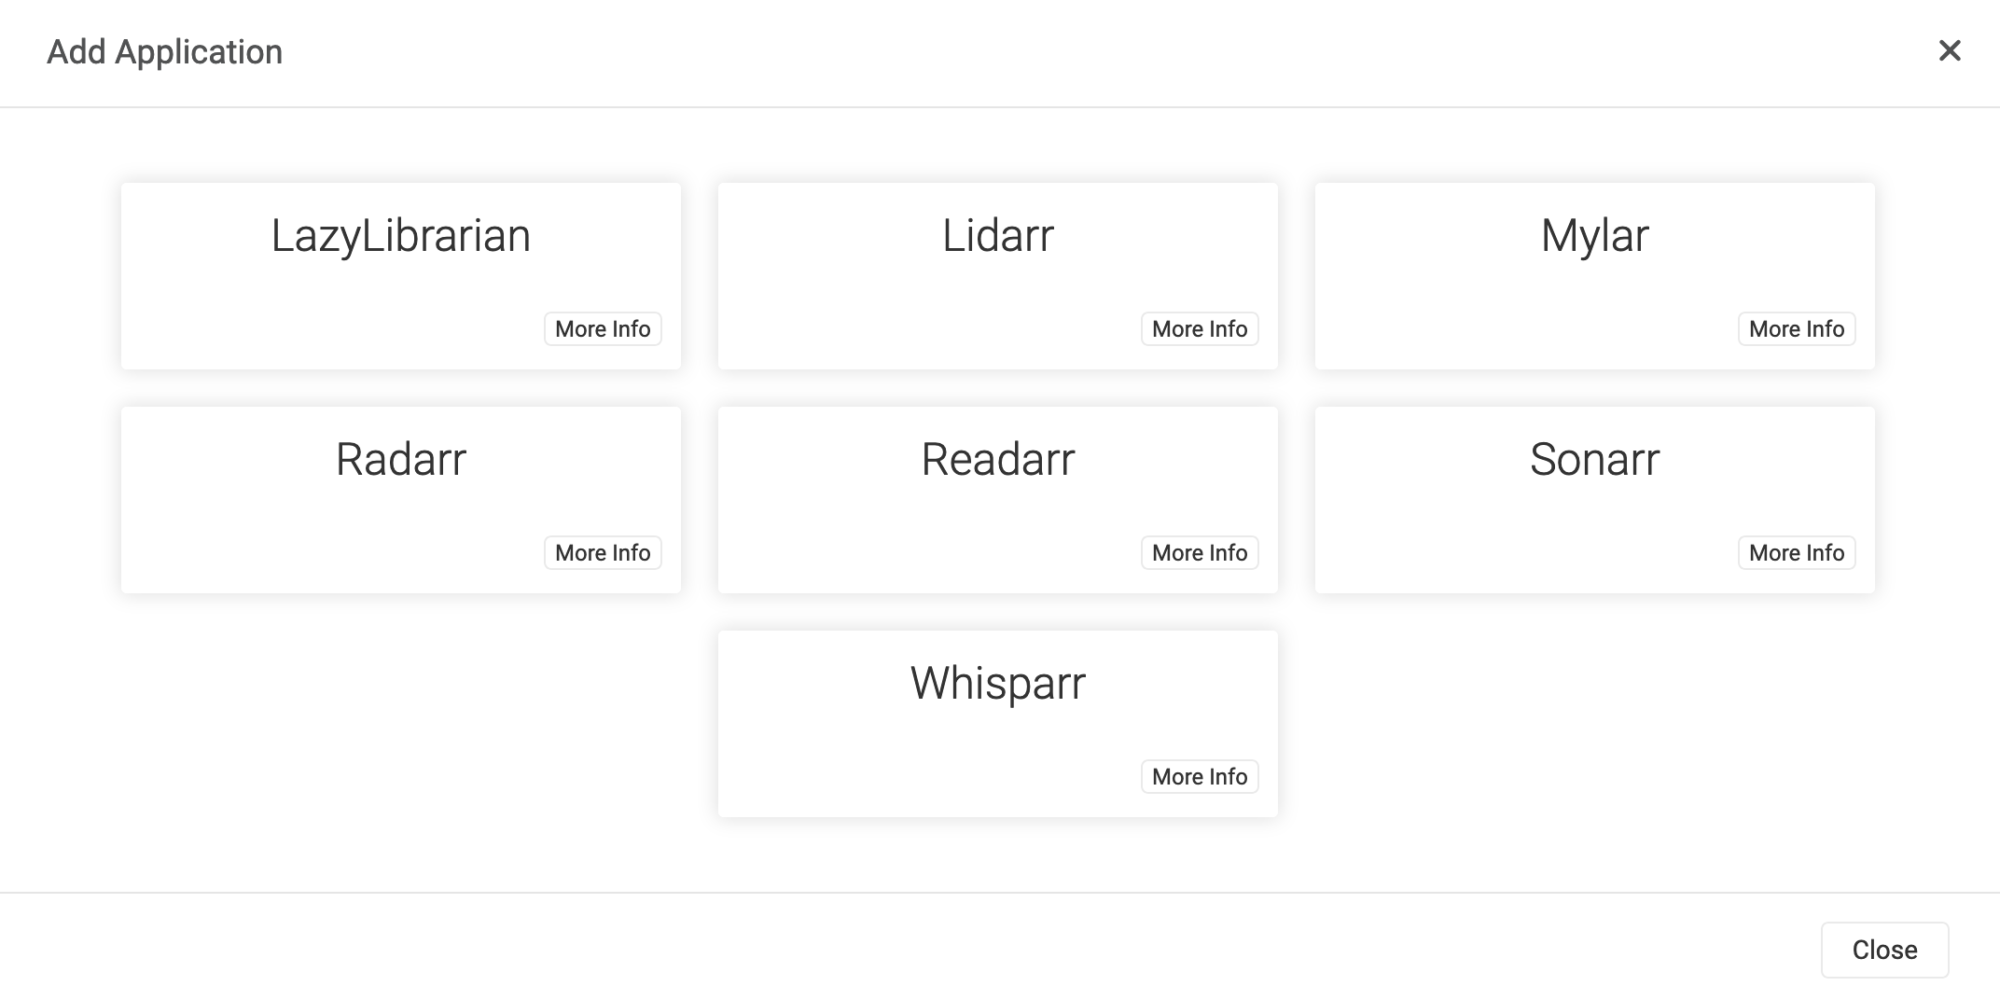
Select the corresponding application. I choose Radarr
Go back to Radarr, go to Settings > General and scroll to API Key to copy this key.
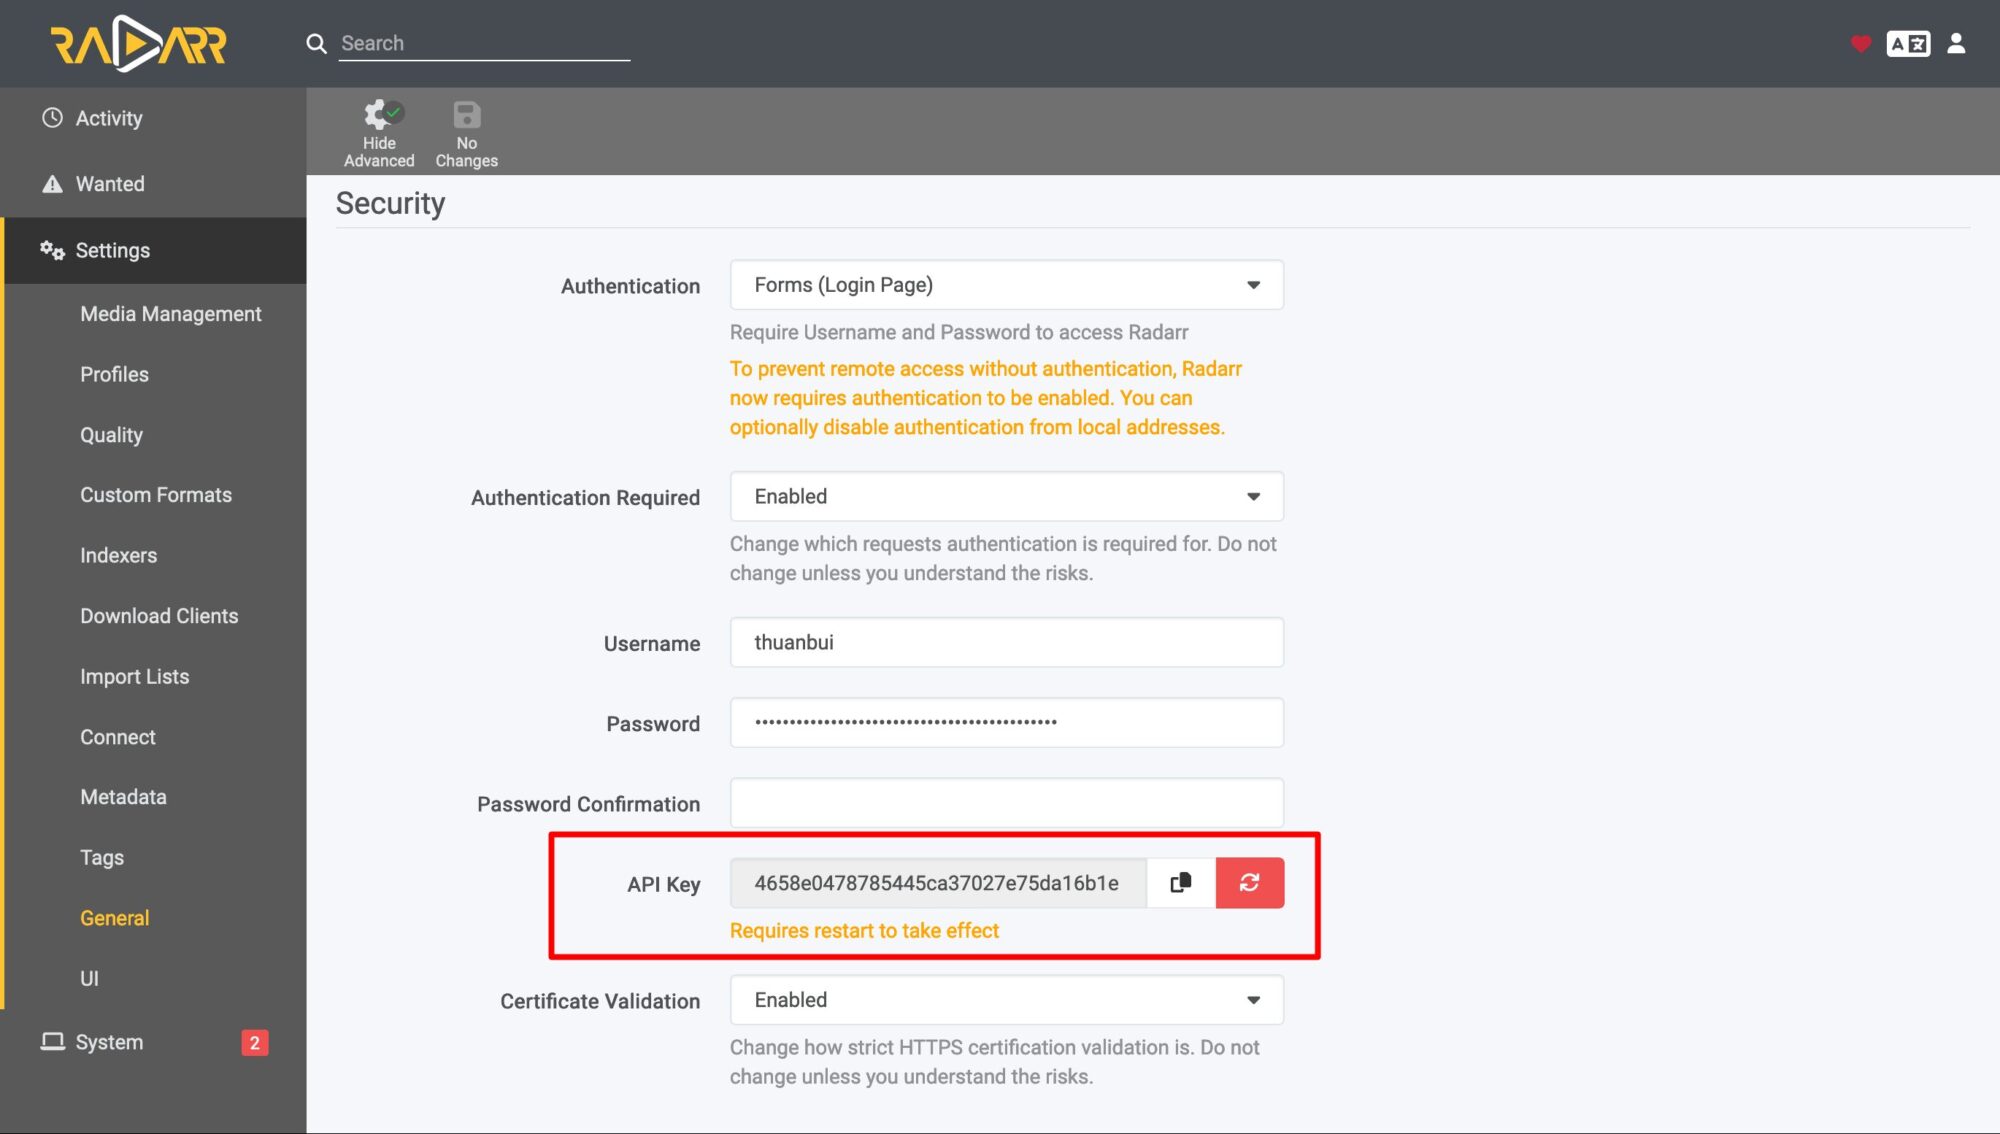
Enter the following information
- Prowlarr Server:
https://prowlarr:9696 - Radarr Server:
http://radarr:7878 - API Key: Enter the API Key you just got from Radarr
Click Test to check the connection and then Save.
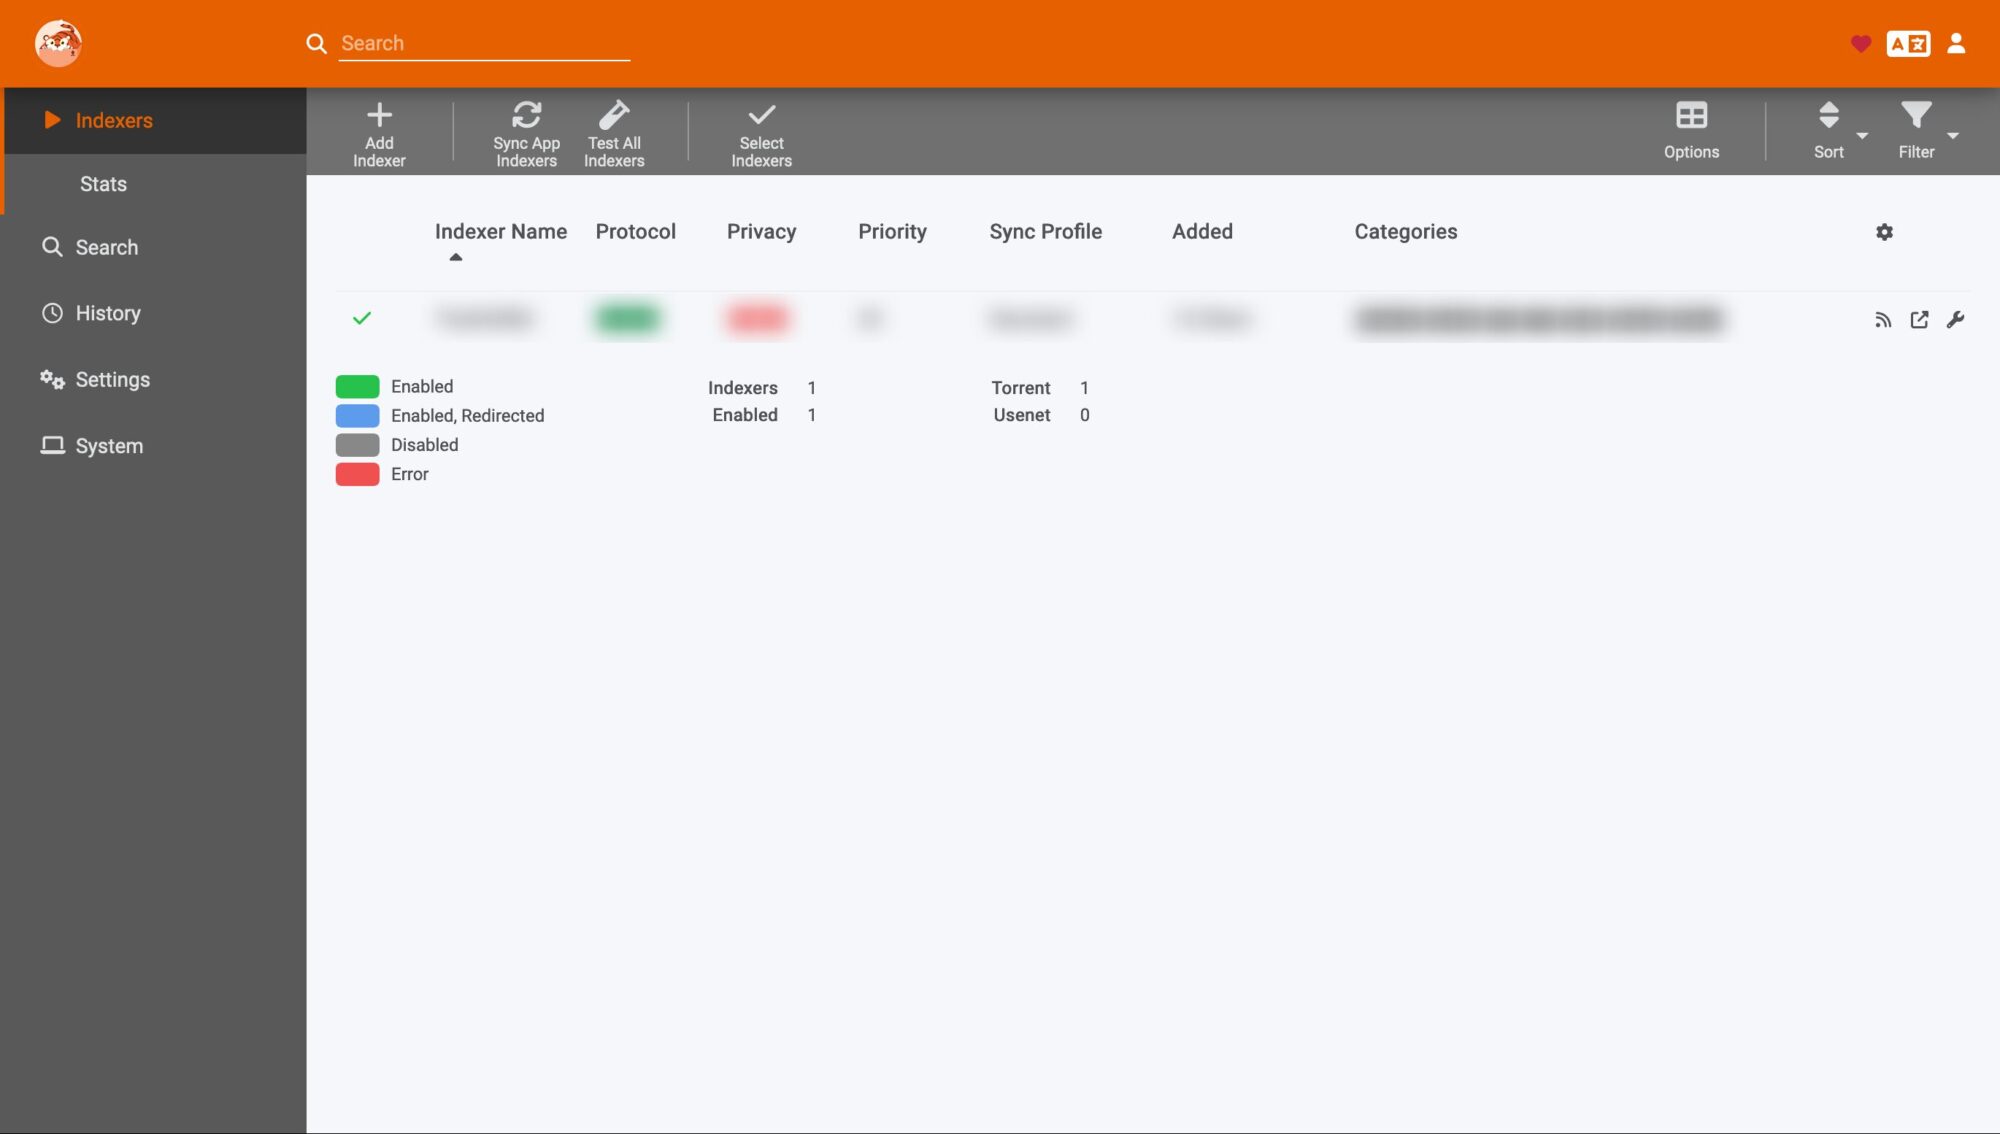
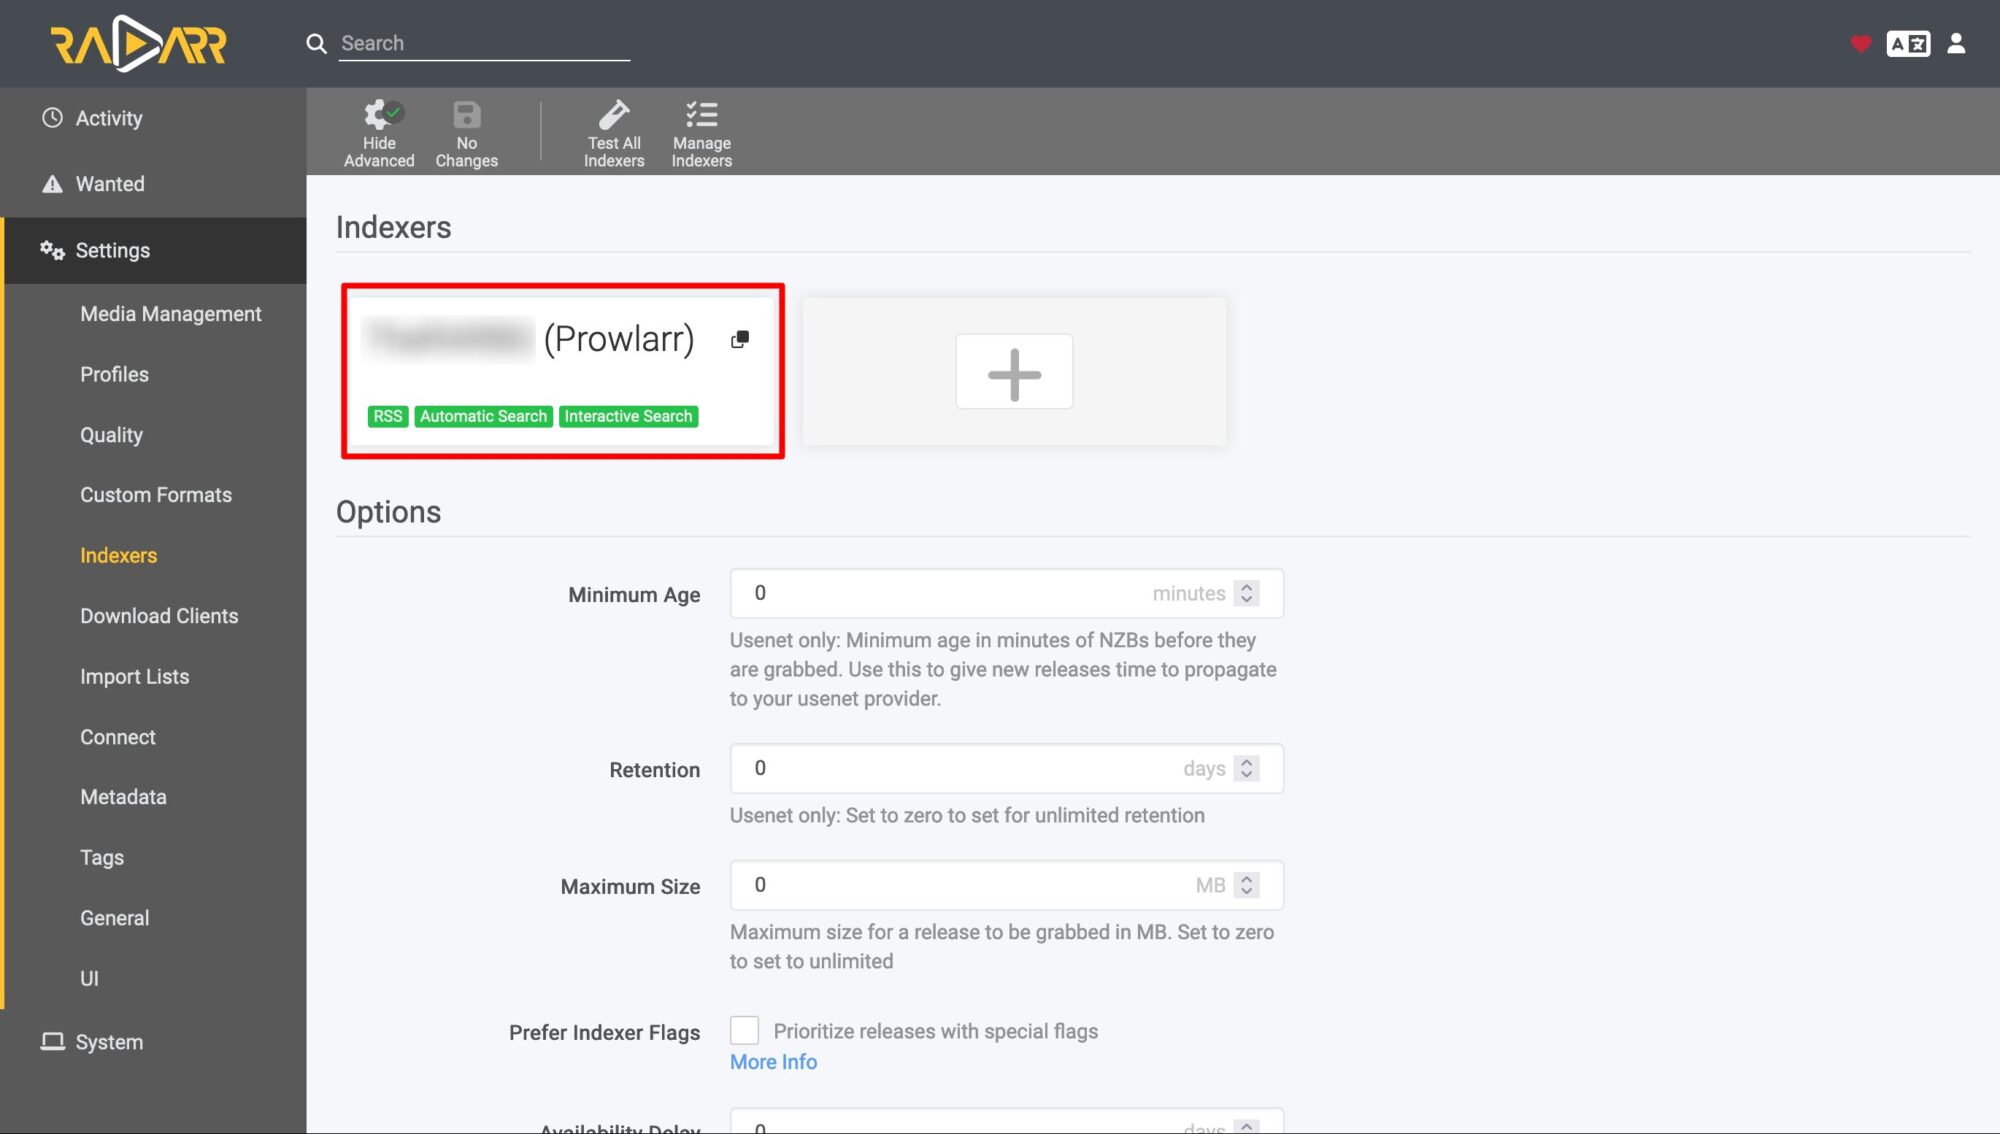
If the connection is successful, go back to the Indexers section of Radarr, you will see it automatically add a new section as below.
VI. Manage movies on Radarr
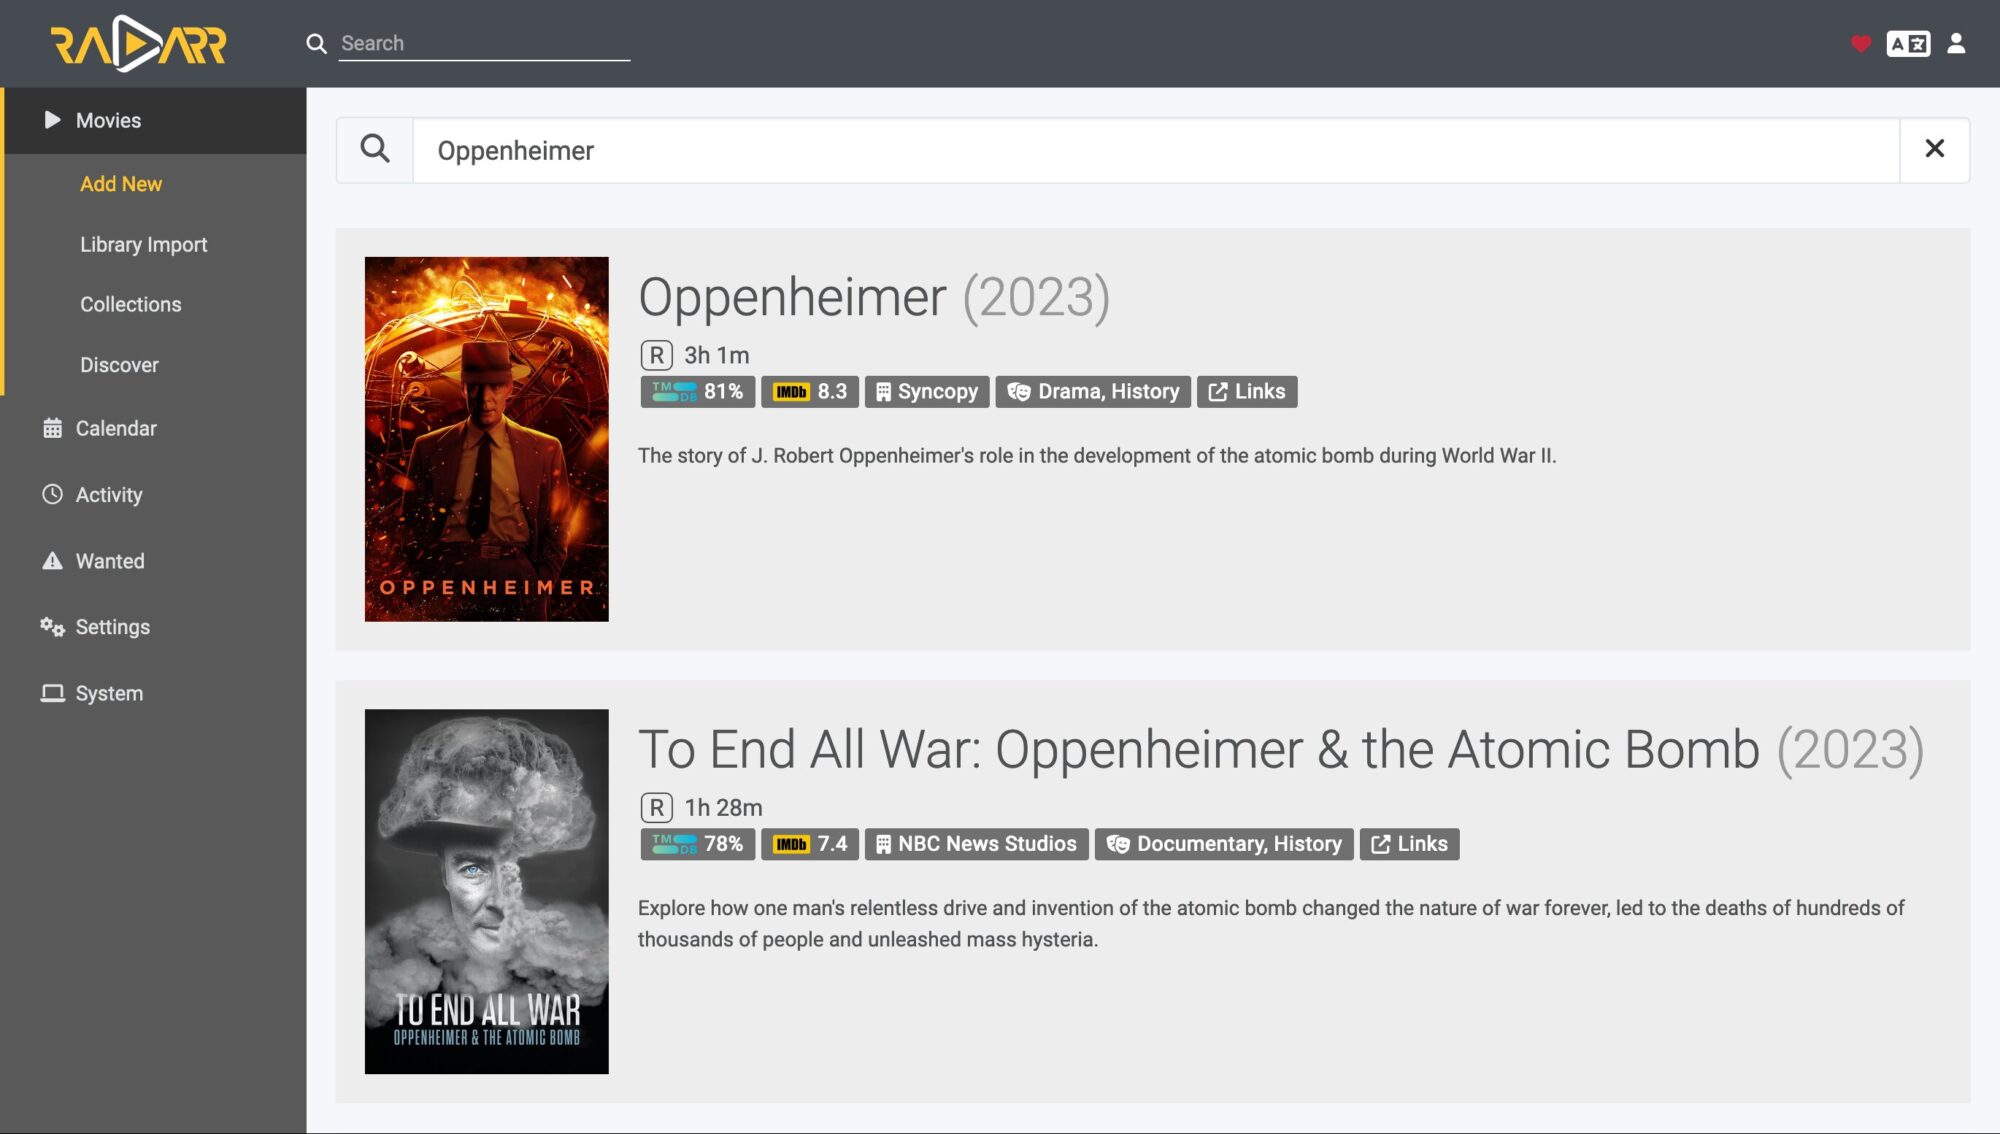
1. Add new movies
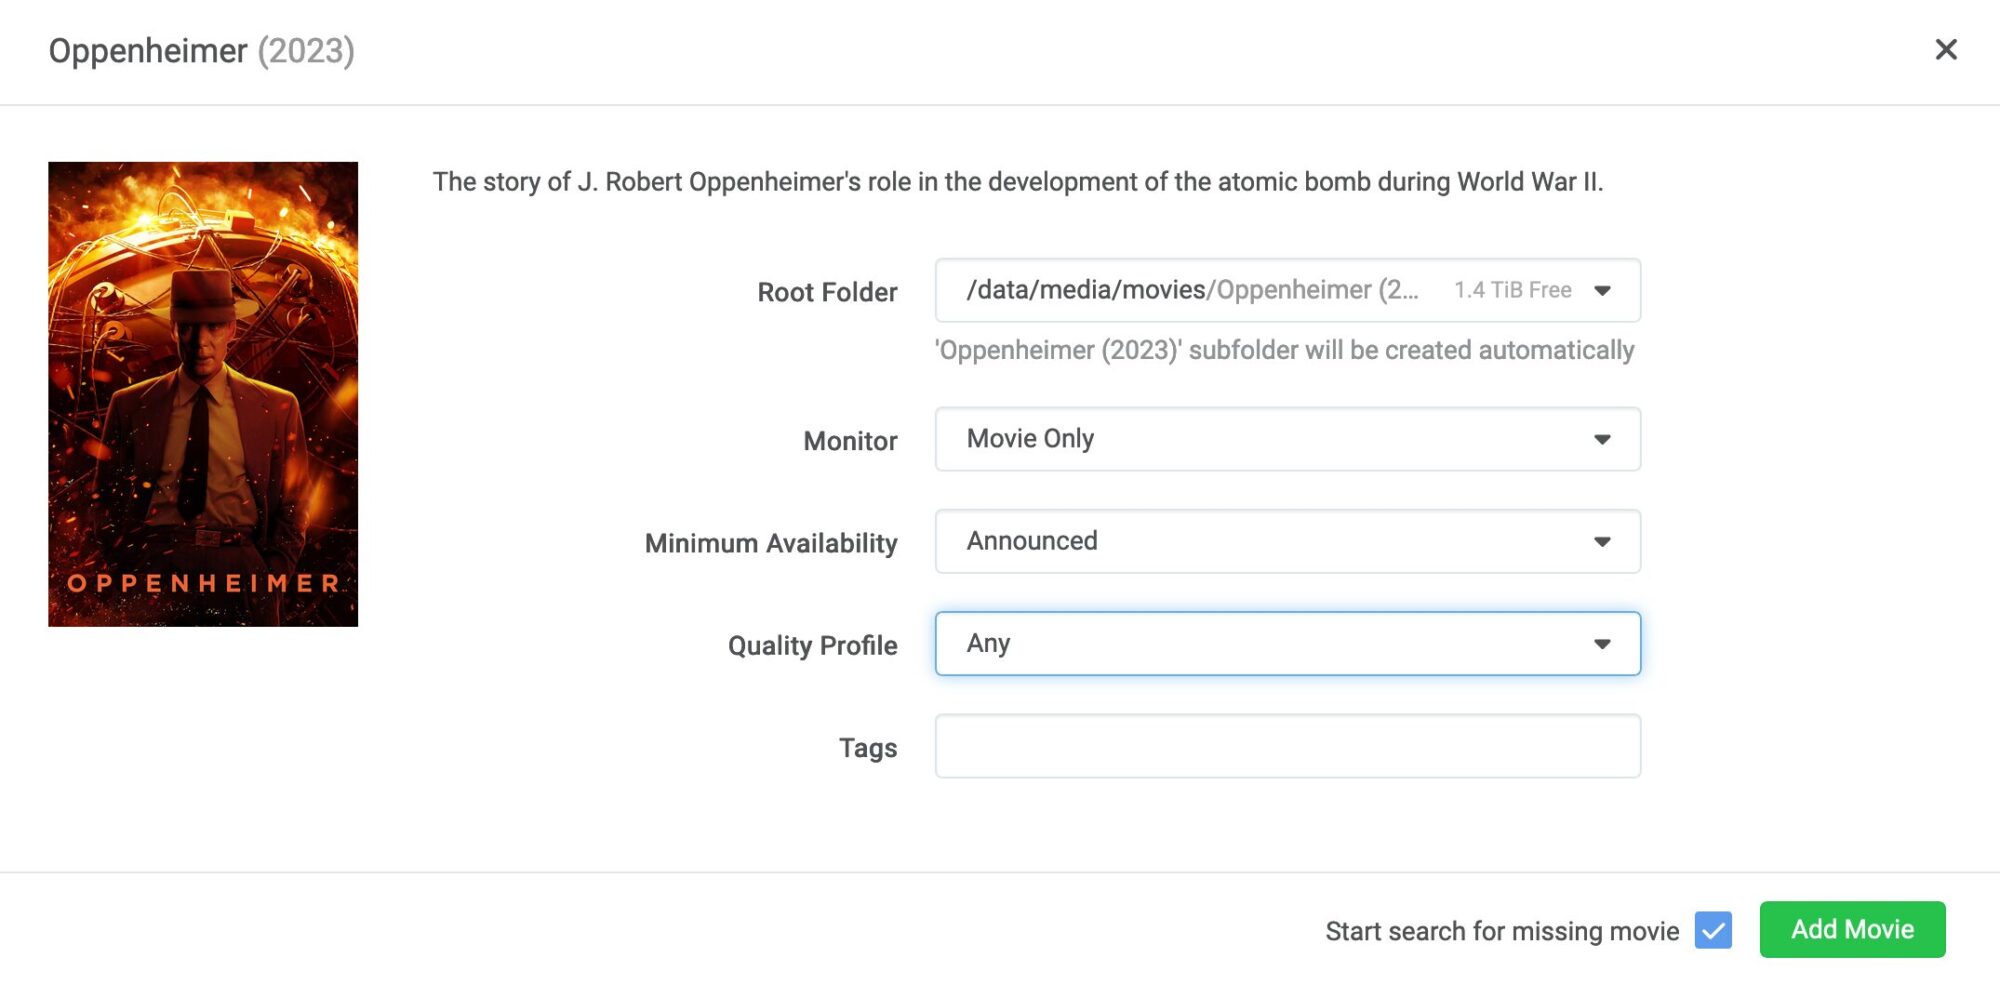
Go to Add New on Radarr to search for a movie name, for example Oppenheimer
Click on the movie name, set the necessary parameters and then click Add Movie.
Radarr will automatically download movie related information from online databases.
2. Download movie
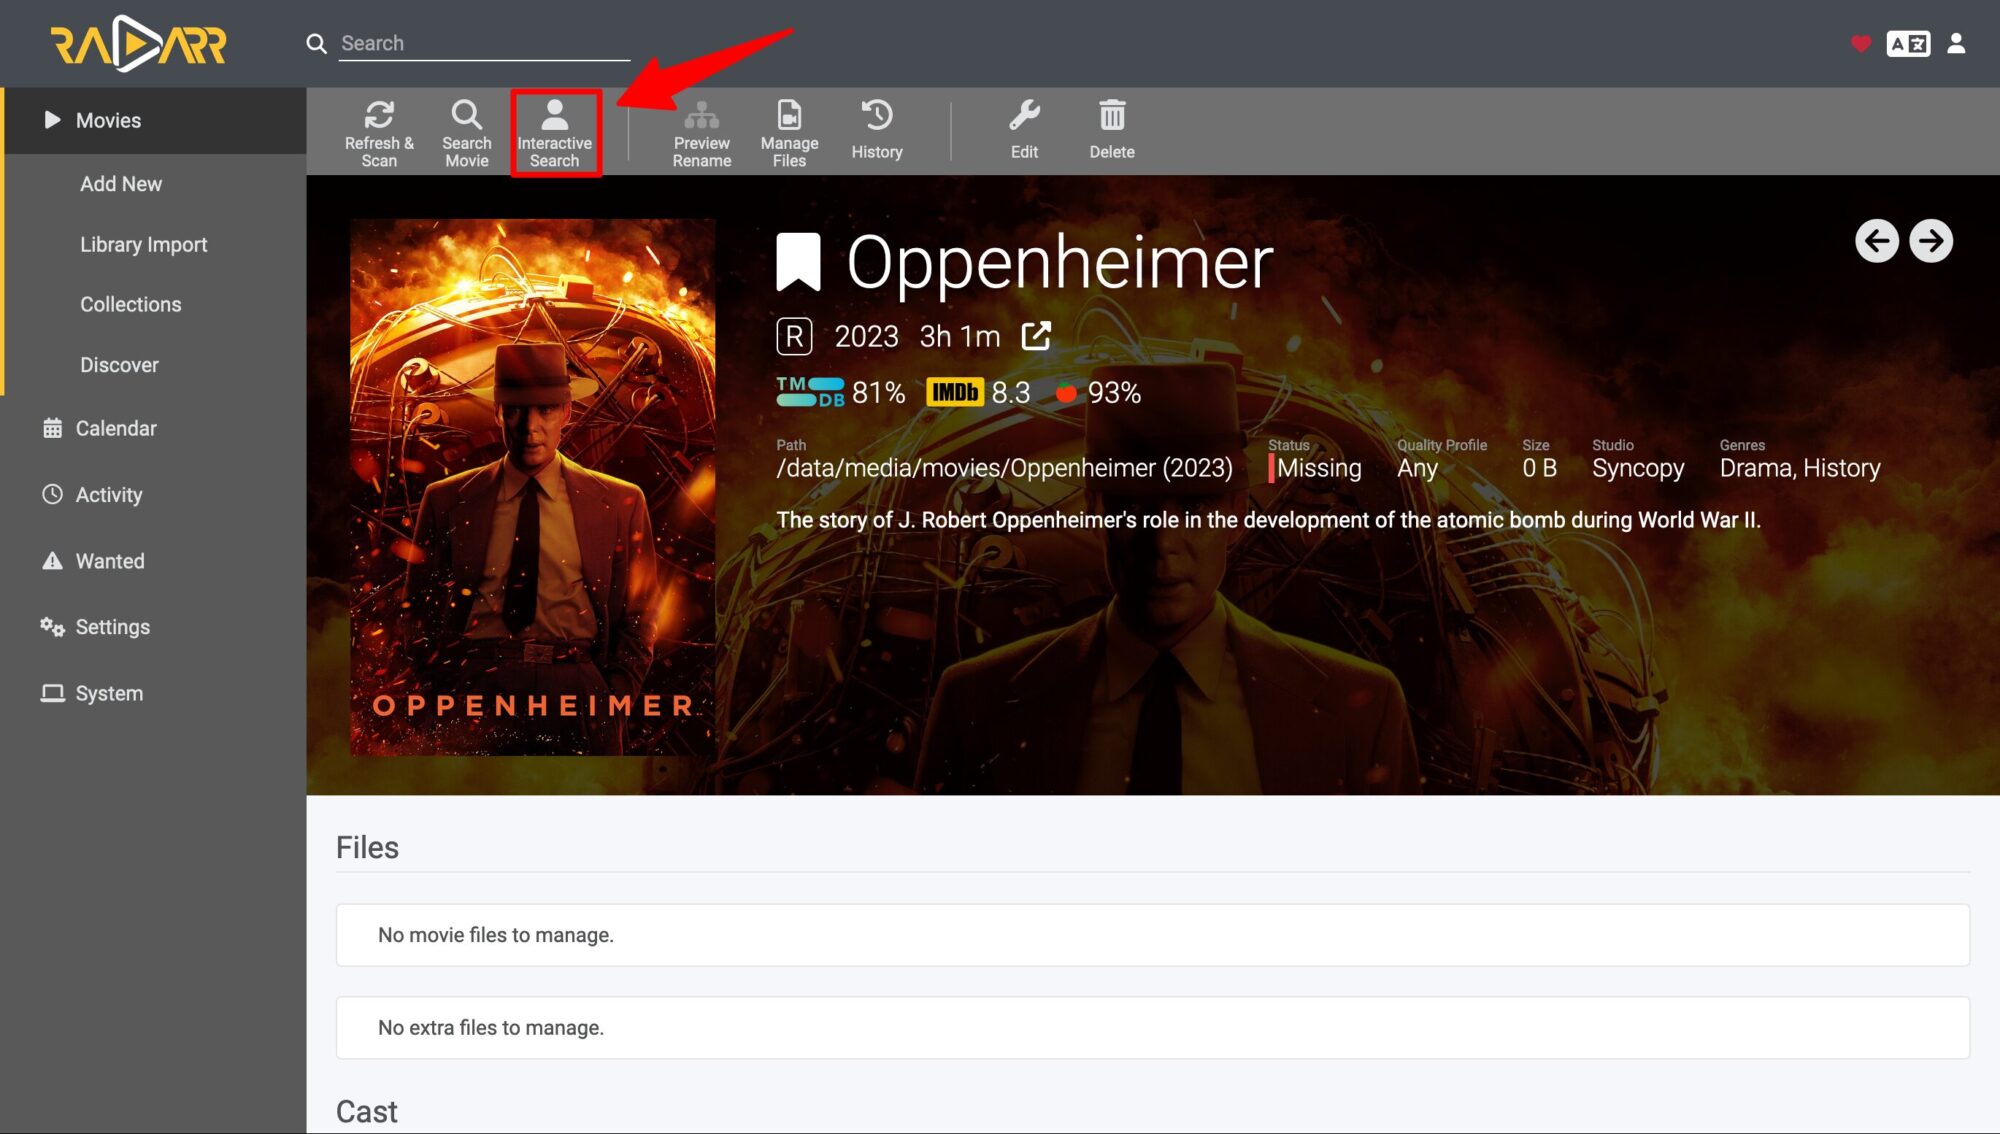
You can click on the Interactive Search button to find the movie download link.
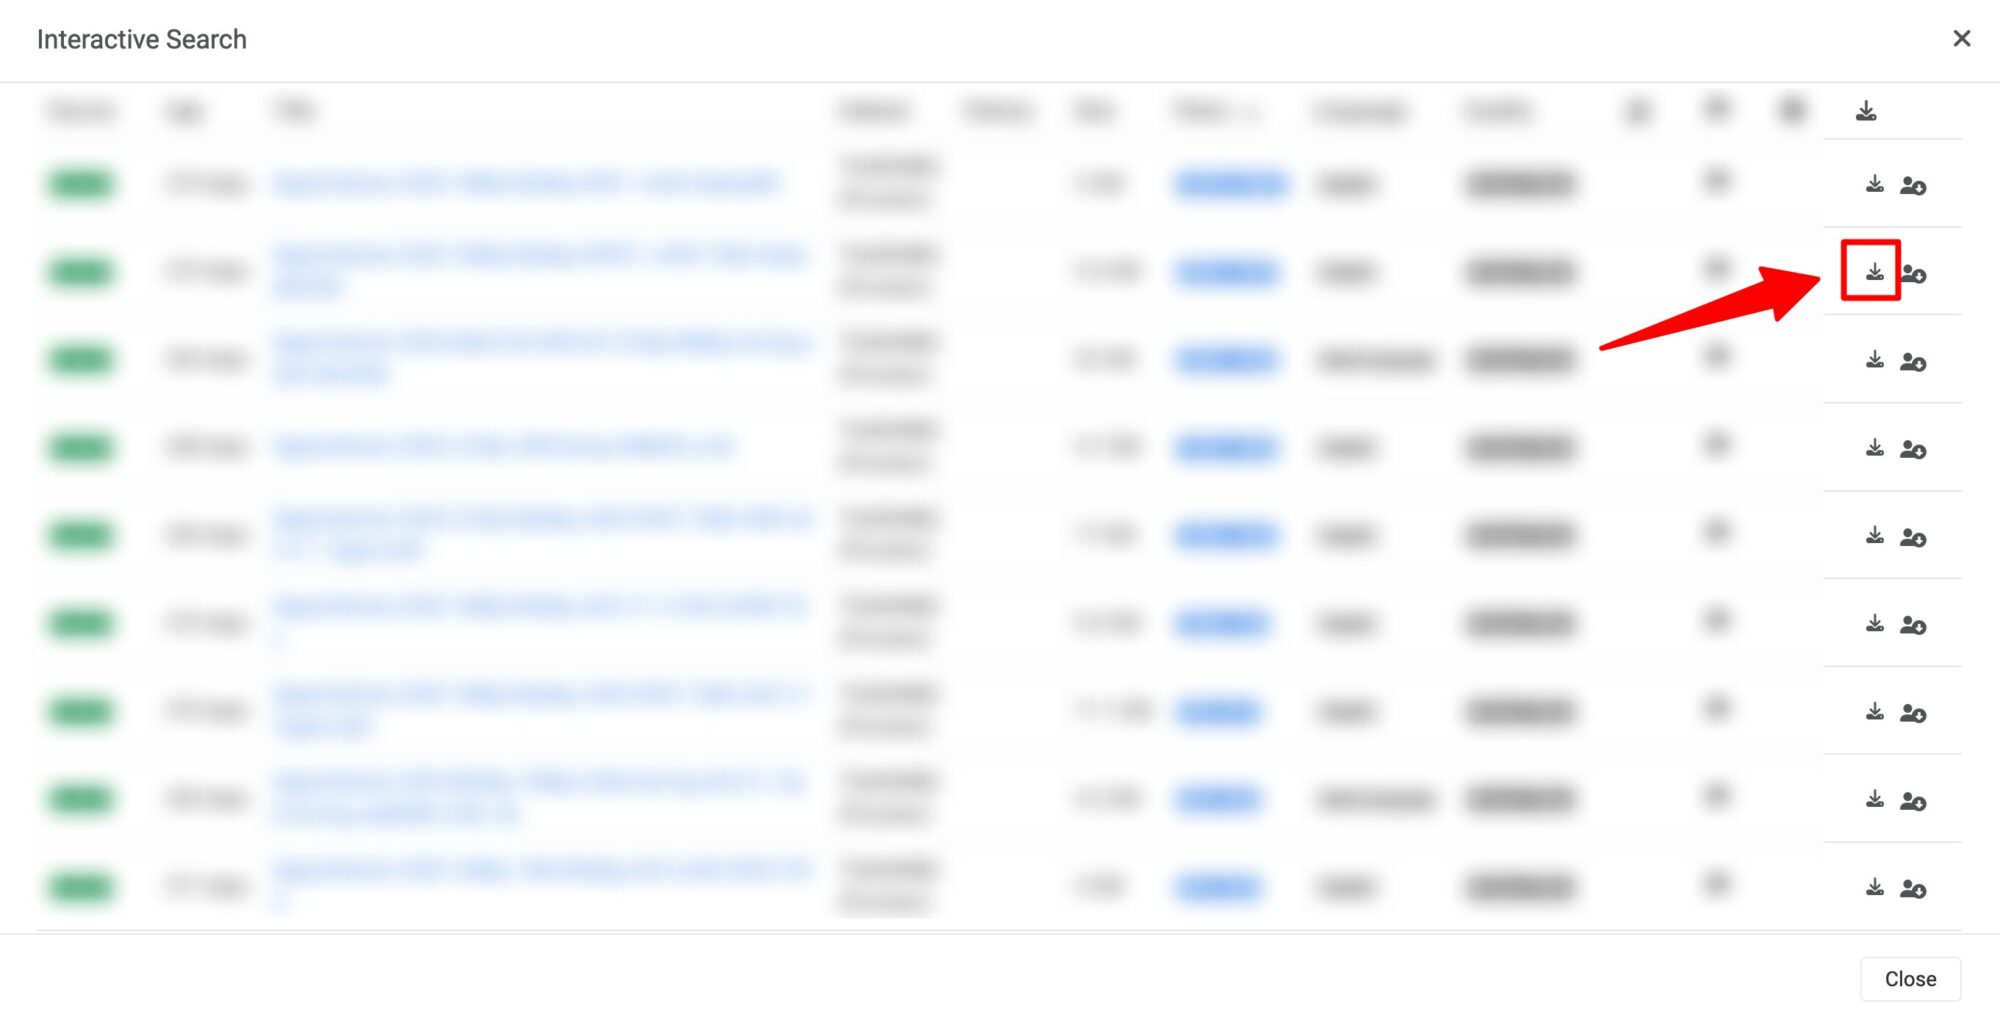
Wait 1-2 minutes, the result will return a list of downloadable files. This list will depend on the Inderxers you have configured on Prowlarr. Click the Download button to download to your computer.
If the system is working properly, Radarr will automatically send a request via Flood to download the movie. After the download is complete, it will automatically create a hard link for the downloaded movie and save it to the folder. /data/media/movies/
Sonarr, Whisparr, Readarr, Lidarr operate almost the same as Radarr so I don’t need instructions. Have fun with the Arr suite!
Reference source: https://trash-guides.info/Hardlinks/How-to-setup-for/Synology/, https://wiki.servarr.com/
Comment Policy: We truly value your comments and appreciate the time you take to share your thoughts and feedback with us.

Note: Comments that are identified as spam or purely promotional will be removed.

To enhance your commenting experience, consider creating a Gravatar account. By adding an avatar and using the same e-mail here, your comments will feature a unique and recognizable avatar, making it easier for other members to identify you.

Please use a valid e-mail address so you can receive notifications when your comments receive replies.